It’s been said that “dips are squats for the upper body,” and it’s a saying that I agree with; the pattern of movement is quite similar, and it hammers multiple muscles just like the squat does. But if you’re getting shoulder pain either during or after performing this beauty-of-an-exercise, something isn’t right and needs to be fixed.
Shoulder pain from dips is most often the result of excessive stress on the front of the shoulder, poor shoulder and chest mobility, and overloading the involved muscles and tendons. Solutions involve optimizing your technique, improving shoulder mobility and using appropriate resistance.
If you want to learn more on the “secret sauce” on how to get more bang for your buck with dips — and how to stay pain-free in the process — you’re going to want to read the contents of this article from start to finish!
Related article: Why the Sphinx Push-up Reigns King for Triceps Size and Strength
Disclaimer: While I am a physical therapist, I am not YOUR physical therapist. As a result, I cannot tell you whether or not any treatments or training methodologies mentioned on this website or in this article may or may not be appropriate for you, including treating shoulder pain from dips. By following any information within this post, you are doing so at your own risk. You are advised to seek appropriate medical advice for any pain you may be experiencing.

The Basics: shoulder anatomy
You need to have a basic understanding of shoulder anatomy if you’re serious about getting your pain under control and continuing to bang out dips for the rest of your days ahead. If you understand the basic structures, taking the correct action(s) thereafter becomes much more intuitive. The result is less frustration, quicker recovery and fewer workouts missed due to pain.
The shoulder joint
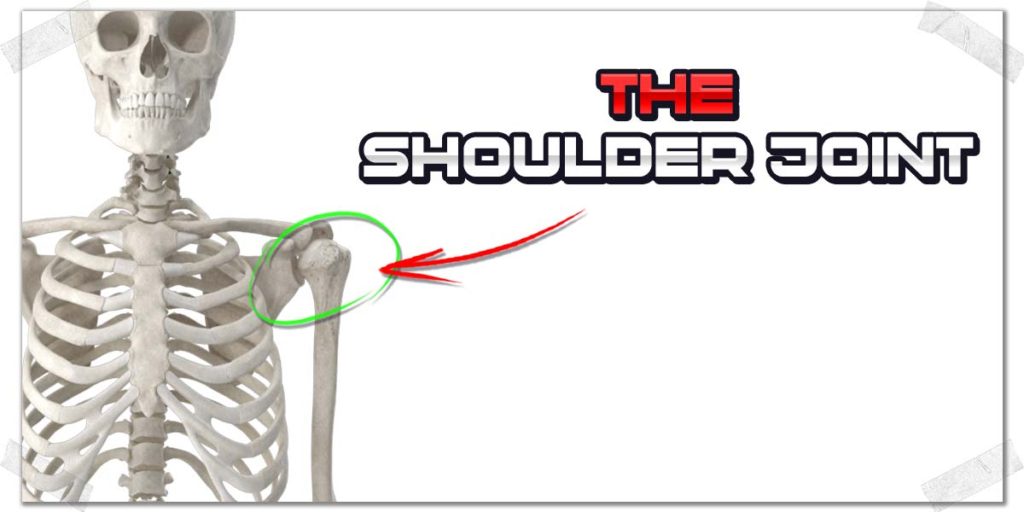
The shoulder joint (anatomically the glenohumeral joint) is a ball and socket joint that allows for arm movement in essentially all directions.
Fun fact: The greatest amount of movement required by dips is shoulder extension (pulling your elbow behind you). Shoulder extension occurs as you drop downwards into the dip while shoulder flexion occurs are you push yourself out of the dip.
The shoulder joint itself is wrapped in a thick, fibrous capsule known as the joint capsule. With this capsule and in the surrounding area are ligaments, which are the structures that connect from bone to bone, helping to reinforce the stability of the joint.
Pro tip: Sometimes, the shoulder capsule can become tight and immobile for unknown reasons, which results in a condition known as frozen shoulder. If your shoulder capsule is tight, you’ll want to perform dedicated movements and exercises that work to restore mobility to the capsule itself.
Muscles and tendons
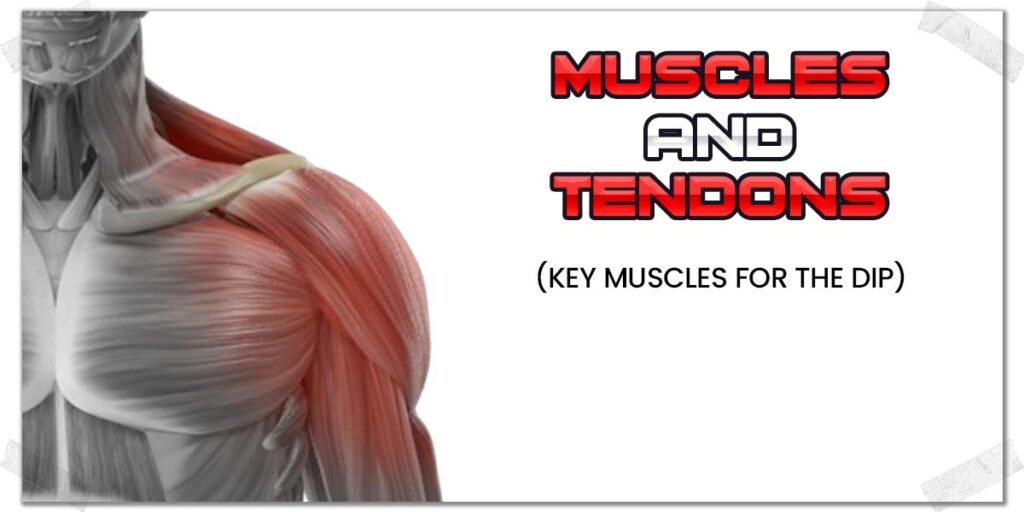
There are a handful of muscles that cross your actual shoulder joint. As a result, any muscle that crosses over this joint will help to produce a specific movement for your upper arm. The fine details for all of these muscles are beyond the scope of this article. However, when it comes to dips, there are a few key muscles (and their respective tendons) to be aware of:
The main muscles and tendons to be aware of are:
- The pectoralis major
- The pectoralis minor
- The long head biceps tendon
- The anterior fibers of the deltoid
- The triceps brachii
The first four muscles on this list attach more on the front side of the shoulder, while the fifth (specifically, the long head of the triceps brachii) crosses the backside of the shoulder.
Muscles on the front side of the shoulder will have to stretch when lowering into the dip position, which, if mobility is inadequate, can wreak havoc on the shoulder (more on that later).
The brachial plexus
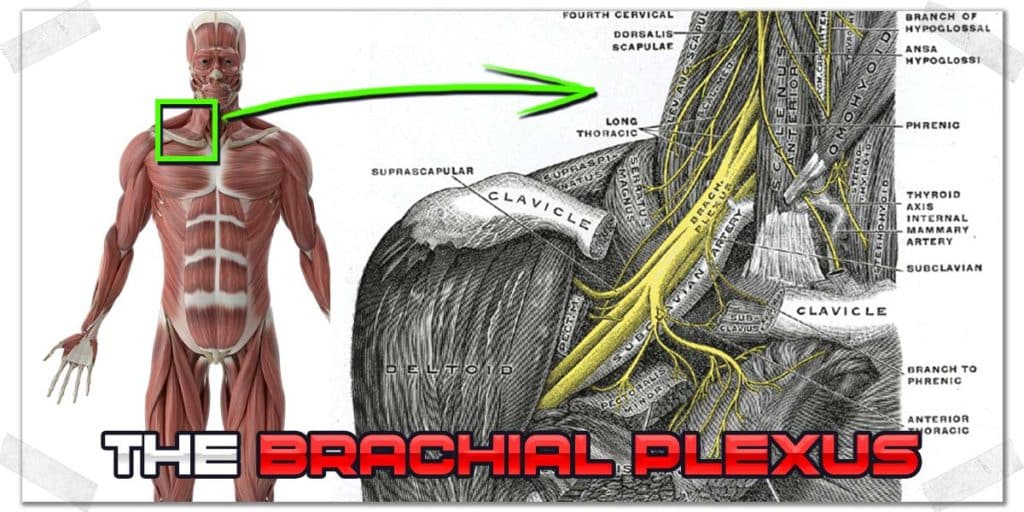
The brachial plexus is a collection of nerves that run from the neck, across the shoulder and down into the arm (some go all the way down into the hand). While it’s typically not a pain generator for dips, there can be times when abnormal tension from these nerves results in sensations of discomfort around the front of the shoulder and even down into the arm.
While the details of the brachial plexus are far beyond the scope of this article, it’s still a good idea to have an awareness of these nerves; if they are irritated or restricted (yes, nerves can sometimes not move/glide enough), they can undergo an intense stretch, which will be perceived as a type of pain or discomfort anywhere along the neck, front of the shoulder or the upper arm.
Dip pain: Common causes
While there could be dozens upon dozens of reasons for your shoulder flaring up from dips, some general movement mistakes and conditions can drive or influence the pain you feel in your shoulder(s).
I’ve found the following issues to be rather common over the years when treating individuals in the clinic or working with clients in the gym who are experiencing shoulder pain with dips.
Poor shoulder & chest mobility
The dip requires a hefty amount of mobility throughout the chest and shoulders. If any of the tissues on the front side of your shoulder have less-than-ideal mobility, it could very well be that you’re going to stretch (and thus, irritate or strain) them beyond what they can effectively tolerate as you drop down into the dip.
With dips, the main structures to watch out for with poor chest and shoulder mobility are:
- The pectoral muscles:
- The anterior deltoid fibers
- The long head biceps tendon
The deeper you drop into the dip, the more stretch (and potentially strain) you will load onto these tissues. This is because any tissue or structure on the front side of the shoulder will have to lengthen out in order to permit you to drop deeper into the dip.
Excessive range of motion
Even if your shoulder and chest mobility is adequate, using an excessive range of motion in the dip can still get you in trouble. And, it should go without saying that if you use an excessive range of motion with poor shoulder and chest mobility, you’re really asking for problems.
Using an excessive range of motion (i.e., moving through a bigger range of motion than what your shoulders and upper body can tolerate) is a surefire way to irritate your shoulder joint or any of the tissues that cross over the joint. This includes muscles, tendons, and even nervous tissue (i.e., nerves from the brachial plexus).
If you’re moving beyond an ideal range of motion when doing your dips, even with adequate mobility, it can lead to pain and discomfort in the shoulder; too much mobility can be problematic, so “more range of motion” is not necessarily better.
The more mobile your joints are, the less inherent stability they tend to have. In the context of dips, this can lead to:
- Excessive strain on the joint capsule and ligaments
- Subacromial bursitis
- Muscle and tendon strains of the rotator cuff
Once any of these conditions are present within the shoulder, it can lead to continual pain or discomfort (until the condition resolves) with any dips you perform or any similar exercises.
Poor dip technique
Believe it or not, there’s actual technique that goes into optimizing the dip — both for safety and performance. However, for this article, I’m only referencing the safety aspect. Improper technique can lead to lousy positioning of the shoulder joint, which can place excessive strain on the joint and involved structures.
Common technique errors include:
- Excessive elbow flare or internal rotation of the upper arm
- Vertical body position throughout the movement
- Dropping down too quickly into the bottom position of the exercise
To learn the proper technique of the dip, you’ll want to read solution 3 to help clean up any movement or positioning errors you may be producing with the exercise.
Solution 1: Limit your range of motion
If your shoulder has been flaring up with doing your dips, take note of when and where you tend to feel the discomfort; it’s possible that you might be able to modify the exercise to allow you to continue performing them.
If your pain is minimal or mild and seems to only be present at the end-range (bottom of the dip) position, you might be able to avoid the pain altogether if you shorten the range of motion you’re using. Provided you don’t have to shorten the range to an excessive amount (to the point where it makes the exercise largely ineffective), you might just be able to carry on so long as you stay out of the pain-provoking position.
Pro tip: If you find that a smaller range of motion doesn’t meet your muscles’ ideal challenge, try performing the dip with a very slow tempo (try two or three seconds down and then two or three seconds up). This will force the muscles to work much harder, to the point where you will feel a marked increase in fatigue.
Solution 2: Mobilize your pecs
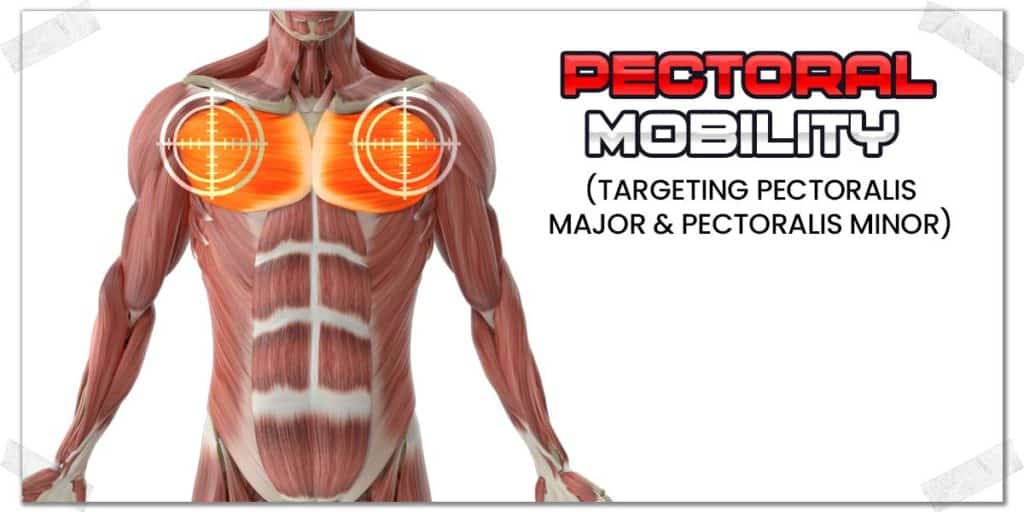
Mobilizing your pecs and general front of your shoulder region is usually a good idea, regardless of whether or not you’re having pain in your shoulders from doing dips.
Related article: Foam Rollng your Pecs: A MUCH More Practical & Effective Way
If you know that your chest or front shoulder region is tight or feels like it receives an excessive sensation of stretching when you’re blasting out your dips, reclaiming the suppleness and range of motion these muscles should normally have will feel like (and be) a game-changer. Be diligent with the following technique, and you just might notice that your shoulder feels better with other exercises and other day-to-day movements as well.
How to mobilize your pecs
My absolute favorite way to effectively restore motion to restricted or immobile chest and front shoulder muscles is to use a medicine ball and sink into it while stirring the body. We’re basically doing some myofascial release for the muscles. It goes something like this:
- Grab a medium-sized medicine ball (or soccer ball, basketball, etc.)
- Place it on an exercise bench and drape your body on top so that the ball rests on the outer portion of your chest muscles.
- Let your body weight sink into the ball and feel for any resulting tension.
- Slowly start stirring your body around, again, feeling for any tight or sensitive areas.
- Perform for approximately one minute, then repeat on the other side of the body.
Remember: this technique should not result in pain. If it’s painful, don’t do it.
Pro tip: The firmer the ball is, the more intense the rolling/pressure will feel. Use a ball that is firm enough to elicit some tension but not so firm that it is painful.
Solution 3: Use proper technique
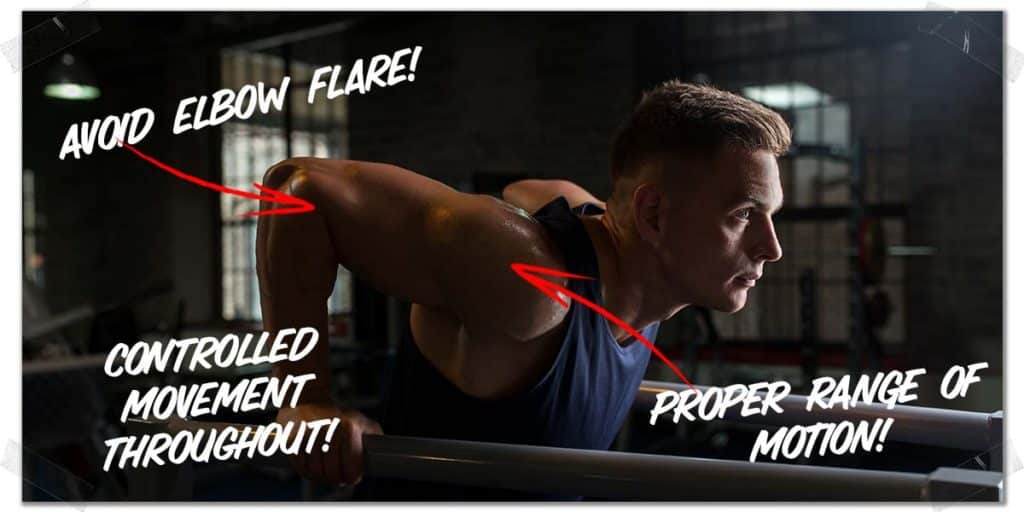
Many lifters aren’t aware that the dip is a movement that requires a decent amount of technique. Of course, good technique is necessary for more than just your shoulders (your elbows will take a beating if your technique is inadequate). Still, for this article, I’m simply focusing on technique more pertinent to the chest and shoulders.
Here’s what you need to keep in mind for your dip technique:
- Ensure that you’re not keeping your upper body entirely vertical; you want your upper body to be leaning forward enough throughout the dip so that your upper pectoral fibers can contribute more to the movement. Staying perfectly upright throughout the movement will potentially place an unnecessary strain on the shoulders joint itself or the muscles that cross the joint.
- Control your movement at all times. Don’t drop fast into the dip — it can lead to less control of the shoulders and increased stress on the tendons or joint (in addition to less stimulus to the targeted muscles.
- Keep your elbows relatively tucked in tight to your body. There’s room for flaring them out to a mild extent, but nothing more than mild. If your elbows are pointed outwards to the point of looking like a chicken wing position, it will create too much internal rotation of your shoulder joint and will likely cause irritation to the joint and surrounding structures.
Remember: The dip is an exercise that is meant to target the upper pectorals in addition to the triceps muscles!
Solution 4: Proper loading
Sometimes you can be doing everything right in terms of technique, range of motion, etc., but are simply pushing more load (resistance) through your chest and shoulders than what they can tolerate.
When this happens, the muscles and tendons pushing against the resistance can become overworked, leading to acute or chronic issues involving pain or discomfort. The intense, repetitive demands of heavy loading can lead to muscle strains or tendon conditions such as tendinitis (an acute issue) or tendinosis (more of a chronic issue).
Muscle strains involving the pectoral muscles are relatively common for athletes and highly active individuals, and while the tendon conditions mentioned above aren’t as common in the shoulder as they are in other areas of the upper body (such as the forearm), they still happen.
And since you still want to train without this issue getting any worse, you’ll need to reduce the intensity of how hard your muscles are working.
How to reduce load and still challenge your muscles
If you’re keen on still doing dips or similar exercises and want to make sure that you effectively challenge your muscles without flaring up your pain, here are some strategies to try:
- Get familiar with the concept of time under tension (TUT). TUT is a form of resistance training that is quite metabolically taxing on muscles without being as structurally taxing. It involves performing resistance training at slow rates of speed for exercises but done for longer durations of time. There is some emerging scientific evidence that shows it can be very effective for improving the size and strength of muscle tissue.
- Look around for an assisted pull-up machine. Assisted pull-up machines most always have a set of parallel dip bars as well, doubling as an assisted dip machine. With these machines, you simply select the amount of weight from the weight stack that you want to counteract your own body weight. The result is the ability to fine-tune how much weight of your body you want to offload from your chest and arms during the dip.
- If an assisted machine isn’t available, you might be able to get creative and rig up a giant exercise band in some fashion that would permit you to achieve the same effects as an assisted pull-up/dip machine.
Final thoughts
Dips are an effective upper body exercise that few other exercises can rival their benefits. As a result, you’ll want to be doing dips for as long as you live — but you can’t do that when you’re in pain. So, use the information within this article as your starting point for getting to the bottom of your pain and attacking the root cause of the problem. Happy dipping!

Hi! I’m Jim Wittstrom, PT, DPT, CSCS, Pn1.
I am a physical therapist who is passionate about all things pertaining to strength & conditioning, human movement, injury prevention and rehabilitation. I created StrengthResurgence.com in order to help others become stronger and healthier. I also love helping aspiring students and therapists fulfill their dreams of becoming successful in school and within their clinical PT practice. Thanks for checking out my site!
