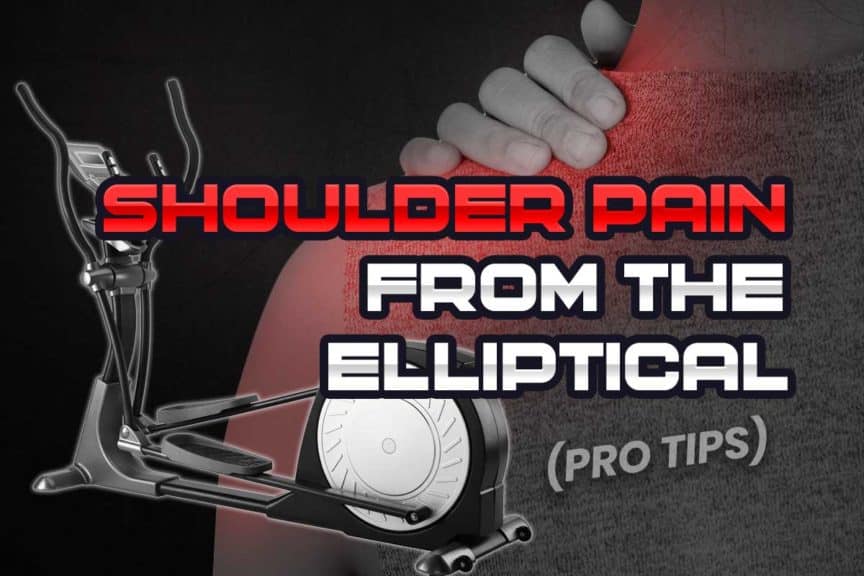
Shoulder pain is likely the last thing you were expecting to experience after using a piece of fitness equipment designed to be gentle on the joints and muscles of the body. Nonetheless, if your shoulder has been experiencing discomfort — or pain — after using the elliptical machine, there are typically a few key reasons as to why.
Shoulder pain from the elliptical machine often arises due to repetitive arm motion when holding the handles. It can result in sore muscles, tendons, and the shoulder joint itself. Solutions involve improving muscle and tendon endurance and movement abilities of the shoulder joint and upper back.
This article will walk you through all you need to know about the common reasons why shoulder pain can arise from using the elliptical machine and how you can make sure that the issue is less likely to happen again in future sessions.
So, if you want all the critical insight required to get yourself back on track, keep on reading!

ARTICLE OVERVIEW (Quick Links)
Click/tap on any of the following headlines if you want to jump instantly to that section!
• Basic shoulder anatomy
• Interpreting your pain
• Solutions for sore joints
• Solutions for muscles & tendons
• Modified elliptical workouts
Disclaimer: While I am a physical therapist, I am not YOUR physical therapist. As a result, I cannot tell you whether or not any treatments or training methodologies mentioned on this website or in this article may or may not be appropriate for you, including shoulder pain from using an elliptical machine. By following any information within this post, you are doing so at your own risk. You are advised to seek appropriate medical advice for any pain you may be experiencing.
Basic shoulder anatomy
The shoulder joint (anatomically known as the glenohumeral joint) consists of the upper arm bone (the humerus) and the glenoid of the scapula (shoulder blade). Together they form a type of joint known as a ball and socket joint.
Each end of the joint’s surface is lined with cartilage, a smooth substance that helps ensure that each surface slides smoothly against one another. The joint itself is encased in a thick leather-like tissue known as the joint capsule, which houses the synovial fluid. This fluid acts in the same manner as oil does for an engine by decreasing friction between two surfaces. It also helps to provide the cartilage with the oxygen and other substances required to stay healthy.
Fun fact: There are nine muscles that cross over the shoulder joint.
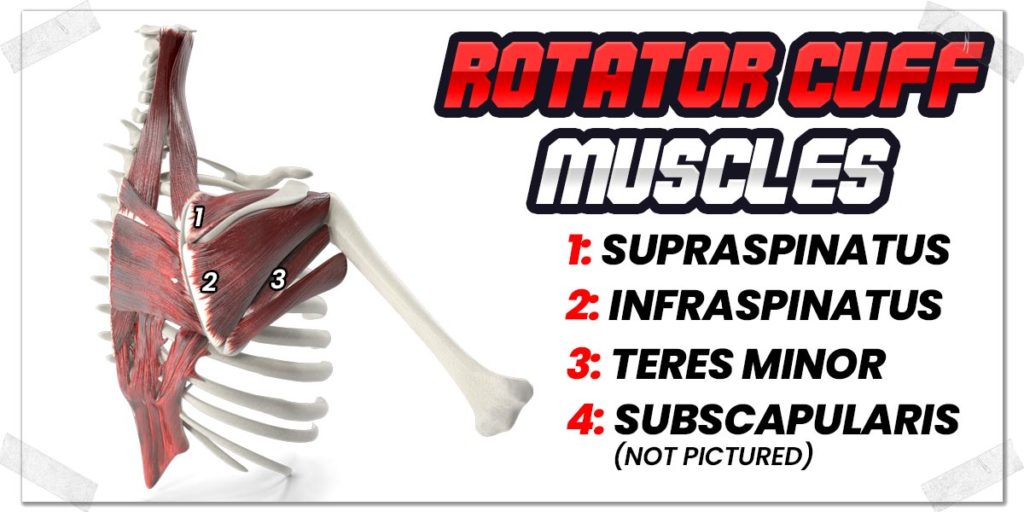
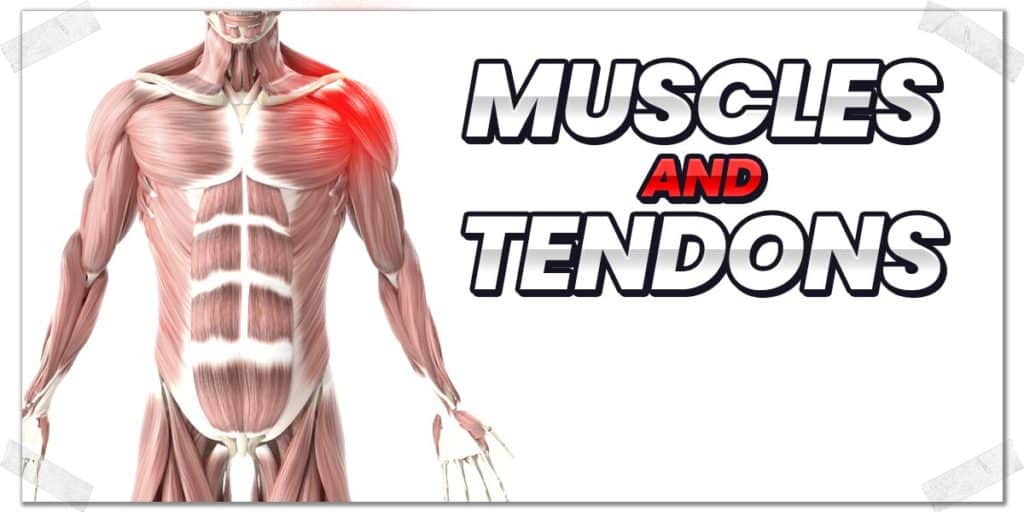
When it comes to muscles of the shoulder, the key muscles to be aware of are a group of four muscles that make up what’s known as the rotator cuff complex. These four muscles are:
- The supraspinatus
- The infraspinatus
- The teres minor
- The subscapularis
These muscles help us fine-tune our shoulder movements as we move our arm from point A to point B. Generally speaking, bigger muscles (such as the lats, the pectoral muscles, the deltoids, etc.) that cross the shoulder joint are the muscles that help us produce larger, more forceful movement from point A to B; however, it’s the smaller, much more delicate rotator cuff muscles that precisely control and coordinate such movements.
Related article: The ABSOLUTE Best Exercise for Subscapularis Strengthening: Here’s How
Being aware of these rotator cuff muscles is important as they can often be in an unhealthy state and, as a result, act as pain generators within the shoulder (more on that later).
Interpreting your pain
When it comes to the shoulder, there are multiple reasons for what may be causing pain or discomfort within the region. What follows is by no means an exhaustive list. Instead, it is a quick overview of more commonly involved structures implicated with the presence of shoulder pain. Remember, there can be numerous reasons for shoulder pain, and I certainly can’t cover all of them within a blog article.
If any of your symptoms match or are quite similar to what’s described below, it should only serve as a general starting point for helping you to better understand what could likely be occurring within your shoulder. I’d highly encourage you to ensure you know exactly what is contributing to (or entirely driving) your shoulder pain to ensure the best outcomes possible for you.
Dull, aching or burning pain on the upper shoulder
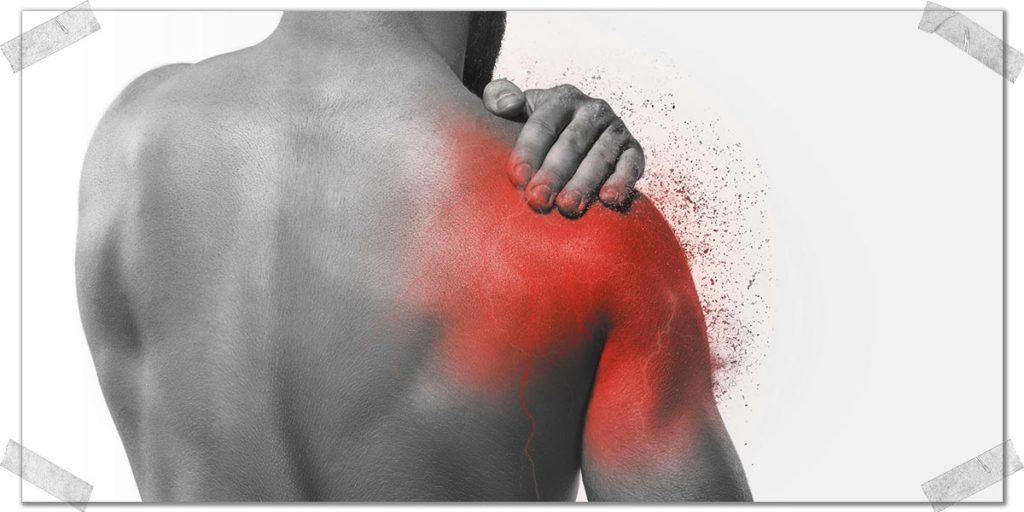
If you’re finding that you have pain that seems to be achy and perhaps dull-feeling in nature, it may signify more of an issue stemming from irritated or unhealthy rotator cuff tendons. If you find that the pain tends to subside when keeping your arm still but worsens once you repeatedly move it, it may be another indication that the tendons are causing you some (or all) of your grief.
Repetitive arm motions (such as when using an elliptical machine) can lead to discomfort, irritation and overall diminished health in shoulder tendons if the tendons aren’t healthy, to begin with. This is often known as a repetitive strain injury.
While there typically isn’t an excessive amount of physical strain placed on the shoulder tendons when using the elliptical, long or intense sessions when using this machine can cause irritation of the rotator cuff tendons, especially if these tendons are not used to performing such repetitive moments (i.e. you’re brand new to using the machine and did an excessively long session your first one or two times when exercising).
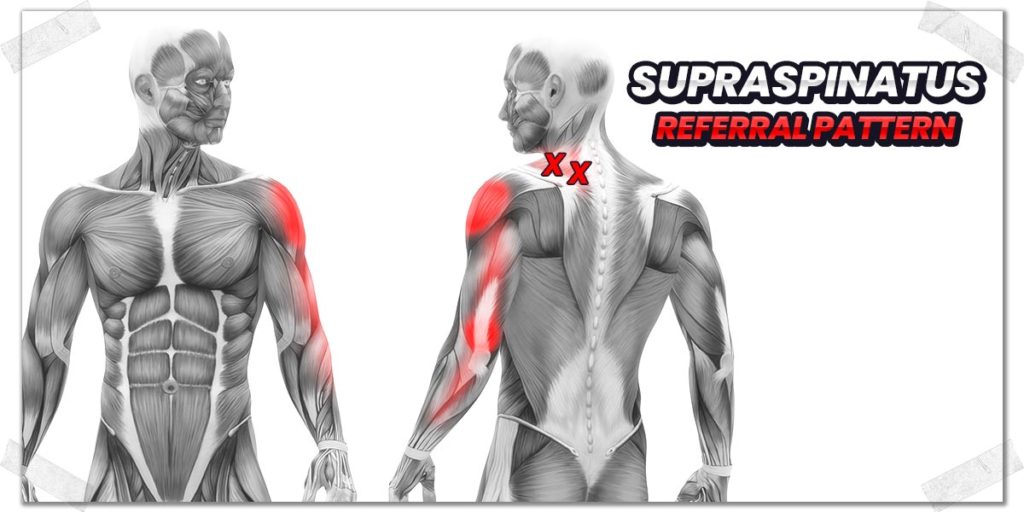
Referral patterns for the rotator cuff muscles
While the rotator cuff muscles all insert on the upper part of the arm bone (the humerus bone), they have unique presentations in terms of their pain location when they are irritated or unhealthy. This phenomenon is known as a referral pattern or referred pain. This type of pain is extensively studied and well documented in the human body.1
Take a look at the following referral patterns for the supraspinatus muscle and the infraspinatus muscle. If you feel that the location and type of discomfort (dull or achy) match these patterns, it may indicate that the culprit is the muscle(s).

Related article: Strengthening Your Infraspinatus With A Dumbbell (3 Proven Exercises)
Intense pain at the top of the shoulder
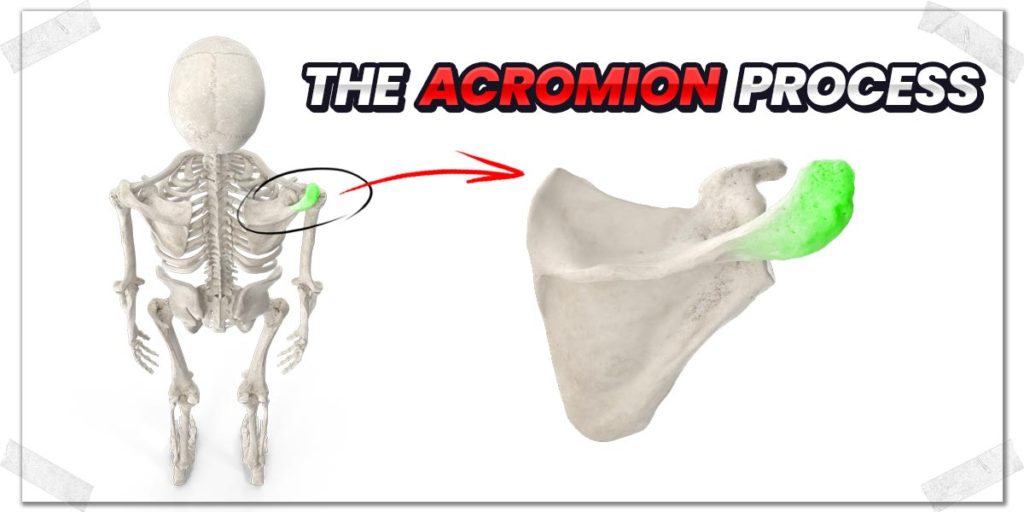
One of the more common painful shoulder conditions that affects individuals is a condition known as bursitis. Bursitis refers to an inflamed (irritated) bursa, which is a water balloon-like disc that serves the purpose of decreasing friction between tendons when they move and glide within the body. There are approximately two-hundred bursas within the body. When it comes to bursitis, one of the most commonly afflicted bursas is the subacromial bursa, which sits right underneath the acromion of the shoulder blade.2
When the bursa is unhealthy, it can cause high levels of discomfort in and around the general subacromial area of the shoulder. It often worsens when producing any movements that involve raising the arm above the head, as this position can produce physical pressure on the bursa if the shoulder blade isn’t rotating upwards with the arm bone at the same time. The result is known as shoulder impingement, which can lead to bursitis, among other conditions.
If the bursa is unhealthy, it may become irritated with the repetitive arm motion when using the elliptical machine.
Pro tip: Oftentimes, the subacromial bursa and the supraspinatus tendon will both be unhealthy. Confirming the health of the tendon and bursa can often be done through a diagnostic ultrasound, which can reveal defects (such as partial tears of the tendon) or changes in either the tendon or the bursa (visible thickening of the tissue).
Sudden, sharp pain deep in the shoulder
If your pain is rather sharp in its nature and is confined solely to the shoulder joint region (anatomically known as the glenohumeral joint), it may signify an underlying issue with the joint itself.
If you’re having sharp pain in your neck that is sending pain down through your shoulder region, it may signify an issue with one of the joints in the neck (the cervical spine) itself. (If this is the case, you’ll likely want to have a qualified healthcare professional assess your neck and shoulder to provide information towards getting the issue under control.)
Still, if the sharp pain is in your shoulder and only rears its ugly head when moving your shoulder, or if there is an audible clicking, snapping or clunking feeling accompanying the pain when moving), there’s a possibility that the shoulder joint isn’t healthy.
Reasons for an unhealthy joint can be numerous. Still, the most common reason involves osteoarthritis of the joint or previous traumatic injury to the joint. Osteoarthritis affects both men and women and tends to become more prominent around the fourth and fifth decade of life, with nearly 60% of those with osteoarthritis being above the age of 65.3
Solutions for sore joints

If your primary pain-generator of the shoulder is the actual ball and socket joint, it would be prudent of you to get further insight from a qualified healthcare practitioner to assess the overall health and integrity of the joint. What follows within this section is generalized information for joint pain as the result of osteoarthritis.
When joints become arthritic due to age-related or use-related degeneration, it becomes a delicate balance between avoiding motions and movements that further irritate the joint and performing enough movement (and the right types) to maintain joint health and even assist with joint healing.
Since joint cartilage has essentially zero blood supply, it receives its required nutrition and various substances through the synovial fluid within the joint.4 Ensuring movement of synovial fluid throughout the joint ensures adequate delivery across the cartilage as opposed to the fluid stagnating and not circulating around the cartilage as much.5
By performing pain-free shoulder movements, the synovial fluid is pushed around the joint, which can help bathe the cartilage with more nutrients and substances, contributing to decreased pain levels, improved joint health and functional shoulder mobility.
So, it’s likely that you can help decrease your joint-related discomfort by performing pain-free movements. Gentle yet highly therapeutic movements for shoulder joints tend to include:
- Arm pendulums (both directions)
- Table slides (sliding your arm forwards while resting on a table)
- Dowel-assisted arm raises
You can Google these exercises if you want the specifics on how to perform them, as they’re pretty common for circumstances involving the need to move the shoulder joint without creating pain. These types of gentle movements can typically be performed multiple times per day to help encourage the joint to receive healthy, therapeutic, pain-free movement. Still, it would be best to check with a qualified healthcare professional to ensure if they’re appropriate for you to perform.
Solutions for muscles & tendons
If you’re confident that your shoulder pain or discomfort is the result of unhealthy muscles or tendons, you’ll certainly want to steer clear of performing repetitive movements with your arms that involve using the affected muscles until you can get them healthier.
When muscles and tendons have recently become sore, irritated or unhealthy, it’s best to be quite gentle on them for the first few days, or even the first week, by minimizing the amount of physical exertion they must produce. However, after this relatively short rest break, you’ll likely want to begin a dedicated strengthening program for the muscles or tendons (often known as a loading or resistance program).
The specifics are beyond the scope of this article; however, it’s critical to know that the rotator cuff muscles themselves need physical stimulation (I.e. resistance training) to help ensure an effective and efficient recovery process.
One of my favorite protocols for beginning to improve the health of the rotator cuff muscles is one of Tom House’s rotator cuff warmup routines. Dr. House is an expert on the rotator cuff, and implementing his rotator cuff protocols for my patients has been a game-changer for me ever since coming across them some years ago.
Give the following protocol a try. It shouldn’t be painful at any point, so if it is, discontinue the movements. If appropriate, I’d suggest performing this routine at least three times a week (I.e. every other day). As your shoulders become healthier and more conditioned, you might want to consider performing it once a day to ensure that your shoulders continue to stay healthy (kinda like brushing your teeth!).
Trust me, it’s more than a warmup; for many people (particularly those with weak rotator cuff muscles), it’s a fantastic series of rotator cuff strengthening exercises.
This is a stellar protocol since the movements are not complicated, and there is no equipment required to perform any portion of the routine.
Modified elliptical workouts
If you’re dead-set on carrying on with your elliptical workouts or using the elliptical machine in general, there are some modifications that you could consider trying to see if they allow you to continue with your physical training without flaring up your shoulder. They may not be perfect, but they just might get the job done if you feel you can get by with a modification or two.
Modification 1: Keep your hands off the moving arms
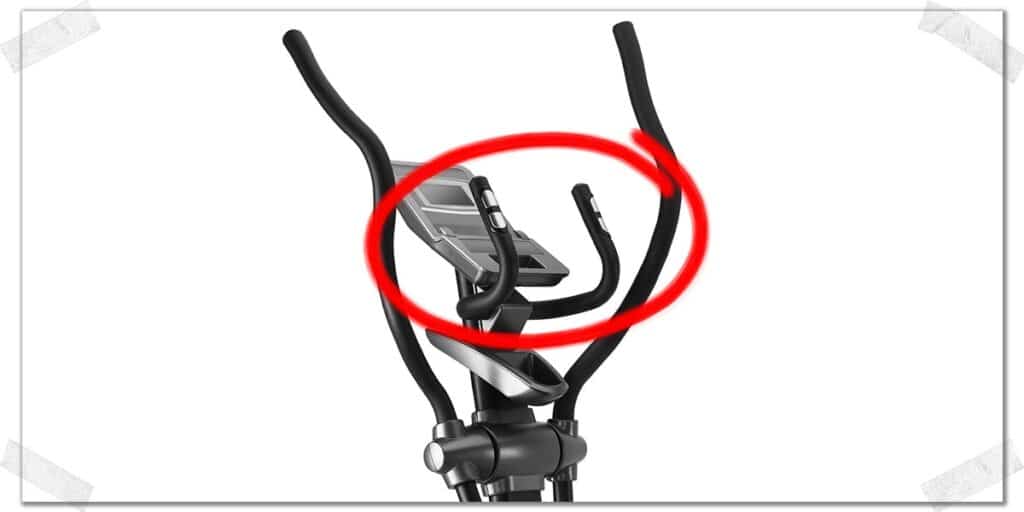
It may sound self-evident, but this modification is likely the safest bet if you want to ensure as much pain reduction to your shoulder as possible. Still, it’s worth mentioning in case you’re not aware that you can still get a great elliptical workout session going without using your arms.
The solution is to either hold onto the stationary arms in the middle of the device (most often just below the center console screen).
You could also opt to have your arms hanging by your side, but you’ll need to be confident with your balance and overall movement while on the machine to ensure that there’s no risk of falling.
Whichever option you choose, you might not burn quite as many calories as if your arms were chugging along on the moving handles, but it will be a relatively minimal difference, and you can offset the difference by either upping the intensity of your elliptical session or by staying on the machine a little bit longer.
Modification 2: Place your hands on top of the moving arms
It’s an incredibly subtle difference, but having your hands resting on top of the moving arms rather than wrapped around them might just provide some shoulder relief. The reason is due to the slightly altered position that the upper arm bone (the humerus) is in while moving.
Resting the hands on top of the arms puts the supraspinatus and infraspinatus muscles in slightly different positions and allows them to rest a little bit more than when gripping the handles.
Since the arms are essentially resting a bit more and now just “following along for the ride,” the muscles of the shoulder get to rest a bit more (they’re a bit more active if you’re holding onto the handles in the traditional sense).
Modification 3: Limit the amount of time you have your arms on the handles
If you find that your shoulder can tolerate some arm movement on the elliptical but isn’t capable of making it through an entire elliptical session, the solution might just be to limit the amount of time you use your arms; it doesn’t have to be an all-or-none deal.
There are different ways to implement this strategy, but here are some ideas:
- Save your arm movement for the back half, last quarter, etc., of your time on the machine.
- Perform “intervals” for your arms, such as one minute with your arms swinging on the handles, then one minute off.
- Perform some sessions entirely without using your hands and some other sessions with your hands on (either for part of the session or the entire session).
Final thoughts
If you are or have been experiencing shoulder pain from using the elliptical machine, your best bet moving forward is to determine which structure or tissues are affected and subsequently causing your pain. Once you know the specifics, you can then try modifications or different strategies altogether to continue using the elliptical machine in a way that doesn’t cause your shoulder pain.
It’s hard to know how to fix a problem when you’re not certain what the underlying issue is that’s causing it to take place. So, do your due diligence to gain insight into why you’re experiencing your shoulder pain, then take the needed steps to tackle the issue and get things back on track.
References:
1. Simons DG, Travell JG, Simons LS. Travell & Simons’ Myofascial Pain and Dysfunction: Upper Half of Body. Vol 1. Lippincott williams & wilkins; 1999.
2. Which bursae that are most commonly affected by bursitis? Accessed March 10, 2022. https://www.medscape.com/answers/2145588-103049/which-bursae-that-are-most-commonly-affected-by-bursitis
3. Millett PJ, Gobezie R, Boykin RE. Shoulder osteoarthritis: diagnosis and management. Am Fam Physician. 2008;78(5):605-611.
4. Kock L, van Donkelaar CC, Ito K. Tissue engineering of functional articular cartilage: the current status. Cell Tissue Res. 2012;347(3):613-627.
5. Tabbaa SM, Görtz S, Lattermann C. A Basic Science Understanding of Cartilage Repair and Its Clinical Application. In: Evidence-Based Management of Complex Knee Injuries. Elsevier; 2022:241-252.
6. Seidman AJ, Limaiem F. Synovial fluid analysis. Published online 2019.

Hi! I’m Jim Wittstrom, PT, DPT, CSCS, Pn1.
I am a physical therapist who is passionate about all things pertaining to strength & conditioning, human movement, injury prevention and rehabilitation. I created StrengthResurgence.com in order to help others become stronger and healthier. I also love helping aspiring students and therapists fulfill their dreams of becoming successful in school and within their clinical PT practice. Thanks for checking out my site!