A pulled groin (also known as an adductor strain) is one of the most frustrating types of pulled muscles one can experience, mainly since it can prevent an individual from doing almost all forms of physical activity that involve using the lower body. It’s much easier to improve groin mobility before an injury rather than afterwards, so if you’re trying to take a preemptive approach, I cannot commend you enough for doing so.
Preventing a pulled groin starts with awareness of your current groin mobility, implementing the right types of training and movements while avoiding static stretches and passive movements. You must also know how to warm up properly and when to use compressive garments for the groin muscles.
Prevention is better than ANY cure, so if you want a step-by-step walkthrough of how to have the utmost confidence that you will avoid groin pulls during your physical activity pursuits, then be sure to keep on reading as the rest of this article; it will contain a complete breakdown of all the things that you need to consider and implement to improve your groin mobility. You don’t want to pull your groin, trust me!
ARTICLE OVERVIEW (Quick Links)
The following headlines are quick links, so simply click (or tap) on the following article headlines to jump to that particular section.
• What are the groin muscles?
• What is a groin pull?
• Start with this simple self-assessment
• Make sure one groin isn’t tighter than the other
• Avoid static stretching (use undulating stretches instead)
• Use active movement to improve groin flexibility
• Make sure you train & move in side-to-side patterns
• Do a legitimate warmup (here’s how)
• Use compression shorts for your physical activities
Related article: Recovering From A Groin Injury: Here’s How To Come Back Stronger
What are the groin muscles? A quick anatomy lesson
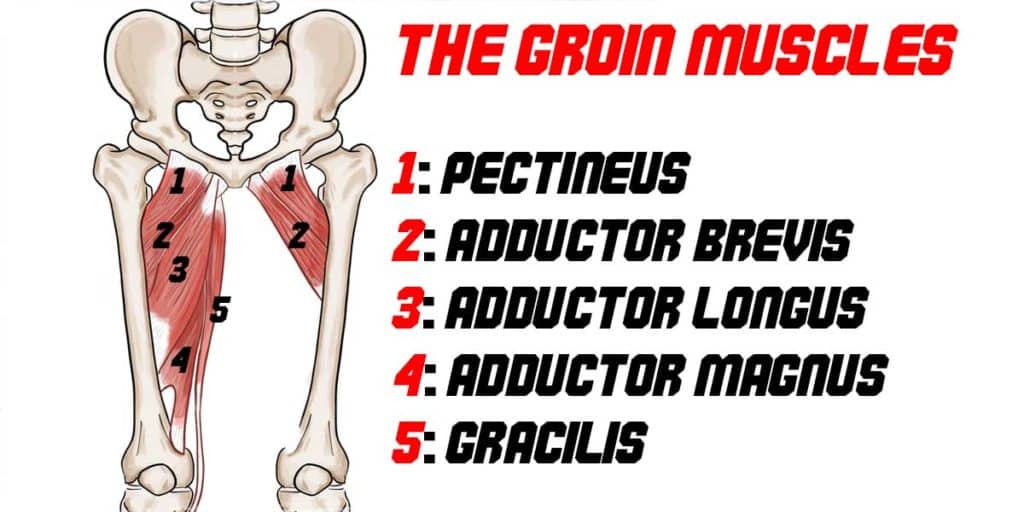
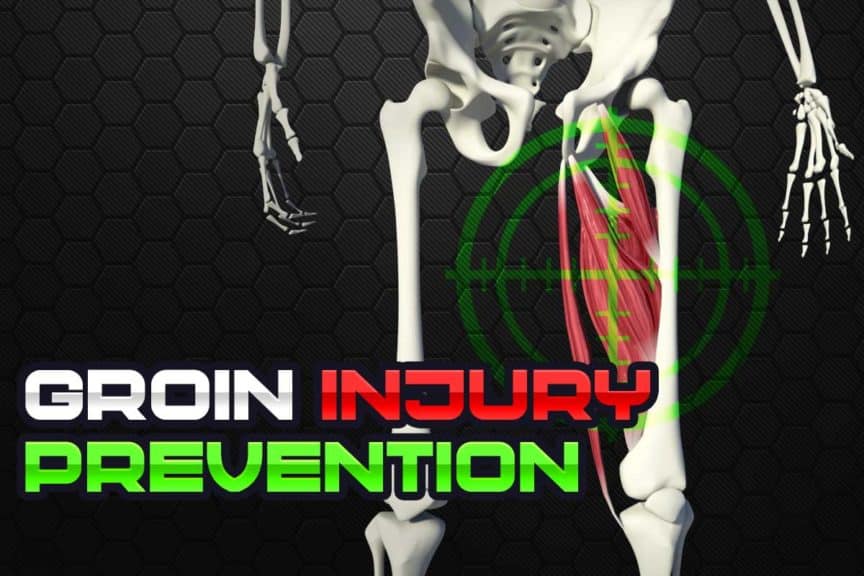
When it comes to the human body, the “groin” refers to a group of muscles located on the inner thigh of each leg. These muscles are responsible for pulling our thigh (and the rest of the leg) towards the middle of our body. Think of pulling your legs back together when performing an activity such as making a snow angel; it’s these particular muscles that pull the legs back underneath our torso.
More specifically, these muscles are known as adductor muscles, which consist of:
- The adductor brevis
- The adductor longus
- The adductor magnus
- The pectineus
- The gracilis
Each of these muscles work as a team to pull the leg towards the middle of the body when the legs are spread out to the side.
What is a groin pull?
Simply put, a groin pull (sometimes called a pulled groin or adductor strain) refers to an over-stretching of these muscles, which tends to occur when the thigh moves too far outwards to the side of the body, beyond what these muscles can safely stretch out to accommodate.
The result is trauma to one or more of these adductor muscles, which is noted by some degree of tearing of the respective muscle(s) and/or its subsequent tendons. The extent of trauma can range from microscopic tearing of these tissues all the way up to a complete rupture (tearing the muscle or tendon in half).
Generally speaking, the greater the tear, the more significant amount of disability and pain the individual will experience (there can be some exception to this when it comes to complete tears, but this is beyond the scope of this article). Additionally, the greater the tear, the longer the recovery process will take before an individual can fully return to their desired activities.
The quick takeaway: Don’t pull your groin!
Start with this simple self-assessment
When it comes to making sure you know how to effectively prevent a groin pull, there’s an old saying that you need to follow:
“If you don’t assess, the best you can do is guess!”
Taking out any and all guesswork is critical when it comes to ensuring you have an optimal understanding of what you need to work on (and that it’ll be effective) in regards to fostering and maintaining adequate groin muscle health. Thankfully, there are a few quick and easy ways to self-assess and thus determine the condition your groin muscles are in and what you should thereafter work on and prioritize.
Check your mobility using the wall
My preferred way to determine your groin muscles’ overall mobility and health is to simply use a wall (if this is unfeasible for you for whatever reason, I’ll include another way you can quickly self-assess your groin muscles after discussing this wall technique).
For the wall self-assessment, you will need to have enough access to an area of an empty wall so that you can swing your legs up onto it and then easily let your legs fall apart. Five or six feet of wall space is typically all that you need
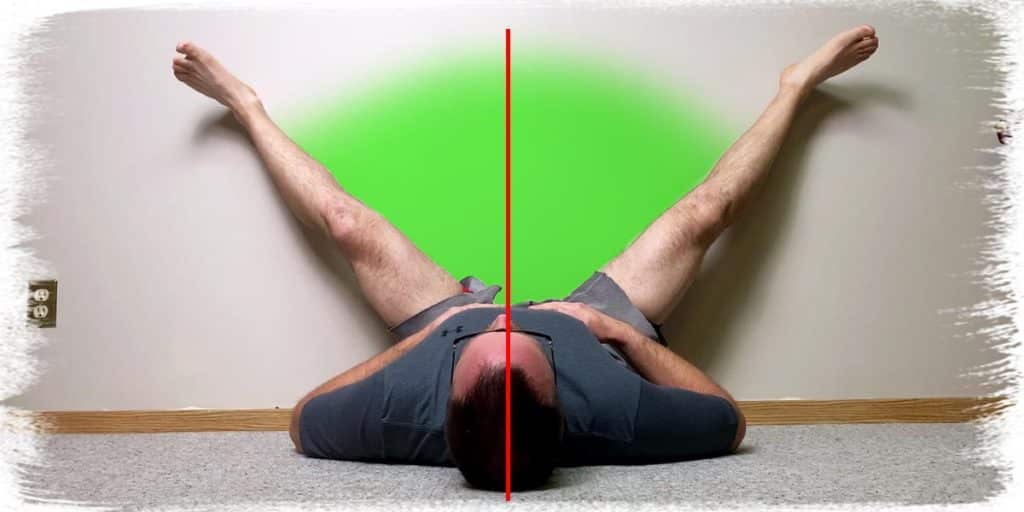
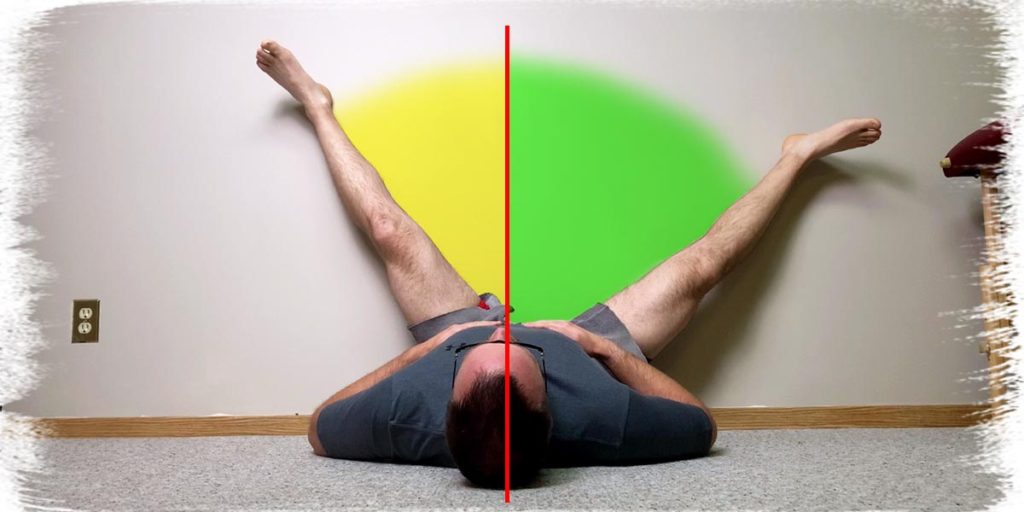
Ideal: symmetrical range of motion Not ideal: Non-asymmetrical range of motion
To get into this position, start by sitting sideways right up against the wall. Then turn your upper body perpendicular to the wall as you lay back and slide your legs up the wall (use clean socks if you want to make sure you don’t mark or scuff the wall).
Next, simply leg your legs spread apart as far as comfortable on each side. As they rest in this position, take note of how far each leg moves downwards — does one move further down than the other? If so, take note, as this may mean you got some extra work to do on that one side.
In addition to leg position, take note of any tension you feel on your inner thigh. Does one side feel tighter than the other? Do you feel the tightness in different spots from one side to the other? Take note of these things, as it will help you fine-tune and customize how to keep your groin healthy in the following sections.
If you don’t have a wall
If you don’t have a wall or the ability to lay down on the floor, here’s another way in which you can quickly assess your groin mobility from one side to the other:
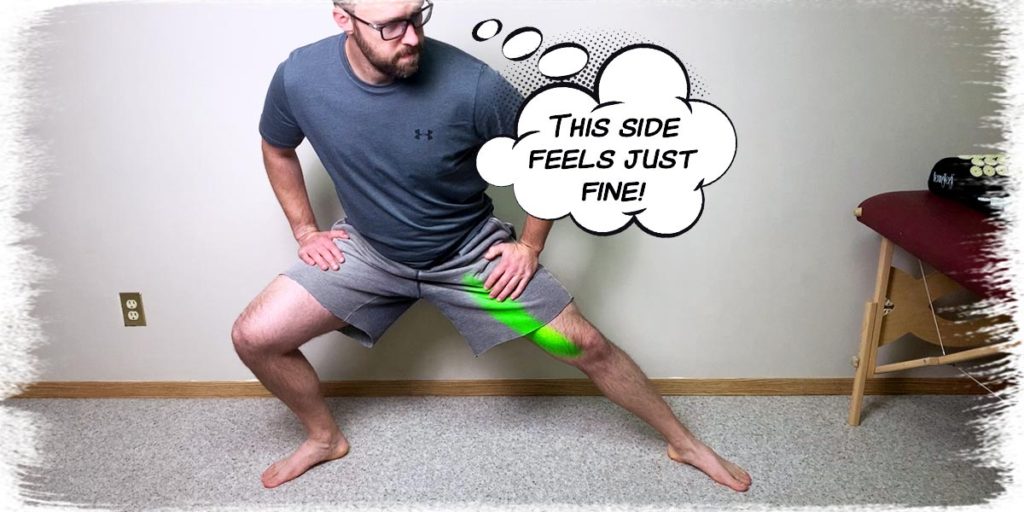
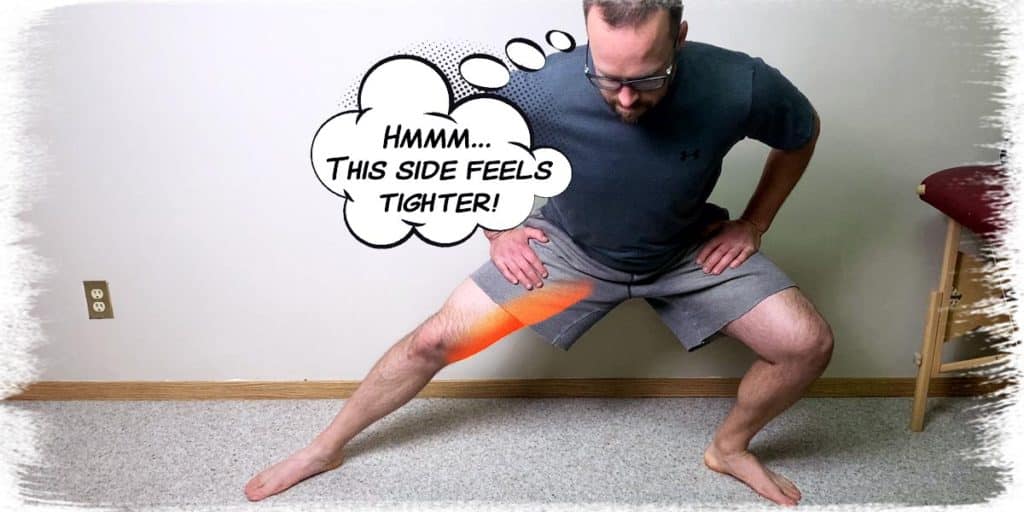
- Start in a standing position and then step sideways about two inches with each leg.
- Next, slowly lunge from left to right. Take note of how it feels — feel for any tension and where you feel that tension (if you felt any).
- Step about two inches apart again with each leg and perform another small/gentle lunge from left to right. Take note of how that felt and repeat the process.
- Perform this as many times as comfortable until you feel you’ve hit your limit (no need to push yourself here; just do this enough until you feel a moderate stretch on one side or the other).
- Make a mental note of what you feel, as you’ll want to focus on these things a bit more as you work on your mobility/movement.
Make sure one groin isn’t tighter than the other
It’s incredibly important to determine if one side felt tighter or more immobile than the other during your self-assessment.
The reason being: the greater the difference of your movement range or quality of movement from one side to the other is a strong indicator of the likelihood of sustaining injury down the road.
Many movement practitioners (including myself) argue that it would be better to have a mild mobility restriction that is equal on both sides of the body than having one side that moves normally while the other side has a moderate or severe mobility restriction.
Ultimately, what this all means for you is that you want to ensure that your movement range and movement quality are equal from side to side to stand the best possible chance when it comes to not suffering a groin pull.
Avoid static stretching and use undulating stretches instead
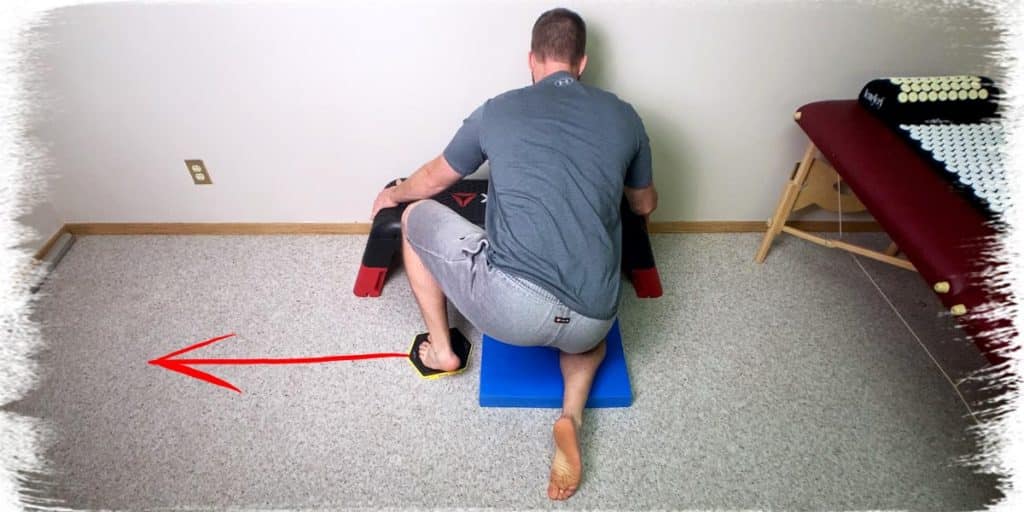
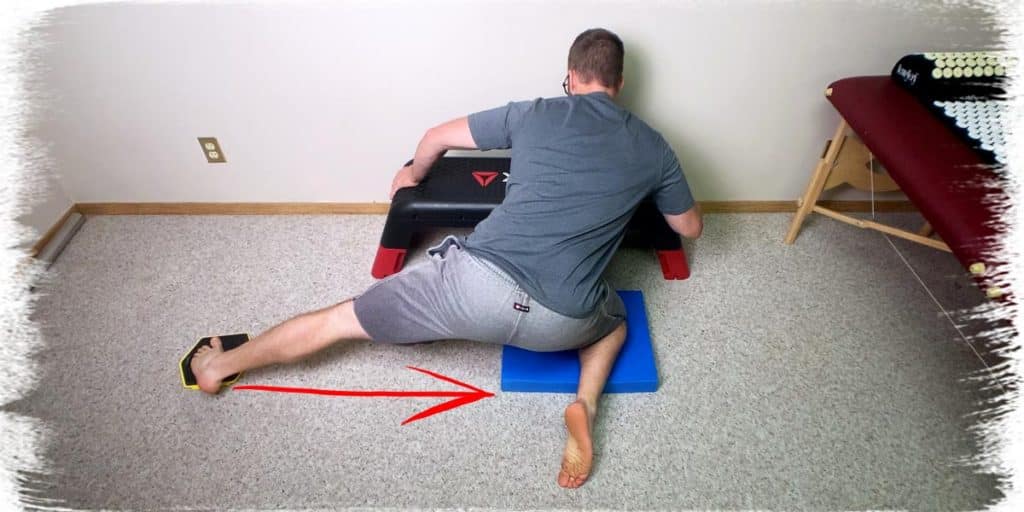
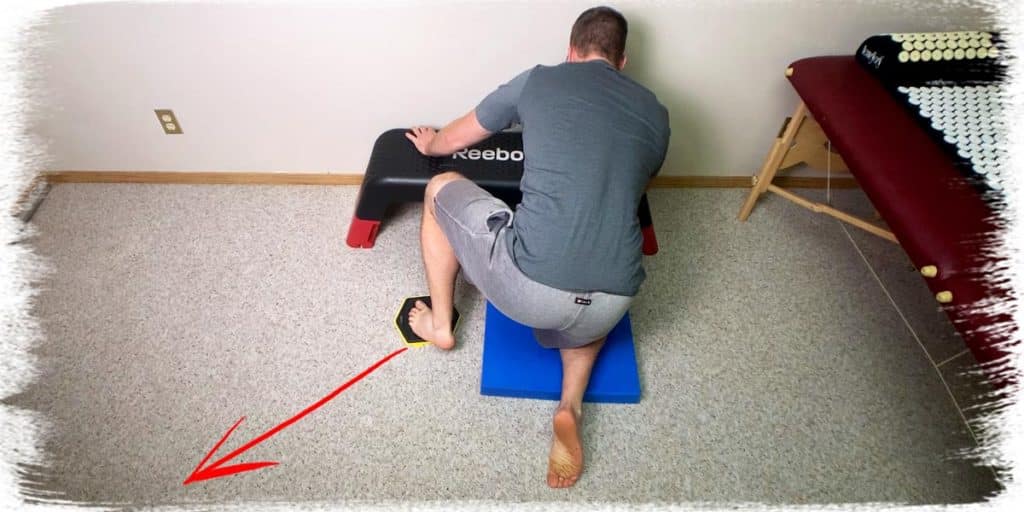
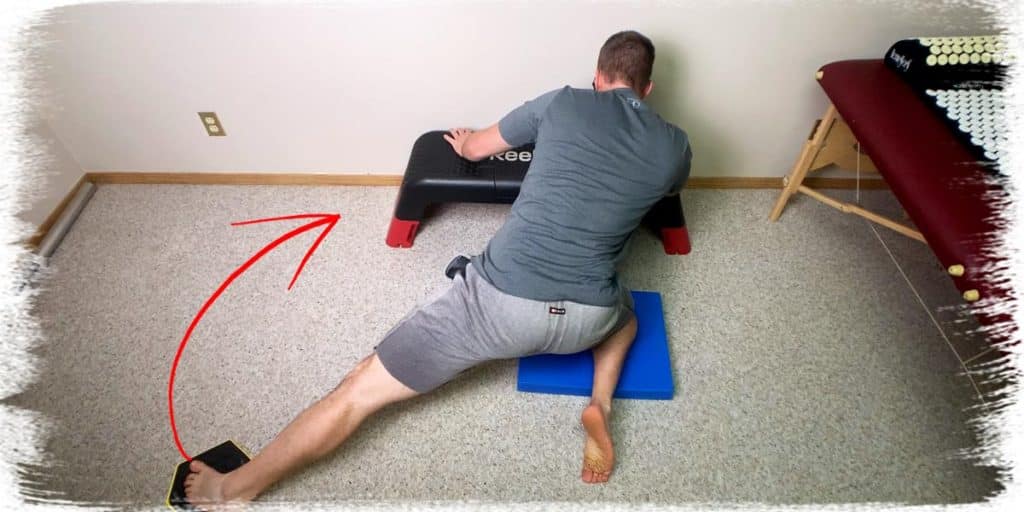
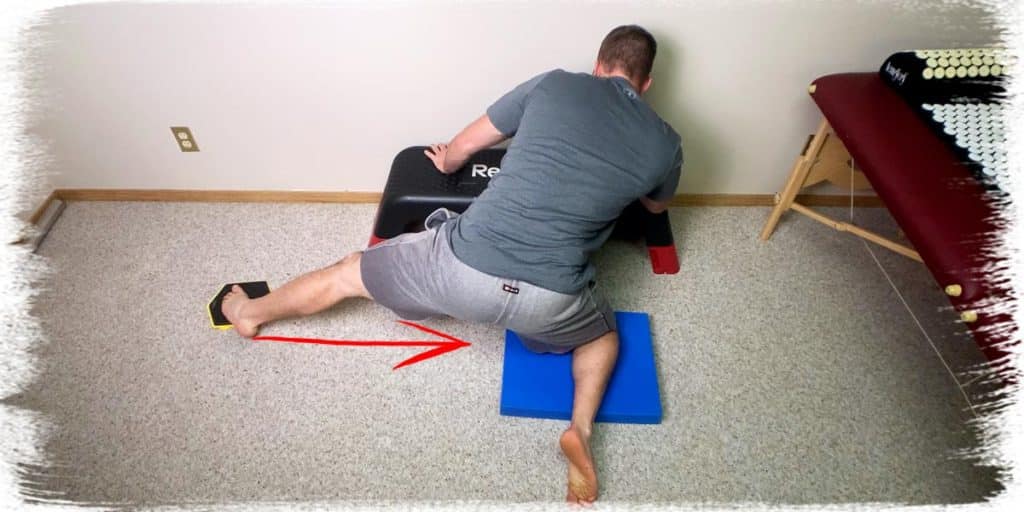
Slide out Slide back in
One of the best ways to ensure that you’re maximizing the effectiveness of reducing the likelihood of sustaining a groin injury is to use active stretches rather than passive stretches when working on your mobility.
Unless you want to minimize the results of working to improving the tissue extensibility and overall health of your groin muscles, it would be prudent of you to avoid static stretches for your groin like the plague. I won’t go so far as to say that static stretching will be a complete waste of your time, but just that there are likely more beneficial methods to use instead. If nothing else, save your static stretches until after you’re done your workout or physical activity session; performing them as a cool-down will be more ideal.
In short, this is simply because static stretching just doesn’t yield the mechanical changes to muscles we once thought it did some decades ago. Static stretching more so desensitizes our brain’s perception of the sensation of stretch rather than eliciting structural/tonal changes to the muscles themselves.1,2
Translation: All static stretching is likely to do is neurologically fatigue the muscle for a transient period of time (something you want to avoid if trying to prepare for physical activity) rather than creating actual changes in muscle tissue extensibility.
What’s the best way to stretch if static stretching isn’t ideal?
Rather than static stretching, you’re likely to have better success with undulating stretches. Undulating stretches are a type of stretch in which you take the muscle to a mild stretch, then after a second or two, ease off the tension for a few seconds and then repeat. Essentially, you’re going from high to low tension repeatedly, as in a wave-like pattern (hence the term “undulating”). This is often known as dynamic movement or dynamic warmup.
Dynamic warmups reign supreme for optimizing range of motion without decreasing muscle performance.3 So, make sure to use undulating stretches or dynamic movements. for your stretching-based sessions.
My favourite groin stretches involve using floor sliders, my Bells of Steel glute-ham roller, and going through an undulating stretching pattern for a minute or so. I do this while keeping the extent of the maximal perceived stretch to around a 5/10 (10 being the maximal tolerable end for a stretch).
Use active movement to improve groin flexibility, not passive movements
In addition to utilizing undulating stretches, you’ll likely have higher degrees of success for optimizing your groin muscle mobility if you use active movements rather than passive ones.
An active movement simply refers to a movement that we produce by ourselves, rather than stretching ourselves into a position without using the targeted muscles (the latter being passive movements).
Passive movements certainly aren’t the devil or anything of the sort, but if there were only one of the two movements to perform, active movements would be the way to go.
Step 1 Step 2 Step 3
This is mainly because active movements replicate more of a real-world demand that our muscles and brain have to produce on a daily basis. This equates to more time spent controlling and feeling our movement. In turn, this helps us to better feel how our body and muscles are performing overall, which can yield valuable pieces of the puzzle when it comes to better understanding the state of our body and overall movement quality.
If you’re a big fan of passive movements, at least try to incorporate some active, undulating stretches into your movement regimen.
How exactly does one go about doing this? Read the following section to find out!
Make sure you train & move in side-to-side patterns
The best part about using active movements and undulating stretches as a means to prevent sustaining a groin injury are that you can do all of this while actually doing training for your sport or activity itself!
While dedicated movement regimens are fantastic, sometimes they’re a hassle in that it’s more time we have to spend in the gym or throughout the day in addition to our weight training or sport-specific training.
But wise athletes and trainers know that you can give your groin muscles a lot of practical and appropriate mobility demand by simply incorporating those movements or positions into your exercises or sports drills.
For example, many athletes and weekend warriors spend lots of time in the gym but only train their bodies (and legs in particular) to move forward and backwards (think of lunges, squats and deadlifts) while failing to do any side-to-side movements.
Side-to-side movements will not only challenge the mobility/tissue extensibility and quality of movement of your groin muscles but will ALSO strengthen them as well!
This is because while the groin muscles will have to lengthen out to move sideways, they will have to contract (forcing them to get stronger) to pull your legs back underneath you.
This is awesome since stronger groin muscles have much better resiliency against being stretched into injury-provoking ranges and can heal much more quickly if they do get injured than when compared to muscles that aren’t strong/conditioned.
So, try incorporating sideways movements into your training regimens. This can include movements such as:
- Side lunges
- Diagonal lunges
- Cossack squats
- Sumo deadlifts
A quick Google search for each of those exercises will yield some great demonstrations on how to perform these movements.
If none of those work for you, there are a variety of other lower-body movements that you can explore that will still get the job done!
Do a legitimate warmup (here’s how)
The more you strengthen and lengthen your groin muscles, the better off you’ll be. However, that’s no excuse for neglecting a proper warmup before a challenging activity, no matter how great your groin muscles feel.
A legitimate warmup that effectively prepares your groin muscles for the demands you’re about to impose on them will include a few key components.
For starters, the more physically intense/demanding your activity session will be, the more you want to make sure that you’ve got a mild sweat going on before diving into the activity at full intensity.
This is because a mild sweat indicates that your body’s core temperature is elevated, which signifies that muscles are a bit more pliable and receiving elevated blood flow than when compared to a resting state.
This all means that your muscles are in a much more prepared and ideal state for lengthening and contracting, which ultimately equates to not only better physical performance for your activity but also a much lower likelihood of straining these muscles throughout the activity itself.
Replicating movements specific to the activity
Once you’ve got a light sweat going, you’ll also want to make sure that you take your groin muscles through some of the movements they’ll need to do throughout the activity session, albeit at a much lighter intensity/demand.
This not only serves to further prepare the groin muscles, but it also affords your brain (and thus, you) the ability to take inventory of how the groin muscles are feeling. This can give you added confidence that your body and muscles are well prepared for the upcoming activity, as well as a chance to perform any other movements or warmup activities if they still feel a bit tight/not quite ready to go.
So, pick a few movements that you know or anticipate performing and give them a run-through at 25%, 50% and then upwards of 75% intensity to make sure that everything is good to go!
Use compression shorts for your physical activities
Compression shorts can be a great option to implement for several reasons if you want to have some extra confidence in keeping your groin muscles happy during your activity (especially if you are coming back from a groin injury).
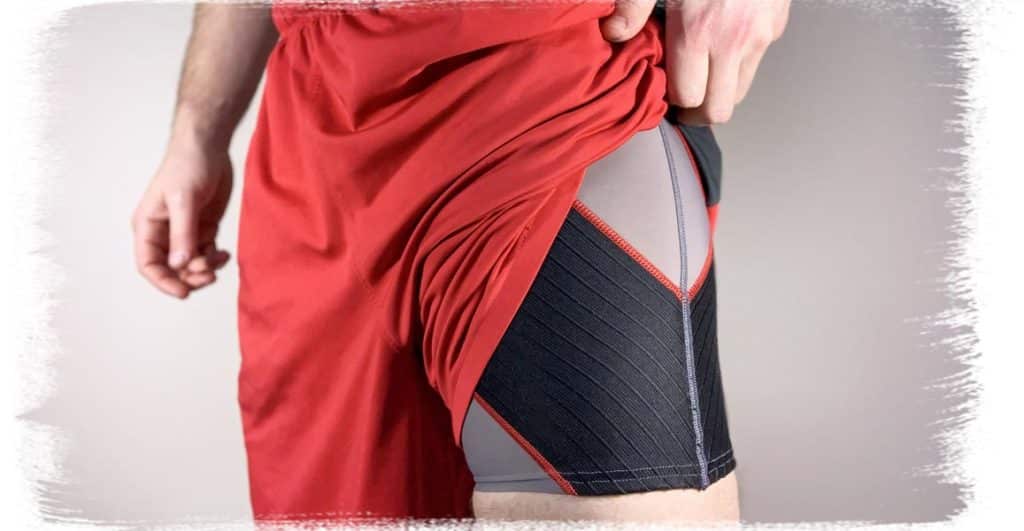
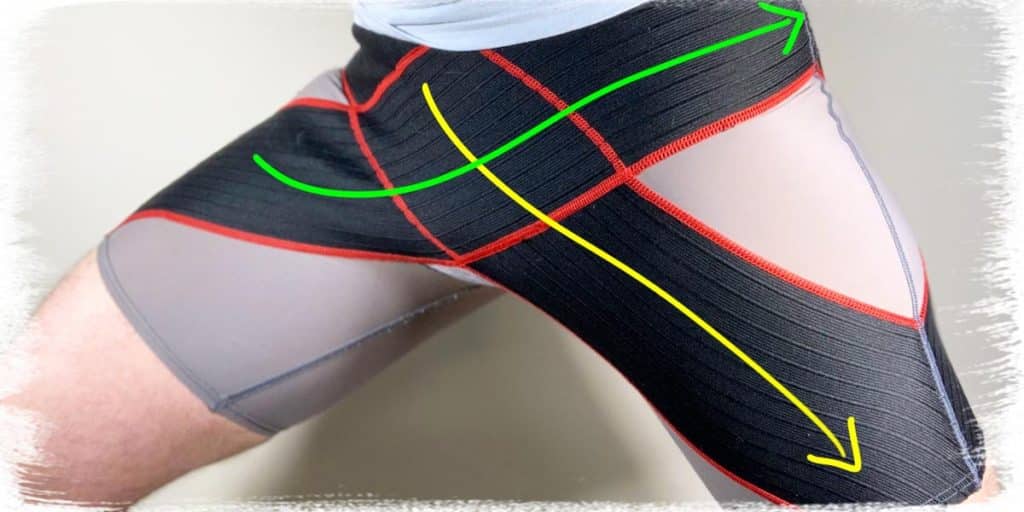
If you’re not sure what compression shorts are, they are essentially a special garment worn around the thighs that help to offload the demand of the groin muscles while also helping to prevent the groin muscles from overstretching.
While the construction and material used can differ from one brand to the next, the general premise with these shorts is that they have a viscoelastic material woven into the tight-fitting shorts themselves.
Additionally, this particular material runs in a direction that assists the groin muscles during their contraction phase while resisting their ability to lengthen out.
Helping assist with muscle contraction while resisting overstretching is only done to certain extents. The reason for this is since you don’t want to have so much resistance or assistance with your movement that it impedes your overall ability to move or perform. But the right amount does help with keeping the groin muscles a bit more protected and safe without compromising athletic performance.
There is actually some evidence that they can assist in the groin strain recovery process as well.4 If you’d like to check out some of the evidence as well as learn about the specifics about their benefits and how to pick the right type for you, you can read all about it here in my article: Do Compression Shorts Help With Groin Injuries?
Final thoughts
The only thing worse than suffering a groin pull/going injury is knowing that you could have prevented it from happening. And, as I mentioned at the start of this article, prevention is better than any cure.
So, do all that you can to prevent groin injuries from happening; not only are they painful, but they can be frustrating to put up with as you work your way throughout the rehabilitative process as well.
If you’re unsure where to start, take your time to work your way through the steps and tips outlined within this article; learning as much as you can about your body is an ongoing process and one that takes time and effort, but that is no doubt absolutely worth doing. After all, you don’t want to be on the sideline; you want to be in on the action!
So look after yourself and make sure that your giving your groin muscles the attention and respect that they deserve — take care of your muscles and your muscles will take care of you!
References:
1. Kay AD, Husbands-Beasley J, Blazevich AJ. Effects of contract–relax, static stretching, and isometric contractions on muscle–tendon mechanics. Med Sci Sports Exerc. 2015;47(10):2181-2190.

Hi! I’m Jim Wittstrom, PT, DPT, CSCS, Pn1.
I am a physical therapist who is passionate about all things pertaining to strength & conditioning, human movement, injury prevention and rehabilitation. I created StrengthResurgence.com in order to help others become stronger and healthier. I also love helping aspiring students and therapists fulfill their dreams of becoming successful in school and within their clinical PT practice. Thanks for checking out my site!
