I’m not a betting man by any means, but if you’re reading this article, I’d be willing to bet it’s because you can relate to how lousy it feels to have a tight, stiff, and otherwise sore upper back…and you are probably looking for solutions.
Don’t worry; I’ve got you covered here. While there’s a near-infinite number of ways you can start to optimize your upper back health if it’s tight, stiff, or sore, I’ll show you a simple little technique that helps to address all these issues simultaneously.
You can often reduce upper back stiffness and improve joint mobility in this region of your spine by performing a rolling technique using a peanut ball. This home technique can often be performed as part of a regular spinal hygiene regimen to reduce pain and dysfunction.
It’s a technique that involves taking a simple little object and giving you the beauty of a two-for-one technique that can help get your upper back muscle tension under control AND help unstick any locked-up joints in this region of your spine as well.
It’s a little technique that I (and other physical therapists) often show others dealing with this issue since it can help free them from annoying aches and pains in their upper back. It’s simple, inexpensive, and often fits the ticket perfectly for many individuals.
And as we get into it here, if you want to download a FREE PDF that you can keep on hand for future use, you can click here to download it in all its glory!
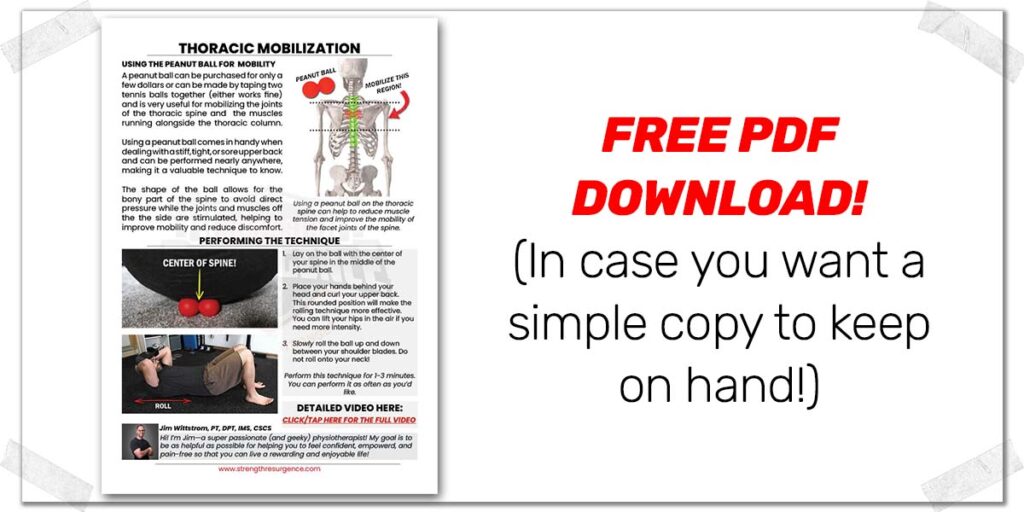
So, let’s not waste time. Let’s dive right in and quickly run through how it works.
A small request: If you find this article to be helpful, or you appreciate any of the content on my site, please consider sharing it on social media and with your friends to help spread the word—it’s truly appreciated!
A stiff upper back: Two common culprits
Dealing with a stiff, tight, or sore upper back is a lousy feeling, which I’d suspect you’re more than well aware of. It’s a surprisingly common issue and can affect individuals of all ages. I treat patients of all ages, young and old, male and female, who come into the clinic with complaints of this issue. When I evaluate them, all the objective signs in my examination and their symptoms confirm that we’re dealing with upper back dysfunction.
Two very common culprits that cause stiff and sore upper backs are:
- The muscles that run up along your spine
- The joints of the spine themselves (which we call facet joints)
While I have plenty of clinical hands-on techniques I can perform in the clinic to help manage these issues, my ultimate goal is always to arm my patients with techniques and strategies they can incorporate on their own as much as possible to help ensure they can tackle and manage the issue without needing to see me for unnecessary amounts of treatment.
Whenever I have a patient dealing with a tight and stiff thoracic spine who is looking for ways they can work to improve these issues on their own, I often have them give the peanut ball a try (keep in mind, I have many techniques they can try and I select the peanut ball once I’ve deemed it to be appropriate for that patient).
Related article: How To Stay Fit & Active When Injured (Yes, It’s Possible)
The reason being is that the peanut can often simultaneously address muscle and joint issues. And everyone likes a two-for-one deal, right?
Why: Harnessing the power of the peanut
Enter the peanut ball.
A peanut ball is simply two tennis ball-sized balls connected together. You can buy them for a few dollars or make them by taping two balls together.
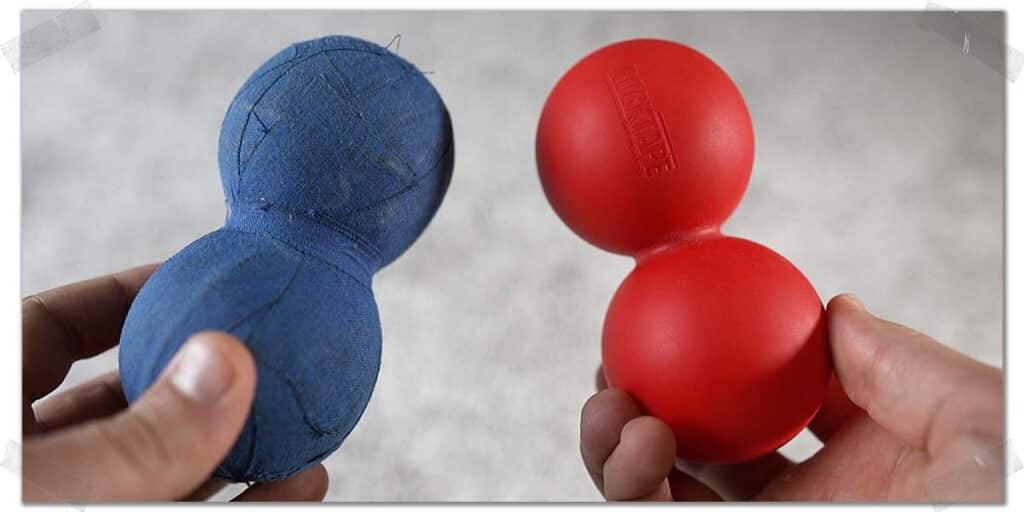
Whether you decide to buy an official peanut ball (they’re only a handful of dollars) or go the homemade route is up to you; you’ll be fine with either (I’ve used both for many years now and tell my patients to do what’s best for them).
Pro tip: If you’re really on a budget or don’t want to go through the hassle of taping two balls together, shove two tennis balls or lacrosse balls into a tube sock and tie the end so that the balls stay in contact with each other. Remember, it doesn’t have to be pretty; it just has to work.
How: Performing the peanut release technique
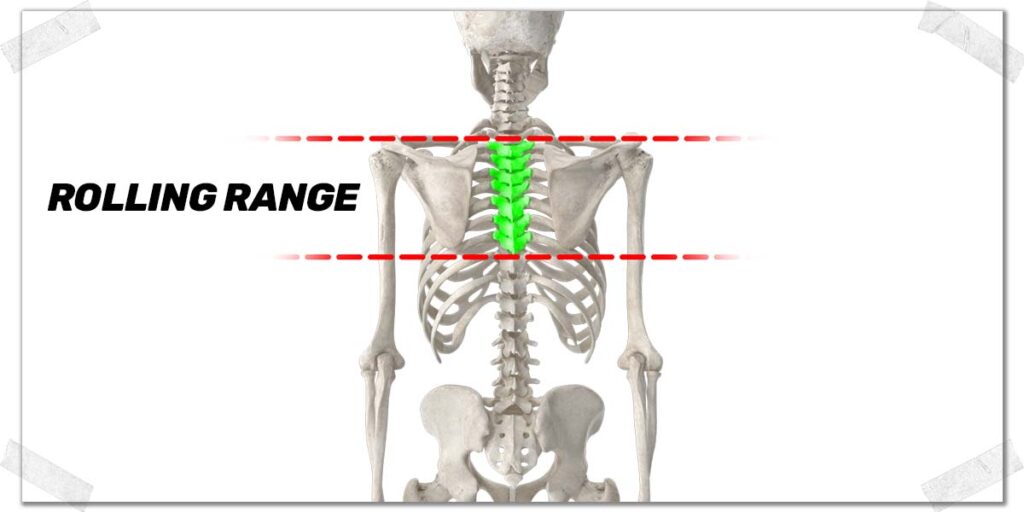
When I have my patients perform this technique, I tell them to keep it to a general region from the top to the bottom of the shoulder blades or perhaps a bit lower.
You certainly don’t want to roll up onto your neck.
Of course, you can play around with the range a bit, but as a general rule, keeping this technique confined to the shoulder blade region will give you the best results while minimizing any unnecessary pain or discomfort.
Step 1: Get your positioning right
With your peanut ball ready to go, lay on top of it so that the bony bump down the center of your spine (called the spinous process) fits into the peanut’s gap.
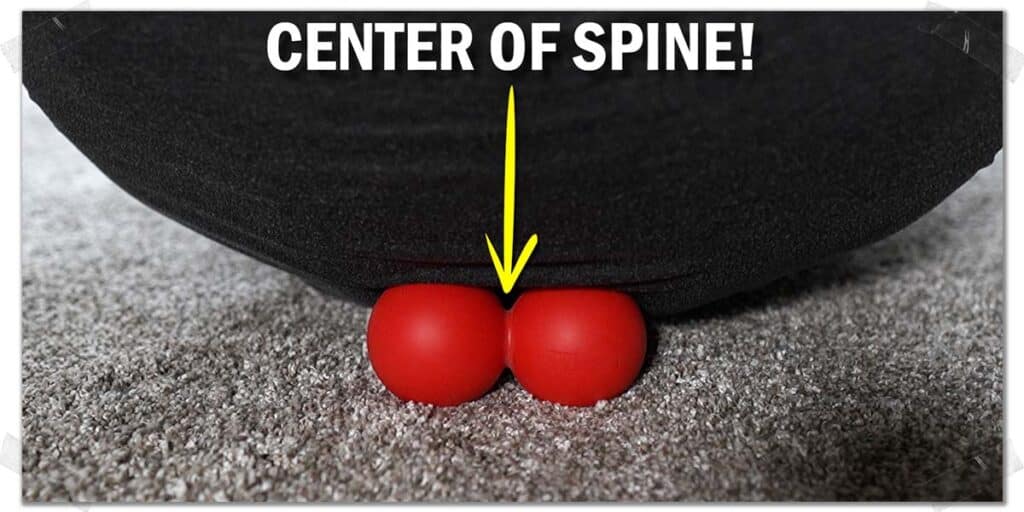
Note: Placing direct pressure directly onto this bony prominence will feel awful and won’t provide any therapeutic benefit, so make sure this bony bump stays in the channel of the peanut at all times.
“A stiff upper back is a surprisingly common issue and can affect individuals of all ages.”
Step 2: Support your neck and curl your spine
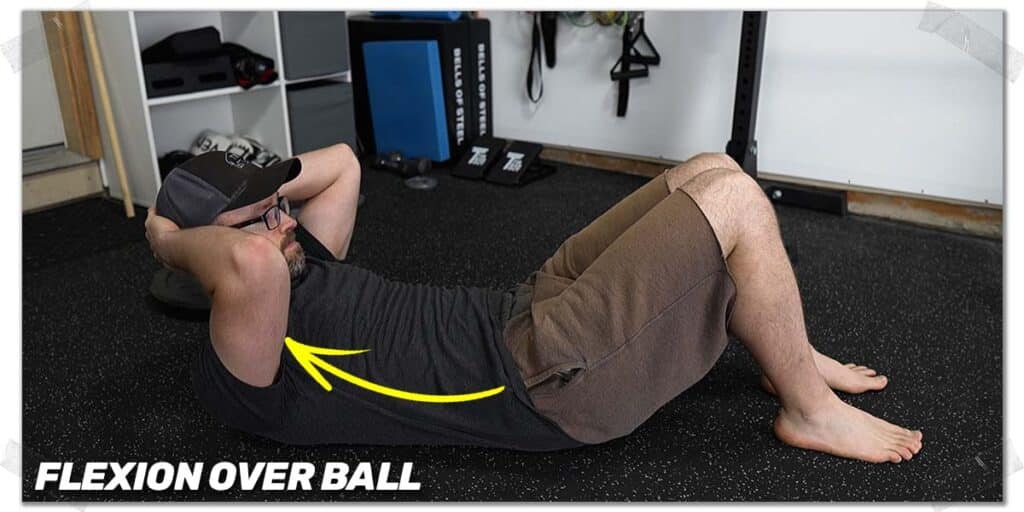
Next, interlock your fingers and place them behind your head, which will allow you to cradle your noggin (so that you don’t strain your neck) while also allowing you to curl your spine into a rounded position, which is the secret sauce of this technique.
By curling into this rounded or flexed position, we force the facet joints to be more susceptible to the pressure of the peanut ball as it presses into the spine. This allows the joints to receive a more notable mobilizing force that can help get them unstuck or just generally move a bit better.
Step 3: Slowly roll up and down
As you slowly roll over each joint with your upper spine in this curled position, you might hear a little pop or click from one or more of these joints as you slowly roll over them. This is a normal (and typically healthy) occurrence, called a joint cavitation.
And it’s really that simple; very slowly, just roll down and up your spine between your shoulder blades. If you want more force to go into your muscles and joints, keep your butt lifted off the ground as you carry out this technique.
Related Article: Why Your Upper Back Gets Sore From Front Squats (And How To Fix It)
The butterfly variation

The method I described above tends to be the most common way I have patients use the peanut ball, but there are times where it may be worth trying a slightly different technique. It’s not about the previously described technique or this variation being “right” or “wrong” but rather more ideal or less ideal based on each individual’s needs.
The butterfly variation starts with the same first two steps as previously described but then changes once you’ve found your first sore spot with the peanut.
Once the ball is pressing on a sore spot, you simply take your spine from the curled position and allow it to drape over the ball backwards (spinal extension) while allowing your elbows to flare out to the sides.
From there, without letting the ball move, curl yourself back to the starting position while bringing your elbows close together. You’ll notice that your arms will move like butterfly wings (hence the name) as you do this.
Repeat this curling and straightening of your thoracic spine as many times as you’d like. Once you feel you’ve done this enough times (it’s up to you how many you do), move the ball to another spot and repeat the process as needed.
Related article: How To Fix Neck Pain From Squats (And Why It Happens) | Expert Insight
Peanut ball parameters
As for how much and how often to do either of these techniques, it’s not set in stone, so you’ll want to experiment and see what works best for you. As some general rules, it’s a technique that can be done any time of the day, whenever you feel it’s needed.
You can do it before, during, or after workouts or physical activities, or even as a stand-alone technique.
I generally do this technique for maybe a minute or two and I feel it works best for me to do it every handful of days, but play around with how much and how often you do it to find what works best for you.
Typically, I tell patients to perform this technique as part of a daily habit for at least a few weeks to ensure progress. Once their upper back stiffness or soreness is no longer present, I recommend continuing with the technique for another week or two to ensure the issue is less likely to come back. But, as always, it all comes down to your individual needs and circumstances.
Final thoughts
Now, let’s be clear: This is one simple little technique for your upper back, but there are so many other techniques you can use to help improve movement and reduce aches and pains in this area. And if you want to see another simple and arguably my favorite exercise for improving this region of the body, check out this article right here.
And in the meantime, keep making great things happen!

Hi! I’m Jim Wittstrom, PT, DPT, CSCS, Pn1.
I am a physical therapist who is passionate about all things pertaining to strength & conditioning, human movement, injury prevention and rehabilitation. I created StrengthResurgence.com in order to help others become stronger and healthier. I also love helping aspiring students and therapists fulfill their dreams of becoming successful in school and within their clinical PT practice. Thanks for checking out my site!

