Dealing with Runner’s knee, or any other type of knee pain for that matter, is not a fun experience. Anytime you’re sidelined from performing physical activities you enjoy — sporting-based or simply activities of daily living, having safe, simple, and effective ways to decrease pain and discomfort can be immensely helpful.
If you need a simple, effective, and no-nonsense way to K-tape your knee to help reduce pain and discomfort from Runner’s knee, you’re on the right page; you’re about to learn a simple kinesio taping or K-taping technique that I often use on myself, my patients, and athletes to help reduce knee soreness during physical activities.
So, let’s dive right in and show you how to apply kinesio tape to your knee when dealing with Runner’s knee!
A small request: If you find this article to be helpful, or you appreciate any of the content on my site, please consider sharing it on social media and with your friends to help spread the word—it’s truly appreciated!
Want to watch the YouTube version of this article while following along with the taping process? Here you go:
As we dive into the content of this article, keep in mind that if you want to learn the concept and specific of how this taping technique (and other similar Kinesio taping techniques) works, then be sure to check out my Science of Kinesio Taping video (embedded at the end of this article) after I’ve walked you through this taping technique, where you can learn all about:
- How Kinesio tape can help turn down nociception and improve proprioception for your knee.
- The scientific findings for the effectiveness of Kinesio taping for various interventions.
Related article: How to K-tape Your Achilles Tendon All By Yourself: A Step-By-Step Guide
What is Runner’s Knee?
Runner’s knee, more formally known as patellofemoral pain syndrome (PFPS), is an umbrella term for pain or discomfort arising around the patella (the kneecap). It can occur through different mechanisms, but the result is pain being felt around the knee, which worsens when performing physical activities such as running, jogging, sprinting, exercising, or performing other physical activities involving the knee.
Here are some super helpful and trustworthy resources to look over if you want more details on causes, prevalence, and treatment strategies.
- RESOURCE 1: Evidence-based treatment options for common knee injuries in runners
- RESOURCE 2: Patellofemoral pain syndrome (research article)
- RESOURCE 3: The role of hip muscle function in the treatment of patellofemoral pain syndrome
How does Kinesio tape help with Runner’s knee?
While I’ve got an entire article devoted to exploring the science and evidence behind kinesiology taping, here are the basics you should be aware of when using Kinesio tape for Runner’s knee:
- This technique is used for improving proprioception around the joint, which can help influence the biomechanics (positioning and movement) of your knee and leg when running, jogging, etc. This, in turn, can help decrease or eliminate stress or strain that may otherwise occur with any tissues (such as the IT band, patellar tendon, quadriceps tendon, etc.) during exercise.
- This taping technique can help decrease nociception around the joint. Nociception refers to the brain’s detection and process of noxious (painful) stimuli.
Note: Using Kinesio tape when taping for Runner’s knee does not provide any structural support to the patella (kneecap) or knee joint; if you want structural taping techniques (typically used to try and alter patellar tracking, you’ll want to search for McConnell medial glide taping for the knee.
What you will need for this taping application
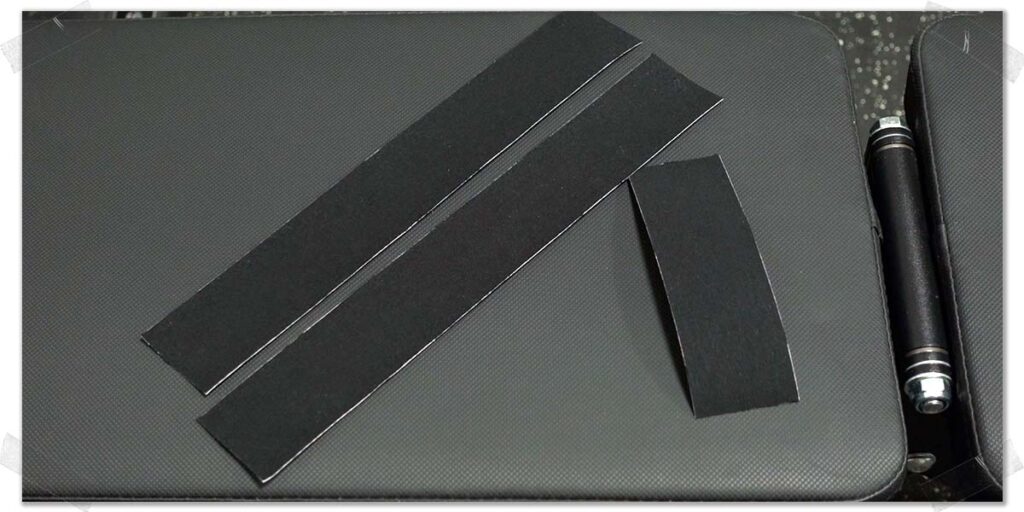
Keep in mind that, as with nearly any Kinesio taping technique, there is more than one way to tape this area of the body. As long as we follow a few basic principles, you can often get creative with the rest. Kinesio taping really is half science and half art. I’m keeping it simple in this article to ensure you can do this on yourself without any issues.
So, for this technique, you’ll need:
- Two strips of tape around 14 inches long
- One shorter strip of tape around 4 inches long, but it may not be a bad idea to cut a second piece as well (you’ll see why in a moment).
Pro tip: If you’re not sure which brand of tape to use when taping your knee, my personal preference is RockTape. There are a lot of solid brands out there, but RockTape is my personal favorite.
Step 1: Skin and tape preparation
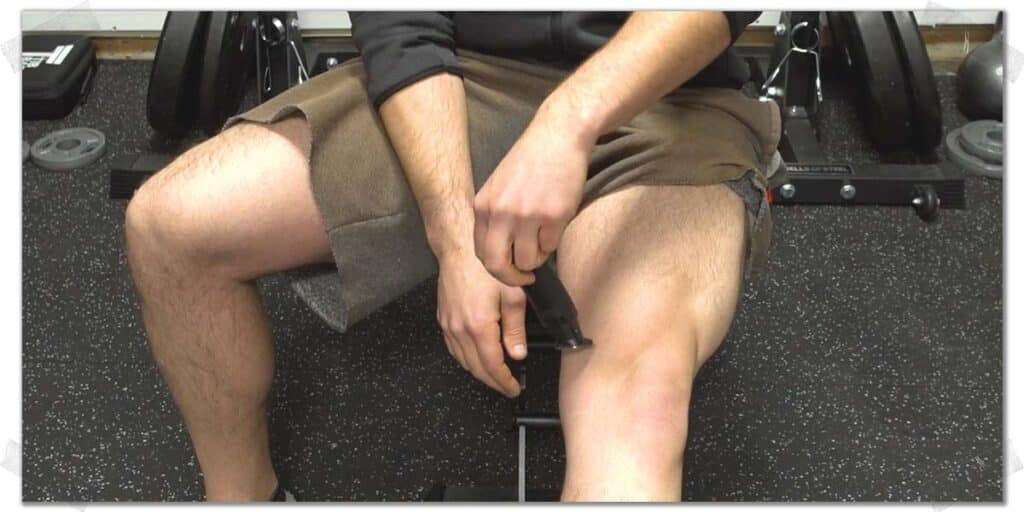
Start by making sure your skin is clean and dry. Also, be sure to buzz down any hair over the area you’ll be taping, as this will ensure the tape sticks to your skin.
Next, round off the corners of the tape strips using a pair of scissors. This is done to help ensure the tape stays on your skin since sharp corners tend to peel up rather easily.
Step 2: Laying down the first strip
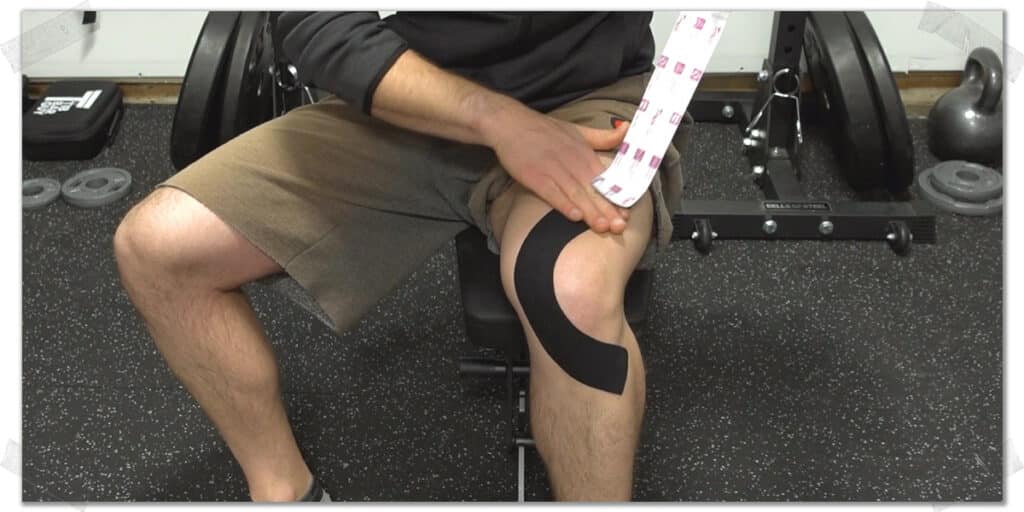
With the tape all ready to go, bend your knee to approximately 90 degrees. If you can’t achieve this position, just get as much of a bend as you comfortably can.
You want to apply the tape with the knee bent since the skin is stretched out in this position.
This, in turn, will help with decreasing nociception (the sensation of pain) to the brain as the tape will pull and lift your skin a bit more when you move it.
Next, peel about an inch or two of the paper backing from one end of the tape, and place this portion of the tape a couple of inches below the bottom of your kneecap. Place it just to the side of the front ridge of your shin bone while angling it upwards, and make sure it’s firmly anchored to your skin.
Now, pull the tape upwards and cross it over your shin so that it is just off to the side of your kneecap. As you pull, stretch the tape to about 25% of its full stretching ability.
Keep pulling the tape upward and cross it over the top of your thigh so that its path resembles the curve of a banana. As you lay the last inch or two of tape down, do so without any stretch on the tape, as this will help avoid skin irritation.
Step 2: Laying down the second strip
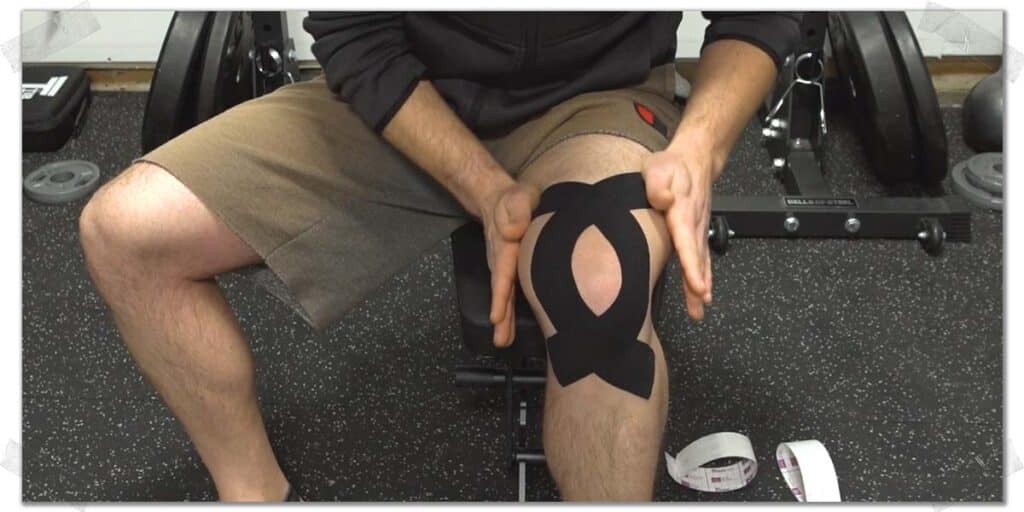
Next, we’re going to repeat this process on the other side of the knee, essentially creating a mirror image. So, repeat the exact same process in step 1 but while going to the other side of the knee.
Covering the inner and outer portion of the knee ensures the most commonly sore and painful areas of the knee are stimulated from the tape for those who are experiencing patellofemoral pain syndrome or Runner’s knee.
Step 3: The decompression strip
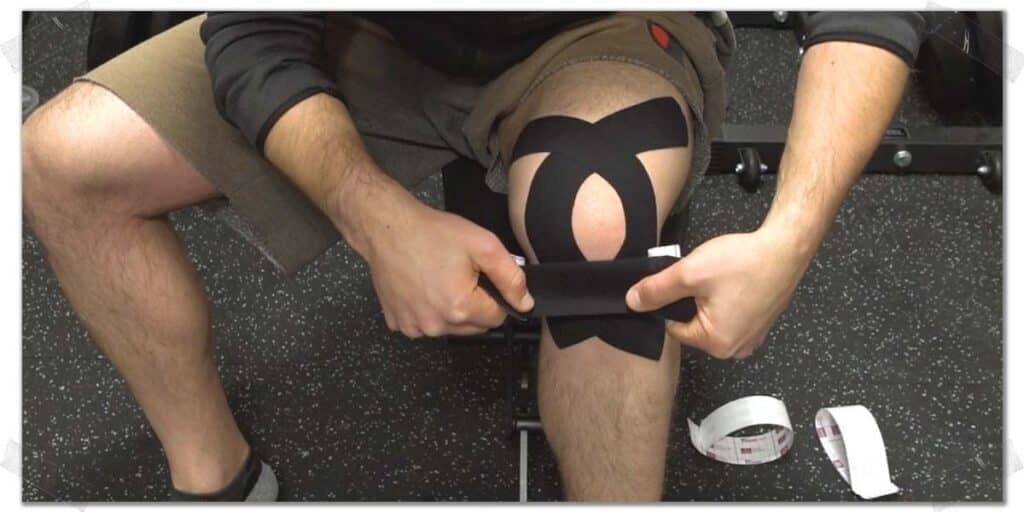
Once you’ve got both of the long strips laid down, it’s time for one last piece, which we’re going to lay right over the patellar tendon, which is the thick cord-like structure you feel just beneath your kneecap.
Start by tearing the paper backing of the tape down the mid-portion of the strip. Peel the paper backing away, and with about a 50% stretch applied to the tape, lay it directly over the tendon (this strip should have more stretch applied to it than the two longer strips). Take the remaining inch or so of tape on either end and lay them on your skin without any stretch.
The optional fourth strip
If desired, you could repeat this process with an additional decompression strip of tape just above your kneecap, laying it over your common quadriceps tendon. This strip could come in handy if you tend to have some knee discomfort in this area.
When taping my patients, I will sometimes include this strip and other times, I won’t. I always try to individualize certain aspects of my taping based on my patient’s needs and preferences.
Pro tip: There’s no harm in laying down this extra strip, so if you want to have a bit more sensory stimulation of your skin when moving your knee, it may be worth adding this fourth strip.
The final product: watch what happens next
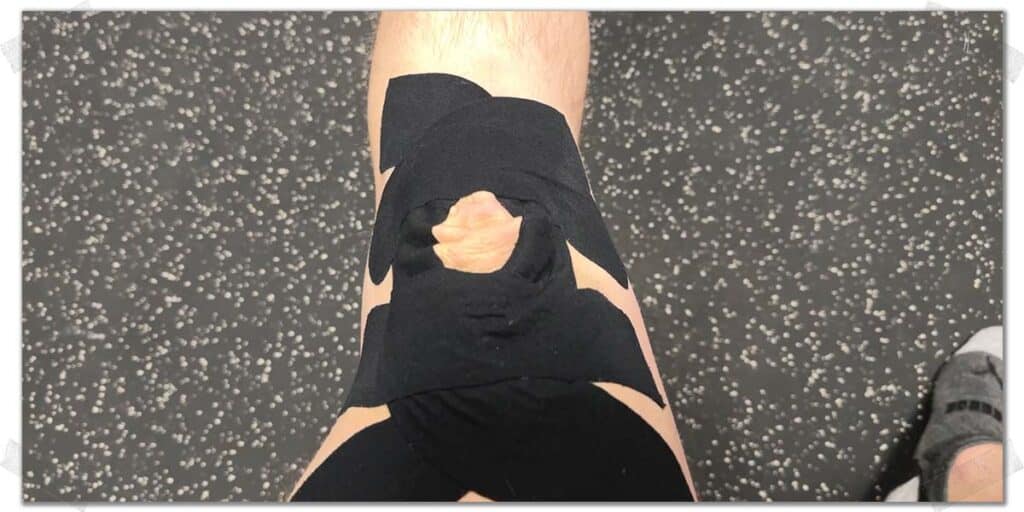
Now that you’re all taped up, straighten your knee, and you will see that your skin becomes super crinkled and wrinkly when straightened out, which is exactly what we want!
The lifting and wrinkling of your skin as you straighten your knee provides two helpful mechanisms for your knee:
- When your skin moves this much (gets all crinkled), it provides a massive sensory input to your brain, letting it know your skin is moving, which blocks out or reduces pain signals that are reaching your brain, essentially distracting it from feeling and interpreting pain (this is known as the gait theory for pain control).
- The lifting of your skin can help create a bit of separation between the subcutaneous layer of your skin and the tendons and fascia beneath it. This separation or lifting can help improve fluid dynamics in the area and help with swelling and certain aspects of injury recovery.
If you want more on these details, check out my Science of Kinesio Taping video below, which will teach you how kinesio tape actually works, what it can be used for, and what researchers have found about its effectiveness!
Modifications: Altering this Kinesio taping technique
The knee-taping application shown and described in this article is only the tip of the proverbial iceberg when it comes to finding the optimal Kinesio taping treatment for your knee. Taping really is half science and half art, after all.
Here are some common modifications I’ll make to this taping technique based on my own needs (when taping myself) or the needs of my patients when taping them:
- For knees that are quite sore, I may choose two long strips of tape per side of the knee, overlapping each strip by approximately half. This provides further sensory input over the knee.
- I often double up on the decompression strips below and above the kneecap; I’ll place two strips over the patellar tendon (overlapping by half) and two over the quadriceps in the same manner.
Again, there’s no right or wrong here. If you’re not sure how much tape you may want or need, start with fewer strips and add additional ones as time goes on.
Related article: How to Remove ANY Sports Tape Without Pain | Easy & Effective Tips
Final thoughts
So there you have it! A simple and straightforward kinesio or K-taping technique for the knee. If you feel like this tape helps, you can keep it on for a few days. You can shower with it on; just be sure to pat it dry rather than rub it when you’re drying off.
Alright, everyone, what the heck did we just do, and why did we do the taping technique that particular way? Find out THIS article of mine, which will give you the rundown on the science behind Kinesio taping!
Frequently asked questions
In order to be as helpful as possible within this article, I’ve included a few brief answers to commonly asked questions others often have when dealing with Kinesio tape!

Hi! I’m Jim Wittstrom, PT, DPT, CSCS, Pn1.
I am a physical therapist who is passionate about all things pertaining to strength & conditioning, human movement, injury prevention and rehabilitation. I created StrengthResurgence.com in order to help others become stronger and healthier. I also love helping aspiring students and therapists fulfill their dreams of becoming successful in school and within their clinical PT practice. Thanks for checking out my site!

