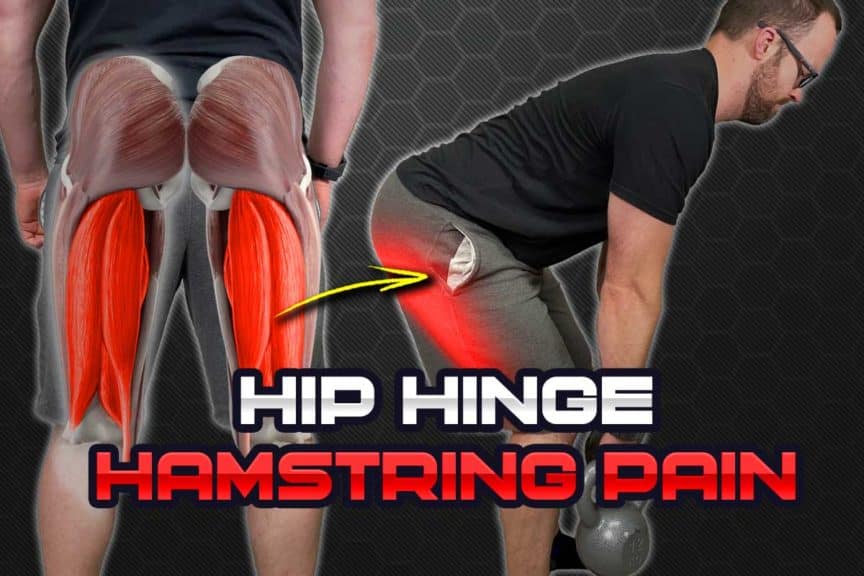
If you’re having hamstring pain or tightness when performing your hip hinging exercises, you’re going to want to read this article. While the hip hinge is an essential movement pattern for strength training (and for activities of daily living), it’s nearly impossible to perform if it gives you hamstring pain. Thankfully, there are often some straightforward and relatively quick fixes you can incorporate to get things under control so you can get back to optimal movement and optimal training.
Hamstring pain when hip hinging is often the result of faulty hinging mechanics, dural tension of the sciatic nerve, myofascial restriction of the muscles or mechanical issues of the lower back. Solutions involve improving movement patterns, mobilizing restricted tissues and using appropriate loads.
This article is going to cover a lot of crucial information to unpack to help you begin to tackle this stubborn and common issue. So, keep on reading if you want all the details!
ARTICLE OVERVIEW
Click/tap on any of the headlines below to instantly read that section!
• Basic anatomy: what to know
• Which is it: hamstrings or sciatic nerve?
• Unhealthy tissues: muscles and nerves
• Perfection: Optimizing hip hinge mechanics
Related article: One Hamstring Tighter Than the Other? Here’s Your Solution
Disclaimer: While I am a physical therapist, I am not YOUR physical therapist. As a result, I cannot tell you whether or not any treatments or training methodologies mentioned on this website or in this article may or may not be appropriate for you, including hip hinging exercises, stretches or neuromobilization techniques. By following any information within this post, you are doing so at your own risk. You are advised to seek appropriate medical advice for any pain you may be experiencing.
Basic anatomy: what to know
I would implore you to read this section of the article, as having a rudimentary understanding of the anatomy at play will likely help you resolve your pain and help you avoid costly mistakes that can impede your recovery or cause your pain to worsen. I don’t want you to experience either of those missteps, so I implore you to read this section.
The hamstrings
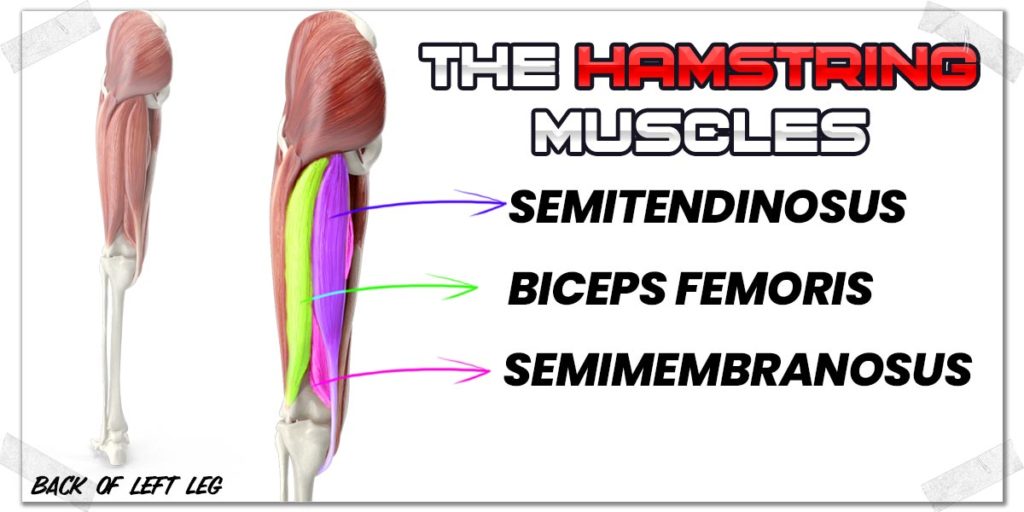
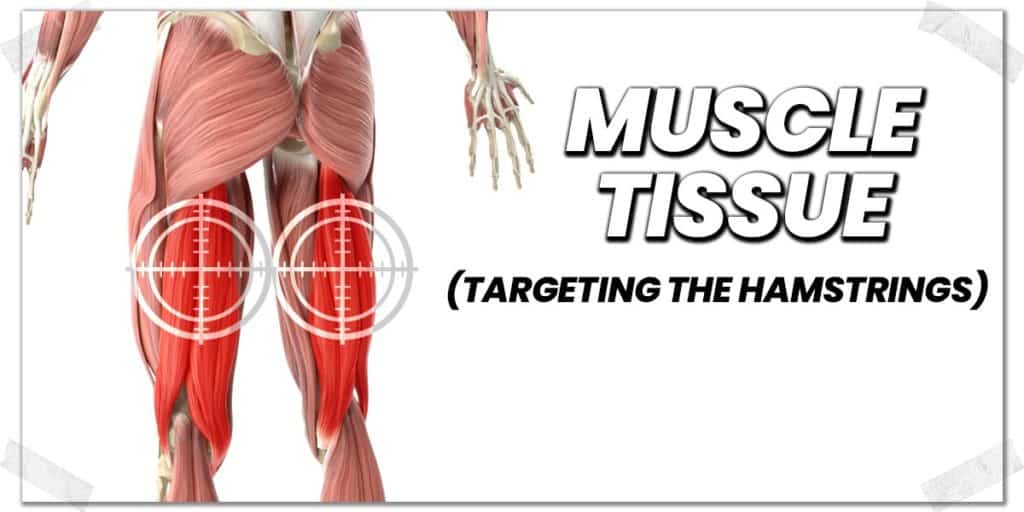
The hamstrings are a group of three muscles that comprise the back of the upper leg. These muscles are:
- The Semitendinosus
- The Semimembranosus
- The Biceps femoris (long and short head)
Collectively, the action of these muscles is to:
- Bend the knee
- Extend (straighten) the hip
The hamstrings can perform both of these movements since they cross the knee joint (which bends the knee) and the back of the hip joint (which extends the hip).
Each of these hamstring muscles is innervated by the sciatic nerve (more on the nerve below), which is the nerve that “talks to the muscle” when it needs to contract.
The sciatic nerve
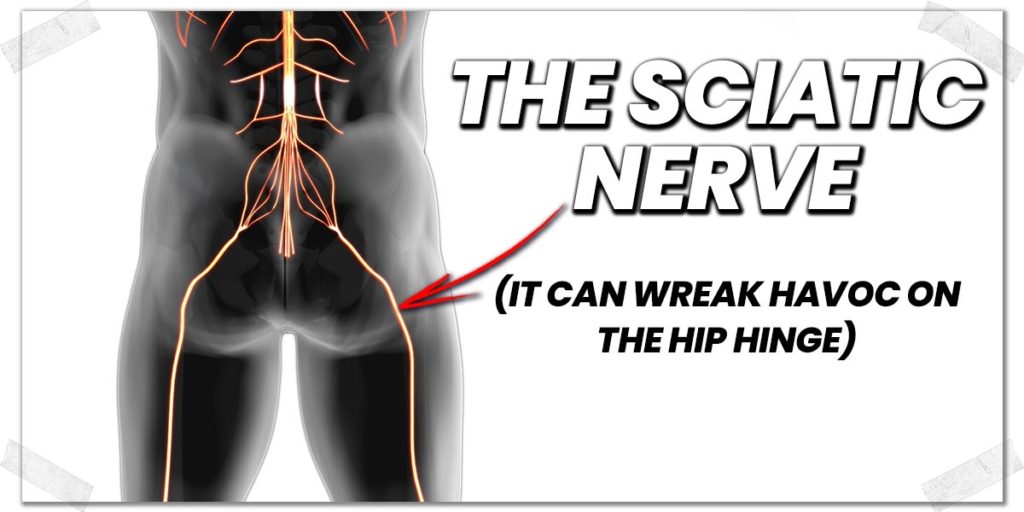
The sciatic nerve is the largest nerve in the body. It comprises the nerve roots (which attach to the spinal cord) from the levels of L4, L5, S1, S2, and S3. These nerve roots all ultimately join together and contribute to the function of the sciatic nerve.
The sciatic nerve runs down the back of your leg (along the hamstrings) and all the way down to your foot.
Pro tip: The sciatic nerve is prone to becoming irritated, just like any other structure in the body. When mildly irritated, the back of the leg can feel painful or tight, just like an irritated hamstring muscle. When it’s really irritated, it can produce numbness or tingling anywhere down the back of the leg or in the foot.
The hip joint
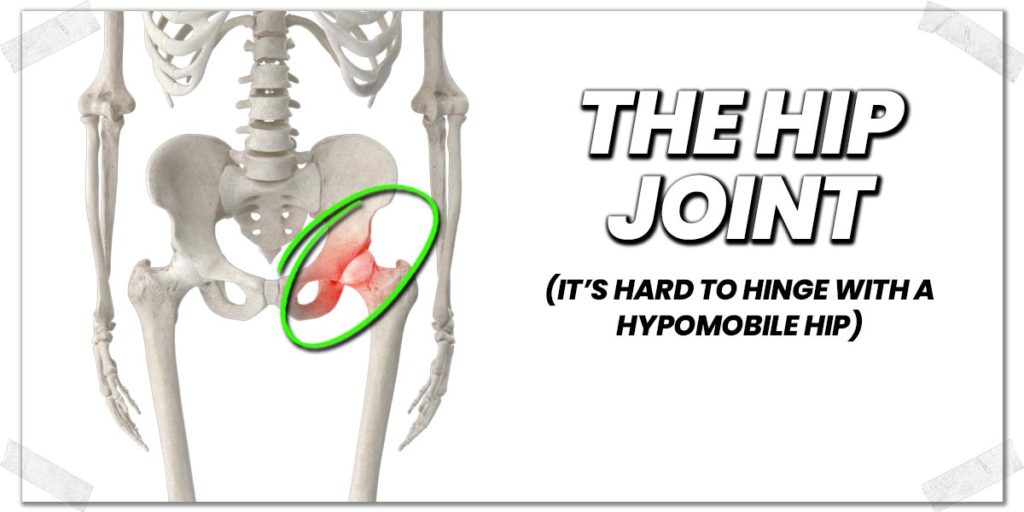
Anatomical image: Envato Elements
The hip joint consists of the femur (thigh bone) and the innominate (the pelvis). It is a ball and socket joint and is the joint that does the majority of movement when performing the hip hinge (as the ball simply turns in the socket).
The hip joint is wrapped in a thick, fibrous membrane known as the joint capsule. This capsule helps to provide stability and integrity to the joint while also housing the synovial fluid within the joint, which acts as a lubricating and nourishing fluid to the joint itself.
Pro tip: The hip capsule can become stiff and immobile, which can lead to movement dysfunction, sensations of a tight hip discomfort or even pain.
Which is it: hamstrings or sciatic nerve?
If there is only one takeaway from this article, it’s this right here:
Before you begin treating your leg, you must have an understanding of what is causing your pain. Sciatic nerve/tension and hamstring pain can sometimes feel nearly identical, yet they require entirely different treatment interventions; the wrong intervention can often make pain significantly worse.
I’ve seen too many patients confuse sciatic pain for hamstring tightness, trying to stretch their hamstrings to get the discomfort under control. Unfortunately, prolonged, static stretching of the hamstrings will usually further irritate the sciatic nerve (if it’s already irritated).
It’s analogous to thinking you’re pouring water on a fire when you’re actually pouring gasoline onto the flames.
Differentiating your pain
Unless you are absolutely 100% certain of which tissue is causing your hip hinging pain, performing the slump test is a solid starting point to help better understand the root cause of your pain. And keep in mind that while it’s possible to be experiencing pain from the hamstrings and the nerve simultaneously, most often, one is of the two is driving the bus while the other takes the back seat.
Your best bet for differentiating the underlying cause of discomfort in the back of your leg (i.e., differentiating between the sciatic nerve and the hamstrings) is to perform the slump test — an orthopedic special test often used in clinical practice.
Typically, this exam is performed by having an examiner perform the movement for you. However, you can still do the movement yourself to get a basic idea of which tissue is the unhappy one.
Check out this outstanding video demonstration by the Physiotutors for a rundown of how the test is performed:
The quick takeaway: If your leg pain decreases when you look up towards the ceiling, you’ve likely been feeling discomfort from the sciatic nerve. If your discomfort remains unchanged, it’s more likely to be the hamstrings themselves.
Now that you’ve got a better understanding of what might be driving your pain, you can move on to begin treating them.
Unhealthy tissues: muscles and nerves
So you’ve got some muscular tissue or neural tissue that is in a less-than-ideal state, eh? Join the club and get the T-shirt. I say that jokingly not to downplay your discomfort by any means, rather to gently remind you that it’s something that all of us deal with, so you’re in good company.
Related article: Six Benefits of Using A Glute-Ham Roller (Here’s Why You Need One)
The most critical piece of information I can give you here is to let you know that either of these issues can be cleaned up using straightforward approaches, but you’ll have to be consistent and put in the work. This requires striking the delicate balance of continually challenging these tissues (often multiple times per day) without overloading them in the process.
And the key word here is process. Keep educating yourself as much as you can as you work through this ordeal and adjust things accordingly; the more in-tune you can be with how your body tolerates this process, the more you can refine it and optimize it best for your needs.
Sciatic nerve exercises
Nerve tension is a unique beast that requires a very specific movement intervention to reign it in and tame its painful nature.
Static stretching must be avoided like the plague when trying to reduce nerve tension. Static stretching will only make things worse. Instead, your best bet is to perform specific neuromobilizations that take the nerve through a rhythmic state of high-to-low tension.
Neuromobilizations are often called “nerve glides,” which can consist of either tensioning the nerve from one end only (known as a slider or from both ends simultaneously, known as a tensioner. Your safest bet is to always start with a slider, as it’s less aggressive than a tensioner. Tensioners are typically used when the nerve is less provocative overall.
Check out this video by the Physiotutors for a quick rundown on how to perform nerve glides for your sciatic nerve:
Dosing the amount and frequency of your nerve glides
If it’s safe for you to perform nerve glides, start by performing approximately 15-20 repetitions for just a single set or two, and only once on your first day of this exercise.
If the nerve doesn’t feel any worse off approximately 24 hours later (sometimes irritated nerves will have a “delayed kickback” with letting you know if they tolerated a movement or not), perform your neuromobilization movement again using the same number of repetitions. This time, however, you can perform three sets (take a thirty-second break between each set). Additionally, you can likely safely perform this routine three, four or five times per day (nerves typically respond well to higher volumes of glides throughout the day, provided they’re performed appropriately).
Remember! Nerve glides should never be painful or performed aggressively! They must only be performed up to the point of brief, mild tension and thereafter immediately backed off from their lengthened state. If you’re performing your glides appropriately but still have pain, cease these movements altogether.
Hamstring movements
Thankfully, when it comes to improving your hamstrings’ health and extensibility, there are many more options available than when dealing with tight or irritated nerves.
There are simply too many options and too much information to pack into a brief, little article, but what follows are some general points and bits of insight that are worth keeping in mind.
Dynamic and static stretches
- You’re likely to experience the best results by performing dynamic movements/stretches to help your hamstrings to relax. The right dynamic movements will take the hamstrings through full ranges of motion and help to decrease myofascial restrictions more than static stretches might.
- Static stretching is still acceptable to perform if it’s something that you feel works for you.
- Keep all of your movements to a gentle or mild-at-most stretch, as aggressive stretching might reflexively cause the muscle to cease up as a means to protect itself from the threat of aggressive stretch.
Soft tissue treatment techniques
There are numerous hands-on and advanced techniques that can be performed for hamstring muscles if it’s something you want to opt for. Some of them you can perform by or on yourself, while others will require the treatment to be performed by a licensed healthcare practitioner. Neither one is necessarily better than the other; they all have a time and place in musculoskeletal rehab and are tolerated differently by individuals.
- Compression flossing/voodoo flossing
- IASTM (instrument assisted soft tissue mobilization)
- IMS (intramuscular stimulation)
- Fascial stretch therapy
- Myofascial cupping
Keep in mind: While every treatment technique has a time and a place, not all of these treatment techniques may be ideal for you.
Related article: IASTM: Here’ How it Works to Decrease Pain and Improve Mobility
Optimizing hip hinge mechanics
As you work on settling down the discomfort, pain or tightness that is wreaking havoc on the back of your leg, you may still be able to perform hip hinging exercises without needing to abandon them altogether. It may just be that all you have to do is shorten your range of motion for the time being (i.e. going as far into the hinge as you can before the onset of the discomfort or pain) or use less resistance or weight for your hinging exercise. Those two strategies alone can work wonders for those who are working through their “hinging rehab.”
However, if your hip hinging mechanics are not on point, you’re bound to run into trouble at some point when it comes to pain, dysfunction or even injury.
The key here is to have full confidence that your hip hinging mechanics are on point and have modifications on-hand that allow you to still perform the movement without any pain. So, let’s do a quick rundown on this topic.
Hip hinging exercises to ensure optimal mechanics
If your mechanics aren’t on point, it may have been what got you into this entire mess in the first place; a rounded lumbar spine during the hinge can easily irritate the sciatic nerve, and an excessive anterior tilt of the pelvis can stretch the hamstrings a bit too much, neither of which is ideal.
Exercise 1: Hinging from the knees
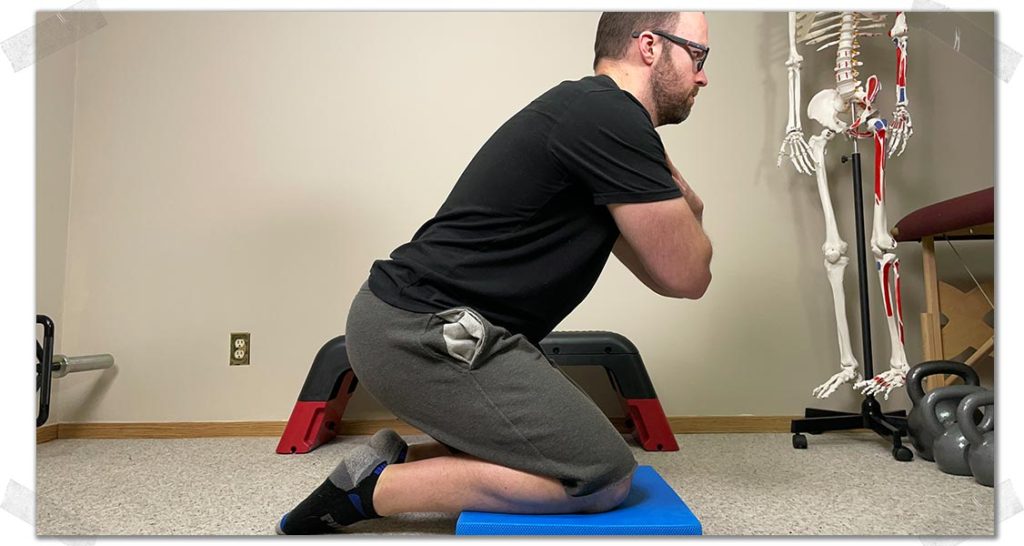
Anytime I have someone learn the hinge, I have them perform it on their knees. Bringing the body closer to the ground makes the movement less complicated while affording the ability to focus better on the hips and lower back.
To perform the hinge from the knees:
- Kneel onto a comfortable surface
- Place your lower back in a neutral position and keep it there
- Kneel backwards as if trying to touch your butt to your heels
- Go as far as you comfortably can without moving through your spine.
- Return to the starting position and repeat for as many repetitions as needed
Pro tip: If you’re having a hard time keeping your back in a flat/neutral position, you can combine the strategy from exercise 2 (below) to help correct your movement.
Exercise 2: Using a dowel
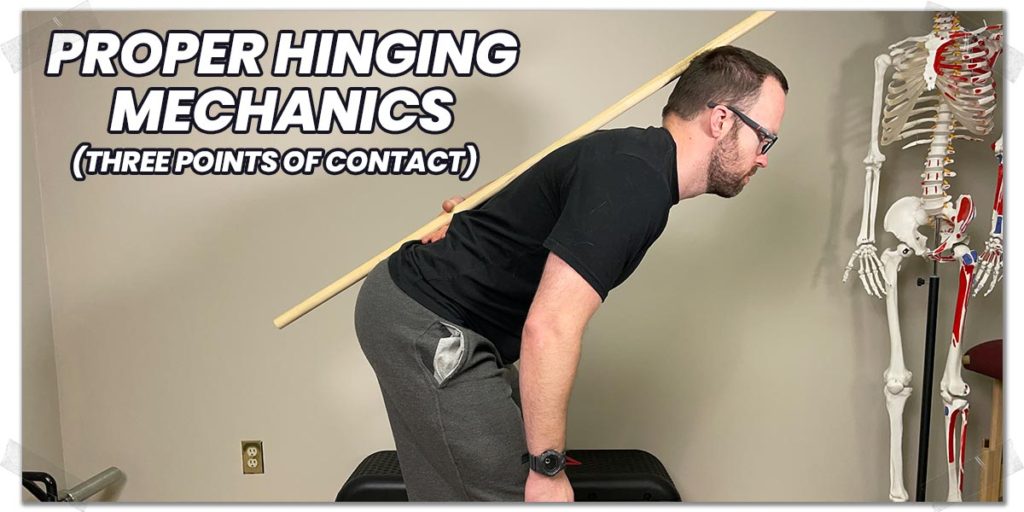
Once you’ve mastered the ability to hinge from your knees, you can try hinging from a standing position. If hinging from the knees is too easy, but you’re not sure if you’re keeping perfect form, using a dowel to provide sensory feedback can be a great strategy to implement. Here’s how it goes:
- Grab a stick or dowel (or even a broom).
- Hold it against your back so that it contacts your tailbone region (1), the section of the spine between your shoulder blades (2) and the back of your head (3) (see photo above).
- Keep these three points of contact at all times as you move as far as possible into your hip hinge.
- Return to the starting position and repeat for desired repetitions.
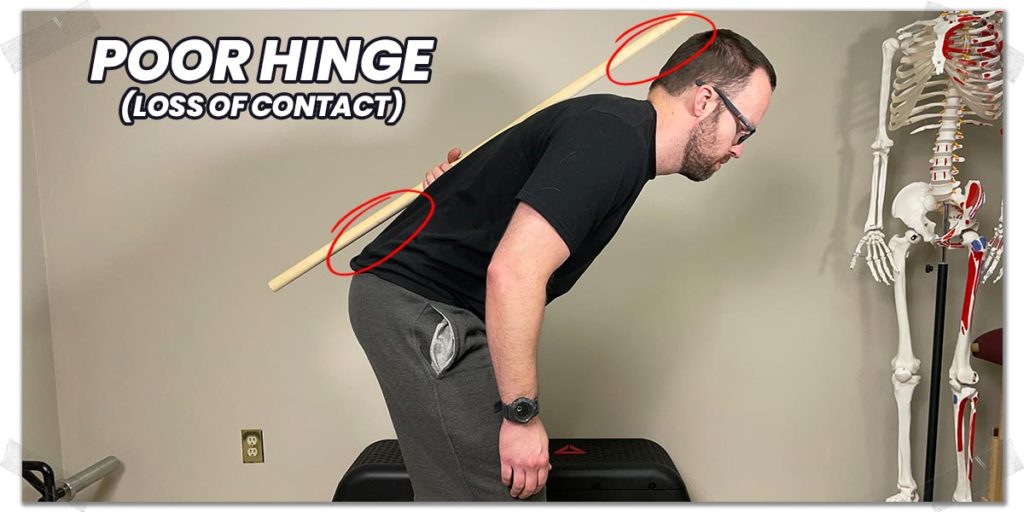
If you feel any of the three points of contact separate from your body throughout the movement, you haven’t hinged with pristine mechanics. Shorten up your range of motion if needed, and practice as much as needed until you can hinge effortlessly without losing any contact with the dowel.
Exercise 3: Closing a door with your butt
This is a great exercise that I picked up from the folks at Exos performance some years ago. It’s one of my favourites for helping people optimize their hinging mechanics and abilities. Here’s how to do it:
- Find a door and open it
- Stand right up against the door, facing away from the direction it closes
- Try to slowly close the door by pushing it with your butt
- Pull the door back to the starting position and repeat as many times as needed
What’s brilliant about this exercise is that it reinforces the backwards movement that the hips must travel for an effective hinge, preventing the lower back from rounding. It’s so simple and effective that I can’t believe I didn’t think of this drill myself.
Pro tip: You can also do this with opening a door — just have the door unlatched but still closed, then push it open with your butt!
Final thoughts
The hip hinge is a fundamental movement pattern for human health and performance. With the perfection of this pattern, dozens upon dozens of brilliant and effective exercises become available to those who want to strengthen their body and movement abilities in highly effective ways.
So, use the tips in this article as a starting point for working towards getting your hip hinging pain eliminated so that you can continue on hinging and building a robust body for years to come.

Hi! I’m Jim Wittstrom, PT, DPT, CSCS, Pn1.
I am a physical therapist who is passionate about all things pertaining to strength & conditioning, human movement, injury prevention and rehabilitation. I created StrengthResurgence.com in order to help others become stronger and healthier. I also love helping aspiring students and therapists fulfill their dreams of becoming successful in school and within their clinical PT practice. Thanks for checking out my site!
