Good ol’ Golfer’s elbow – many people get it, including those who don’t even golf! It can be an annoying, stubborn and painful condition to get rid of. So when it comes to doing all that you can to knock down the pain and speed up recovery, many people like to apply some Kinesio tape (also commonly known as K-tape) to the area.
If you have Golfer’s elbow, this blog post will walk you through a simple but effective way to apply Kinesio tape to the painful part of your elbow all by yourself. There are plenty of different ways to tape the elbow for this condition, and the way within this article will allow you to do it all by yourself while giving your confidence that you’ve done so in an appropriate and effective manner.
If there’s one good thing about having Golfer’s elbow, it’s that you can at least provide some effective taping to the area all by yourself without too much difficulty. As mentioned above, the way that people choose to tape for this condition (and other conditions) is rooted in many factors, including unique factors of the individual and their specific condition, the type of tape being used and the taping doctrine itself. I personally subscribe to RockTape’s taping doctrine moreso than Kinesio Tape’s doctrine, but for the sake of this article, that’s neither really here nor there.
Also, if you need to apply some K-tape to the other side of your elbow for a condition known as Tennis elbow (or lateral epicondylitis), be sure to check out my blog post: How to Tape for Tennis Elbow All By Yourself, where I will walk you through the step-by-step approach for taping yourself for that condition.
ARTICLE OVERVIEW (Quick links)
Click/tap on any of the bulleted headlines below to instantly jump to that particular section of the article!
Things to keep in mind when using K-tape
A walk through procedure for taping up your Golfer’s elbow
A fun bonus tip: How to make sure your tape stays on longer
Concluding remarks
Disclaimer: While I am a physical therapist, I am not YOUR physical therapist. As a result, I cannot tell you whether or not any treatments mentioned on this website may or may not be appropriate for you, including taping your elbow. By following any information within this post, you are doing so at your own risk. You are advised to seek appropriate medical advice for any pain you may be experiencing.

Things to keep in mind when using K-tape
Before you get started with slapping some tape down onto your skin, there’s a few things that are worth mentioning and keeping in mind. Nothing earth-shattering, but still worth briefly mentioning:
The first is that while A good K-taping over the sort spot of your elbow can certainly be helpful with recovery, seeking appropriate treatment from a qualified healthcare professional who can help you with this condition is your best bet. They’ll even likely apply some tape for you after they’ve done the rest of their treatment intervention(s).
K-taping is awesome in that it is incredibly low risk with potentially very high reward. But if you find that tape irritates your skin, makes it red or itchy, then the tape probably isn’t worth it. So if at any point the tape doesn’t feel good and you want to remove it, go right ahead. There’s no harm to doing so and you’ll still be able to do effective rehab without it; it’s just a nice little adjunct to help the recovery process, but it isn’t necessary provided you get appropriate treatment.
Lastly, keep in mind that the more skin the tape can stick to, the longer it will stay on. Thankfully the middle/inside part of the elbow isn’t the hairiest spot on the arm, but if you’re someone with a ton of hair in this area, buzzing down the hair (or shaving entirely, if you want) will ensure that the tape sticks better, so just keep that in mind.
Lastly, don’t get too hung up on tape brand; they’re largely all the same. But if you are in need of a roll to pick up, I’d personally spring for this roll of tape (link takes you to Amazon), as it’s great quality at a very fair price. Purchasing through this link helps me earn a small commission at no extra cost to you. I use these commissions to pay for the expenses of operating this website.
A walk through procedure for taping up your Golfer’s elbow
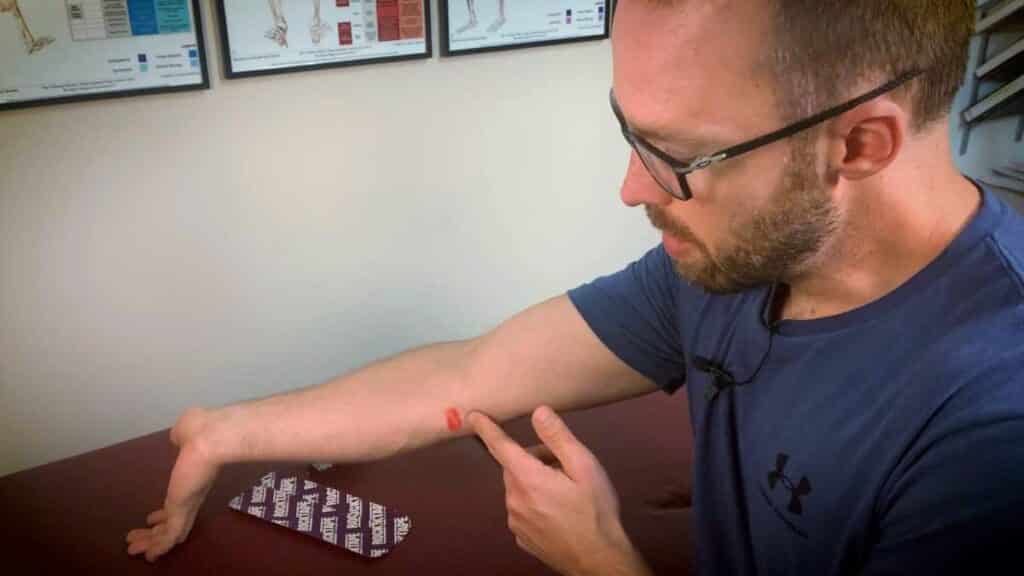
Step 1: The first thing you’ll want to do is make sure you know exactly where the epicenter of the soreness is occurring within your elbow. It is usually just below the bony part of the inside of the elbow. You can mark this spot if you’d like (but don’t have to) in order to make sure you lay the tape down over this exact spot. I’ve marked it out for the images within this blog post just to help you better visualize the entire process.
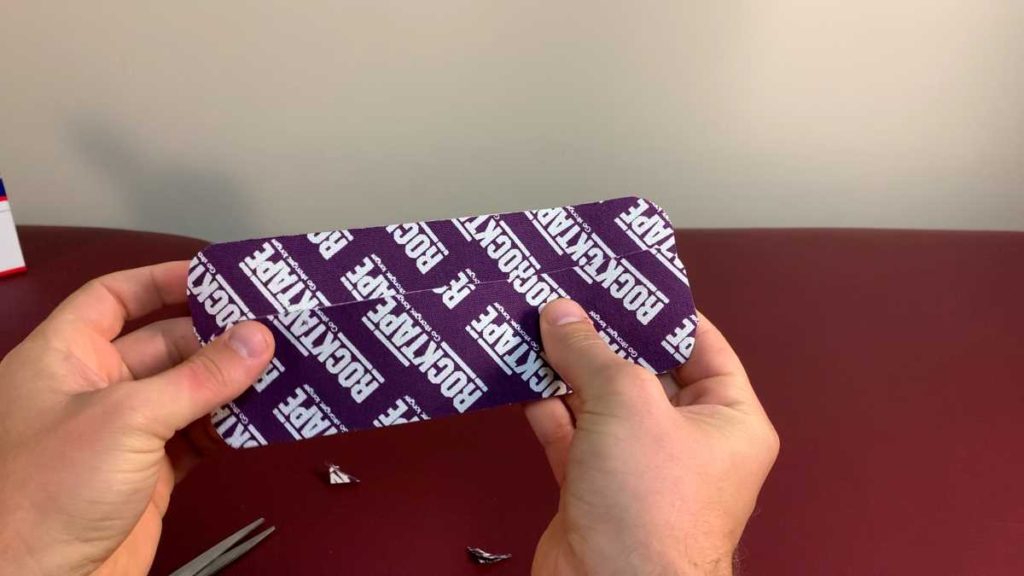
Step 2: The second step is to cut two pieces of tape that are each about six inches in length. We want each strip to be long enough to cross the elbow joint with a few inches to spare on each end. This not only allows us to put appropriate tension on the tape, but also ensures that the tape has enough skin to stick to so that it doesn’t start peeling up when you bend and straighten your elbow during activities.
Step 3: Once you’ve cut these two pieces of tape, you’ll want to use some scissors to round off the corners. Doing this just helps ensure that the tape will stick to the skin longer without peeling up and lifting up off the otherwise 90-degree corners.
Step 4: Peel off about one inch of the paper backing from the tape, and stick it onto the inside of the elbow as seen in the picture below. Be sure to lay the tape end down in a direction that will allow the rest of the tape strip to ultimately cross over the sore spot as you continue to lay the tape down. DO NOT lay the tape end down with any stretch placed on it, as it may irritate the skin if the end of the tape has tension on it.
Step 5: Next, you need to position your arm in a way that places maximal stretching/lengthening on the skin during the taping procedure. I’ll describe how to do this, but be sure to only do so to as much of a pain-free extent as possible; there’s no need to tape yourself in a position that is aggravating the sore spot – just get what you can.
For maximal stretch of the skin, straighten your elbow while rotating your arm outwards and pulling the back of your hand towards your wrist. Hold this position as you lay down the strip of tape (see picture for position). Refer to the image in step 6 for the position to hold your arm in while applying the tape to your skin.
Step 6: With the tape being firmly anchored onto the skin, stretch the tape to about 50% of it’s maximal length as you peel back about an inch or two of the paper backing. Lay the tape down with this stretch and repeat the process for the rest of tape until you have about one inch left. Lay down the last inch of tape WITHOUT any stretch to again make sure you minimize skin irritation.
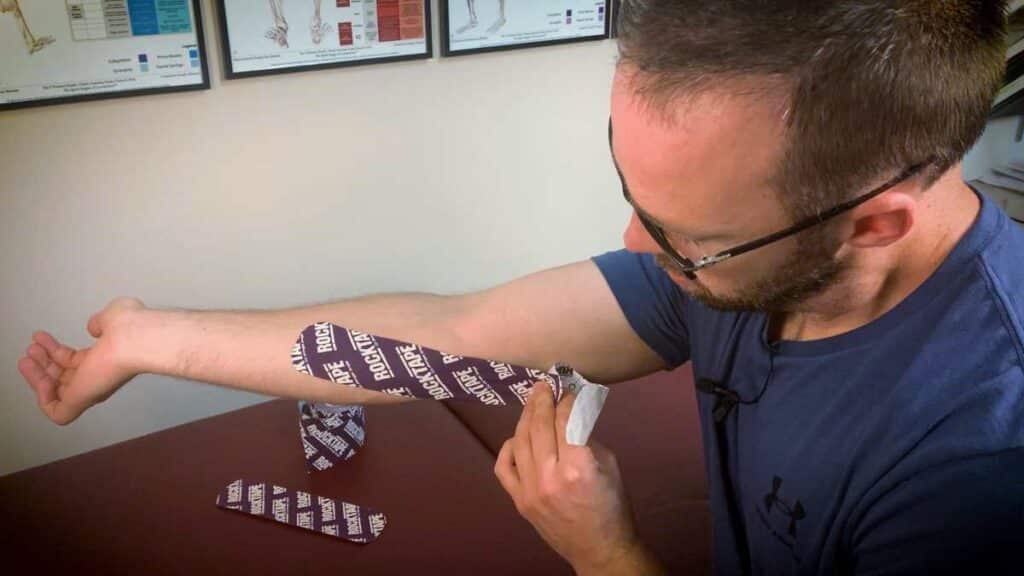
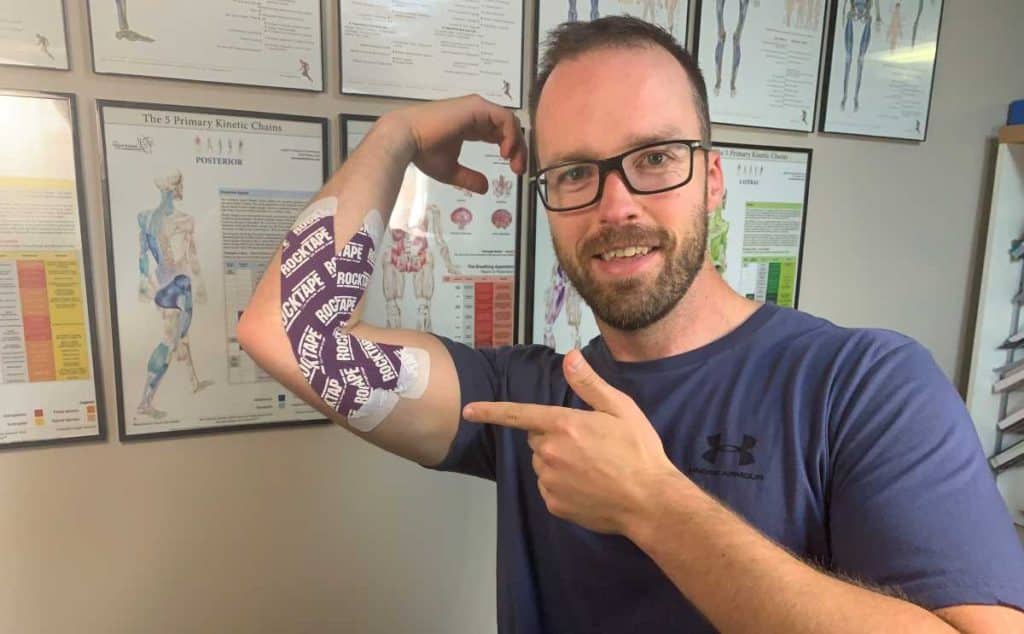
Step 7: Using the second strip of tape, repeat this same process, but starting in a slightly different position (see picture). The goal is to lay the tape down in an X pattern with the tape crossing over the epicenter of the painful spot. This provides maximal lift over the area, which in theory should help enhance fluid dynamics to the best extent possible under the skin within this area.
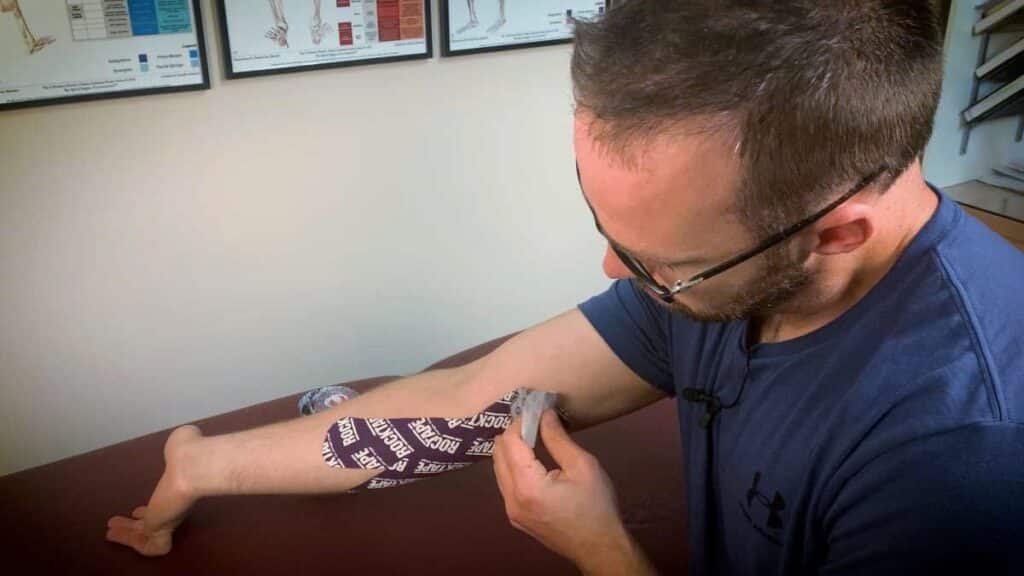
Step 8: Once you’ve got both of the tape strips laid down, take a good ten seconds or so to firmly rub your hand over the tape at a quick rate. This helps to ensure that the tape will stick to the skin as best as possible and that you haven’t missed any spots where the tape could make better contact with the skin.
As you now bend your elbow you’ll see your skin (and the tape) wrinkle up a bit and this is EXACTLY what you want – this provides a bit of separation between the skin and some other sub-dermal tissue, which should help with enhancing fluid flow and exchange within the targeted area.
A fun bonus tip: How to make sure your tape stays on longer
If you have any doubts about the tape sticking to your skin as much as possible, there’s a great little trick you can do to ensure that it really sticks down to the skin. Normally the tape will stick just fine by itself, but if you think you’ll be doing a lot of activity over the next few days or know you’ll be getting rather sweaty, then this little bonus tip can really help you out:
You will need to purchase a roll of Cover Roll (also known as Hypafix) (link takes you to the product on Amazon), which is a hypoallergenic cloth-based adhesive tape. Buying one roll should last you a long time unless you use it regularly for other applications. It’s pretty sticky, and won’t irritate the skin. Note: the above is an affiliate link, which just means that when you purchase through the link, I earn a small commission at no extra cost to you. I use these earnings to help pay for the costs associated with running this website.
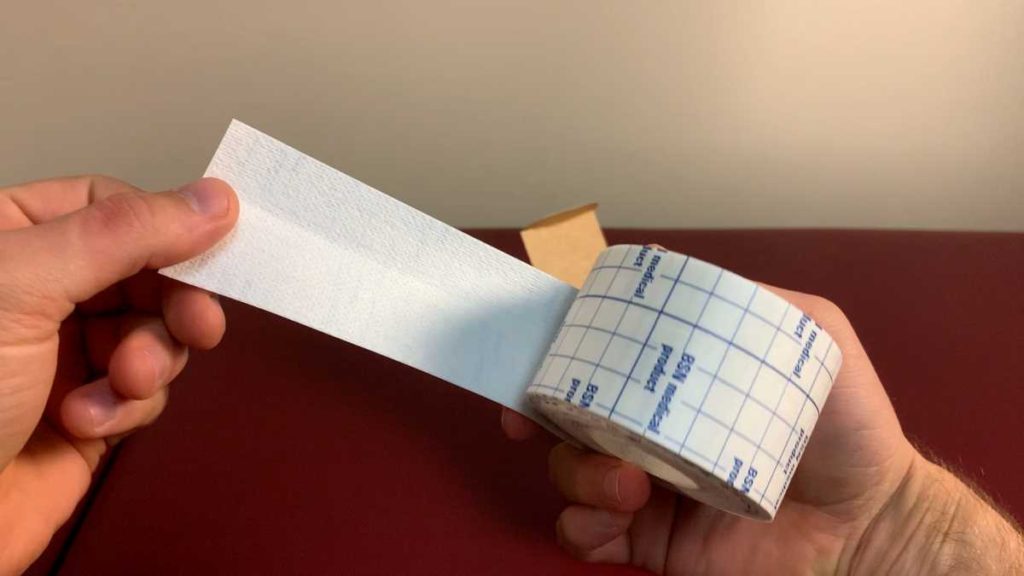
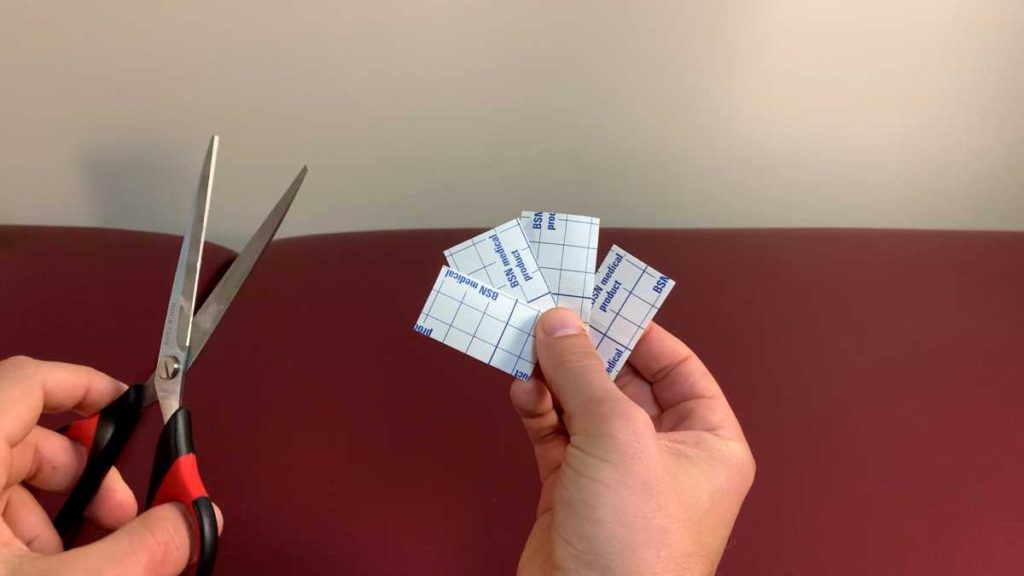
Cut off four small squares and simply round the corners, just like you did with the K-tape. Then, place half of one square on the end of a piece of tape while placing the other half onto your skin. Make sure it’s on there firmly and then you’ll have some great re-enforcement for keeping the K-tape on your skin!
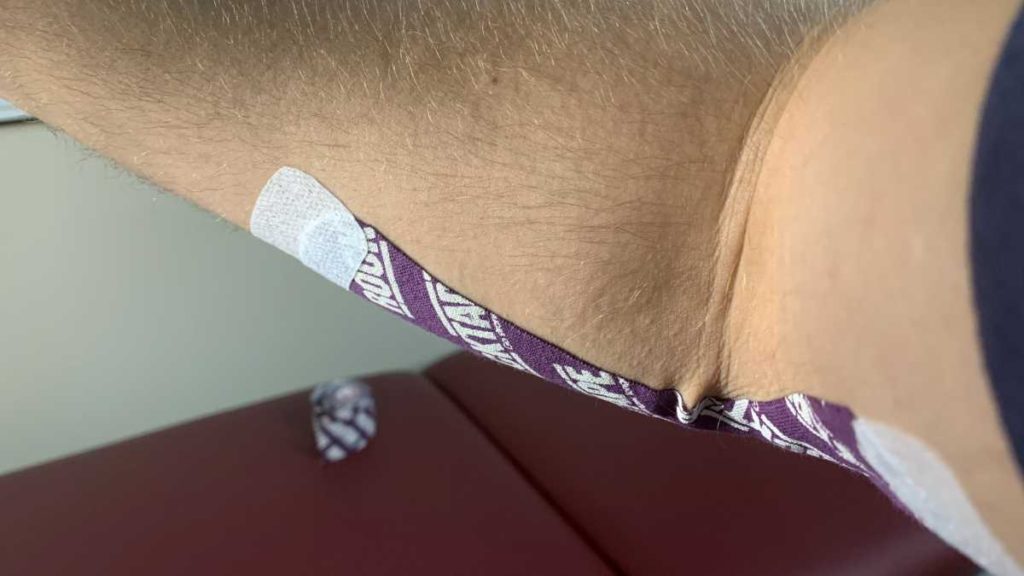
This extra step is by no means necessary, but can come in handy for specific circumstances.
Concluding remarks
Your best bet for getting rid of golfer’s elbow is to seek appropriate treatment from a qualified healthcare professional, such as a physical therapist. Tape can certainly be a nice little adjunct to use, but I’d highly encourage you to seek treatment, especially if your golfer’s elbow isn’t going away or isn’t getting better through your own attempts.
The tape should help by giving your brain something else to think about (due to the sensation of tape on the skin), which is a fun little way of saying that tape will help decrease the perception of pain by turning down nociception within that part of the body. The tape should theoretically help with providing better fluid dynamics to the area beneath the skin as well.
Take good care of yourself and do what it takes to get rid of this annoying, stubborn condition!

Hi! I’m Jim Wittstrom, PT, DPT, CSCS, Pn1.
I am a physical therapist who is passionate about all things pertaining to strength & conditioning, human movement, injury prevention and rehabilitation. I created StrengthResurgence.com in order to help others become stronger and healthier. I also love helping aspiring students and therapists fulfill their dreams of becoming successful in school and within their clinical PT practice. Thanks for checking out my site!

