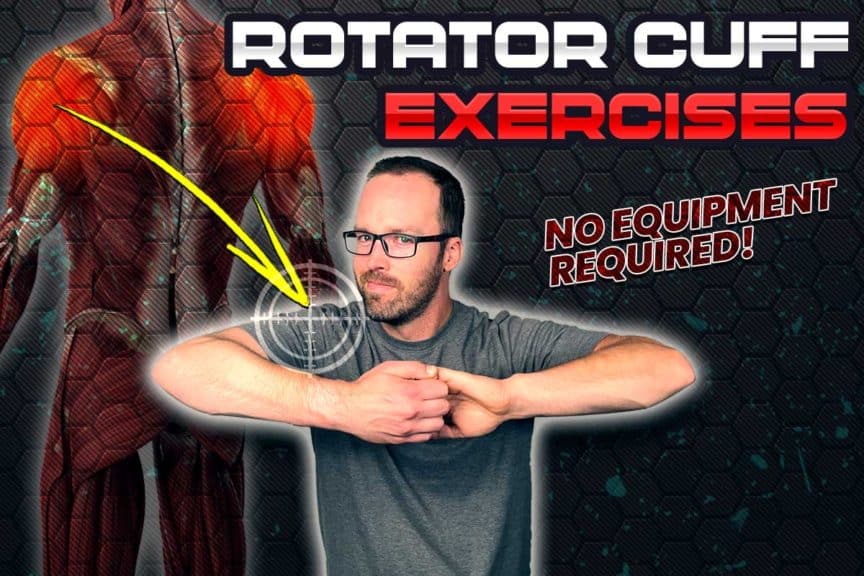
Properly warming up your rotator cuff before a workout or physical activity session is a pretty smart move if you plan on doing exercises or movements that will be using and challenging these muscles. And while there’s no shortage of great exercises and regimens to go through, many of them often require the use of bands or other equipment.
This article will show you a series of eleven exercises you can perform to optimize your rotator cuff health without ANY equipment. The protocol is designed by world-expert Dr. Tom House. These exercises can be helpful for athletic and non-athletic populations and individuals of all ages.
Now, to be clear, bands and equipment are indeed an outstanding way to either warmup or strengthen your rotator cuff muscles, and I certainly encourage this under numerous circumstances. But it’s certainly not a bad idea to have a dedicated protocol or series of shoulder exercises that you can perform without any equipment whatsoever. And that’s what we’re going over in this article.
Related article: Strengthening Your Infraspinatus With A Dumbbell (3 Proven Exercises)
Who devised this rotator cuff protocol
The routine that I’ll briefly walk you through is an exceptional routine to warmup (and even strengthen) your rotator cuff using nothing other than your arms. The following eleven exercises are a shoulder-specific protocol developed by renowned throwing and shoulder specialist Dr. Tom House.
Whether you’re looking to warm up your rotator cuff muscles before a general physical activity session or for a shoulder-specific sport (such as for throwing), this protocol has been used worldwide for all sorts of activities and by all sorts of individuals. It can even be used for injury rehabilitation of a rotator cuff injury under certain conditions.
If you don’t know who Dr. House is, you might know who he has worked with. He’s sought out by some of the biggest names you can come across in the world of professional sports for helping athletes take their throwing and shoulder mechanics to the next level.
This includes names of people such as:
- Tom Brady (NFL quarterback)
- Drew Brees (NFL quarterback)
- Randy Johnson (MLB pitcher)
- Nolan Ryan (MLB pitcher)
- Tim Tebow (NFL quarterback)
- Many, many other professional throwing-based athletes
How to perform the protocol
To get the most out of the following eleven movements, you’ll want to perform all of them in a consecutive manner without many (or any) breaks in between.
For most of the following exercises, performing around three to five repetitions should be ideal (unless otherwise noted); however, many athletes perform more repetitions based on their abilities.
One run-through of this protocol should take around five minutes and should only need to be performed once.
If you don’t have the endurance to make it through all the exercises, simply perform as many as you can. As time goes on, and you stick with this routine, your rotator cuff muscles will likely become healthier and gain the capacity to tolerate more exercises without becoming as fatigued.
Also, As you go through this routine, keep in mind the following:
- These exercises and movements are intended for an otherwise healthy set of shoulders; if you have a shoulder condition, consult with a qualified professional to determine if these shoulder movements are appropriate for you.
- All of these movements should be pain-free, so if anything hurts or doesn’t feel right, skip the movement for the time being.
So here we go, eleven quick exercises that will thoroughly prep and optimize your rotator cuff. Follow along as I demonstrate these movements so that you can begin committing them to memory.
Exercise 1: Saws

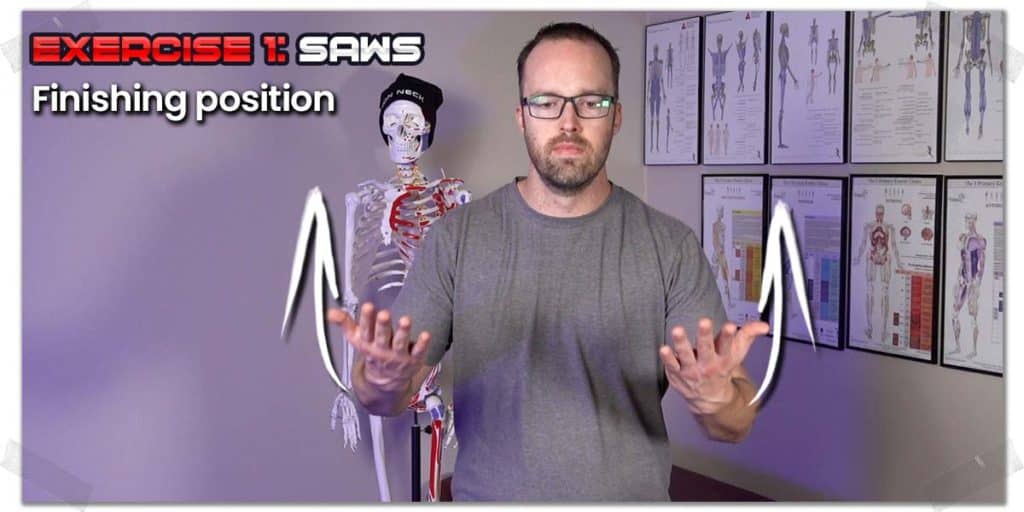
For the saw exercise, keep your elbows directly beneath your shoulders. Then with your palms facing up, push and pull your elbows forwards and backwards in a sawing motion. Then, point your thumbs up in the air so your forearms are in a neutral position and repeat the movement. And after that, rotate your palms down towards the floor and repeat a handful of repetitions one more time.
Exercise 2: Rock the baby
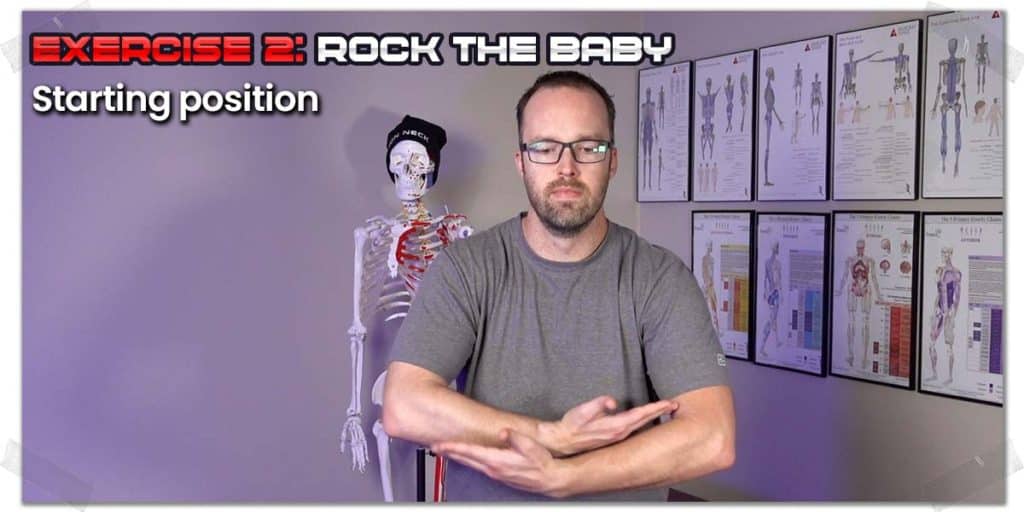
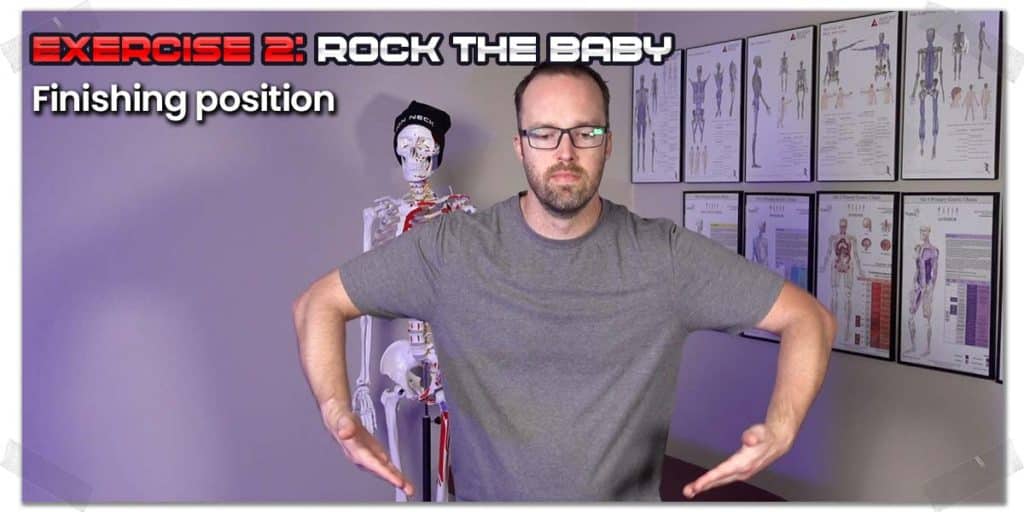
For rocking the baby, place your palms up with one forearm on top of the other, similar to if you were holding a baby. The fingertips on your top forearm should be touching the crease of your elbow at the bottom of your biceps.
From there, pull your arms apart, then bring them back to the starting position with the opposite forearm on top. Perform this movement while alternating which forearm is on top.
Next, turn your palms towards you and repeat the motion.
Then, turn your palms down and repeat the pattern one more time.
Exercise 3: Scissors
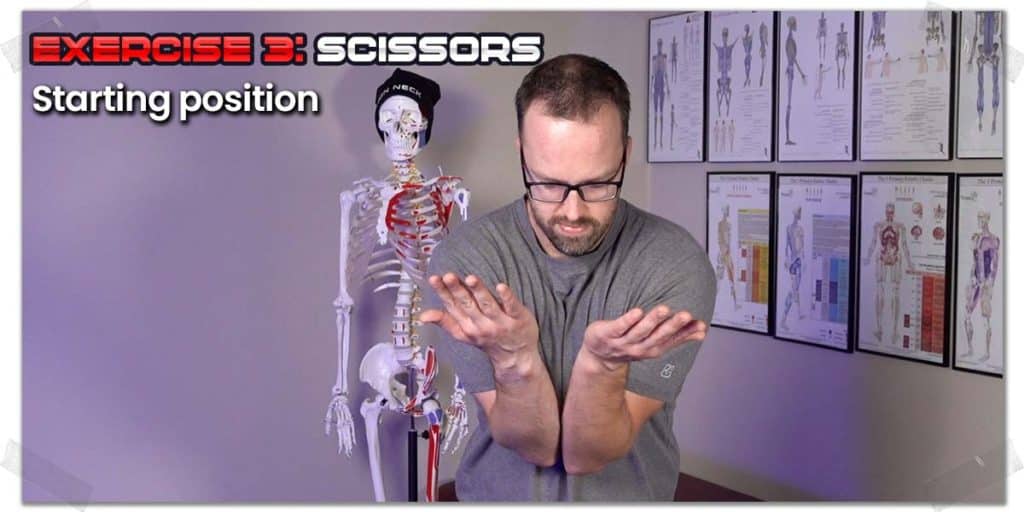
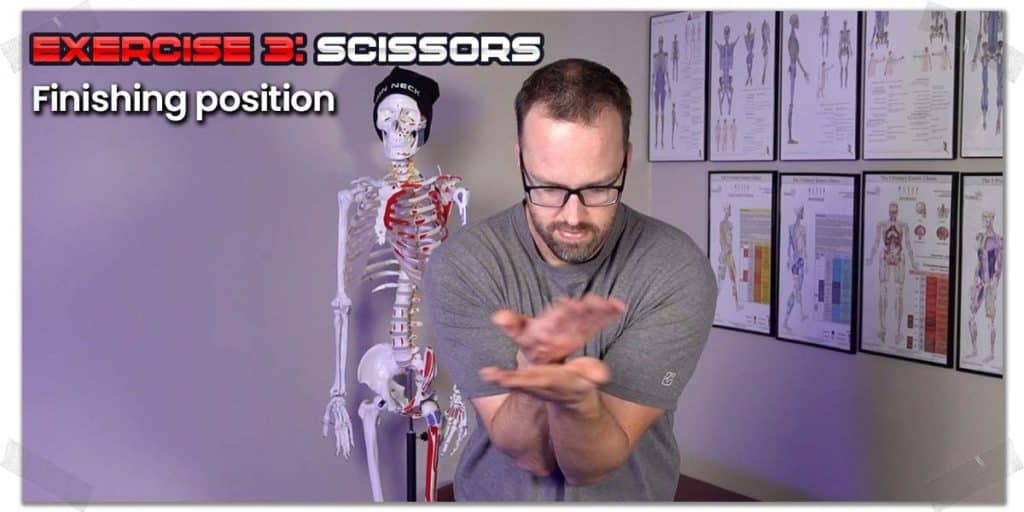
For the scissor exercise, bring your elbows together, so they’re in contact with one another (or as close together as possible). With your palms facing up, scissor your hands apart and alternate which hand is on top each time. Try to keep your elbows together or as close as possible throughout the process.
Next, repeat this process with your palms turned towards the floor.
Exercise 4: Why me?
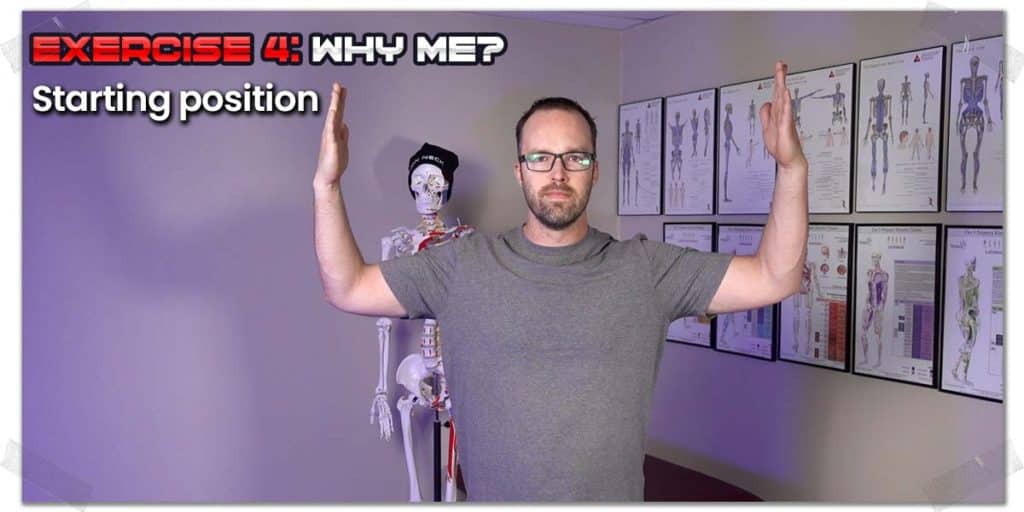
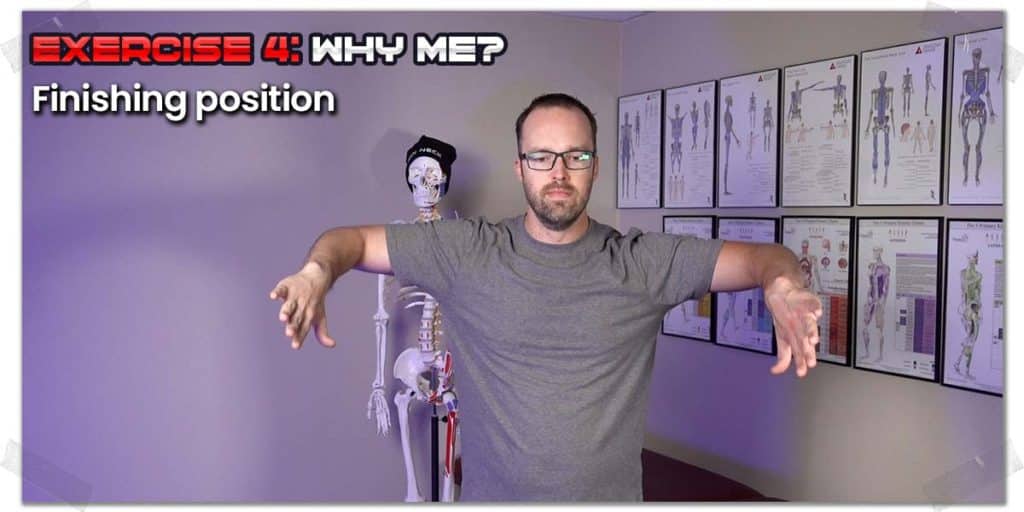
For the Y-M exercise, Start with your palms facing towards one another with your arms raised up to 90 degrees and your elbows bent to 90 degrees. Without letting your shoulders drop down, rotate your forearms down towards the floor while turning your hands so that your thumbs point down towards the ground.
After that, repeat the same pattern but start with your palms facing away from one another, then rotate your forearms down while turning your hands so that your thumbs point towards the ceiling.
Exercise 5: Forearm presses
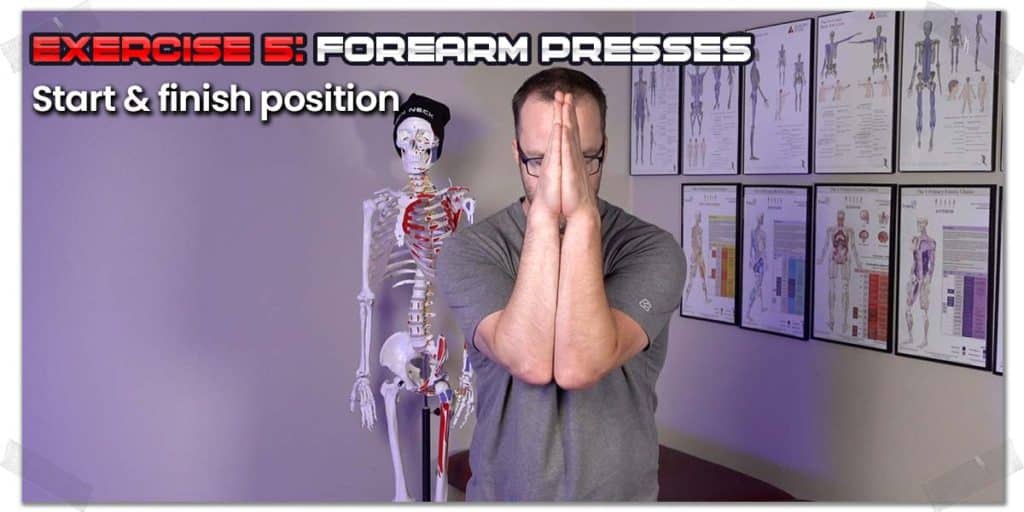
For the forearm presses, place your palms together so that your hands and forearms are in contact with one another. Then, press your hands and forearms together and hold for five seconds.
Related article: The ABSOLUTE Best Exercise for Subscapularis Strengthening: Here’s How
Next, repeat the five-second hold with your palms facing towards you. Then, repeat it one more time with your palms facing away from you.
Exercise 6: Elbows down & up
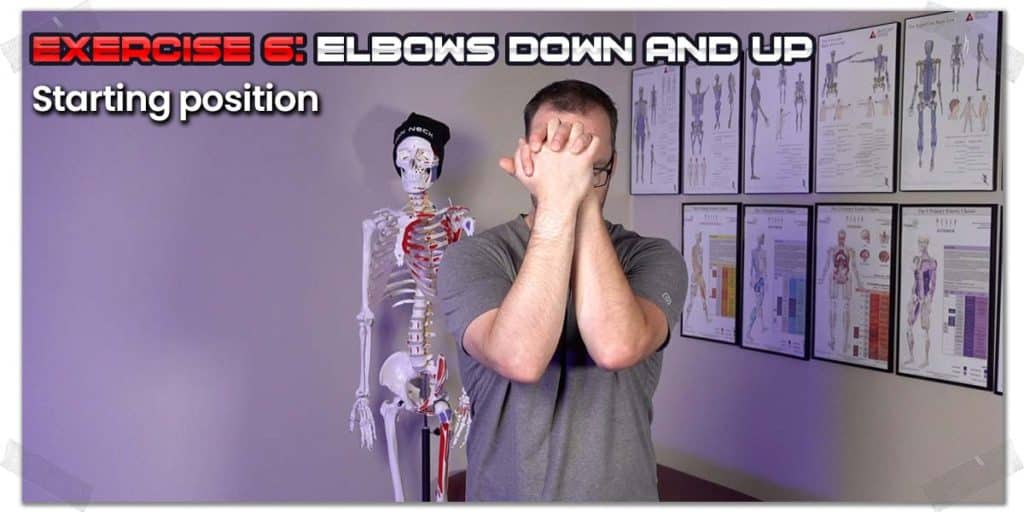
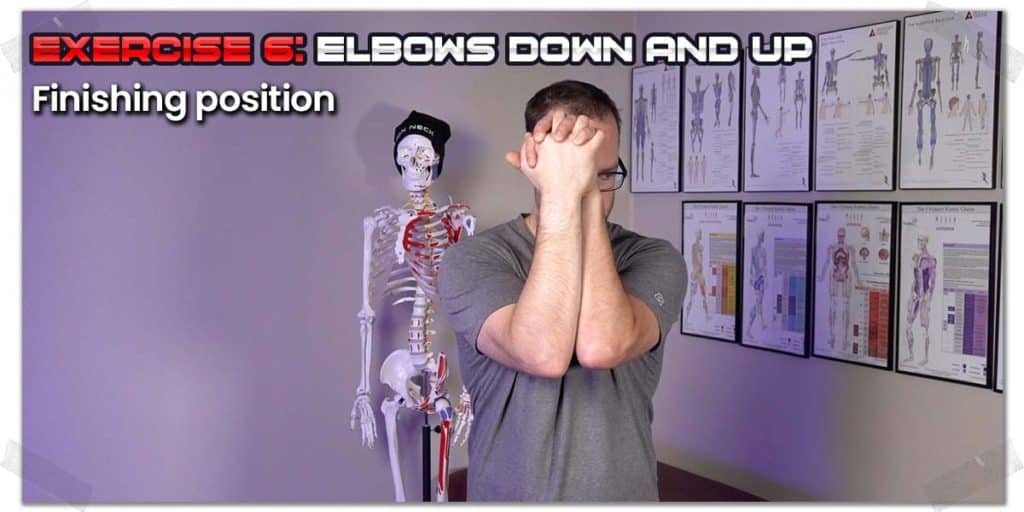
For this exercise, hold your arms parallel to the ground while clasping your hands together so that one palm is facing your face while the other is facing the opposite direction. From there, with a firm clasp, bring your elbows together for one second, then gently pull them apart. Repeat for five repetitions, then switch your palms and repeat the process for another five reps.
Exercise 7: Push pulls
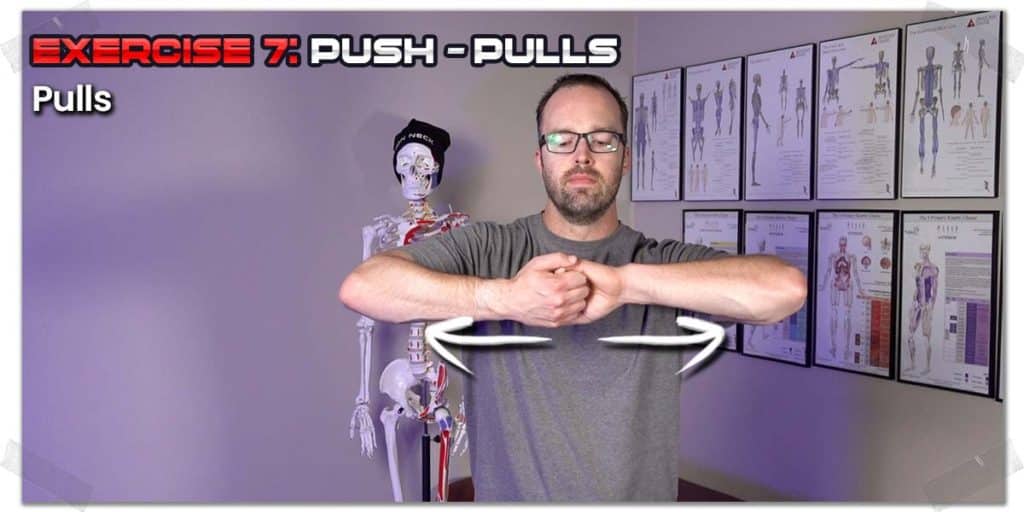
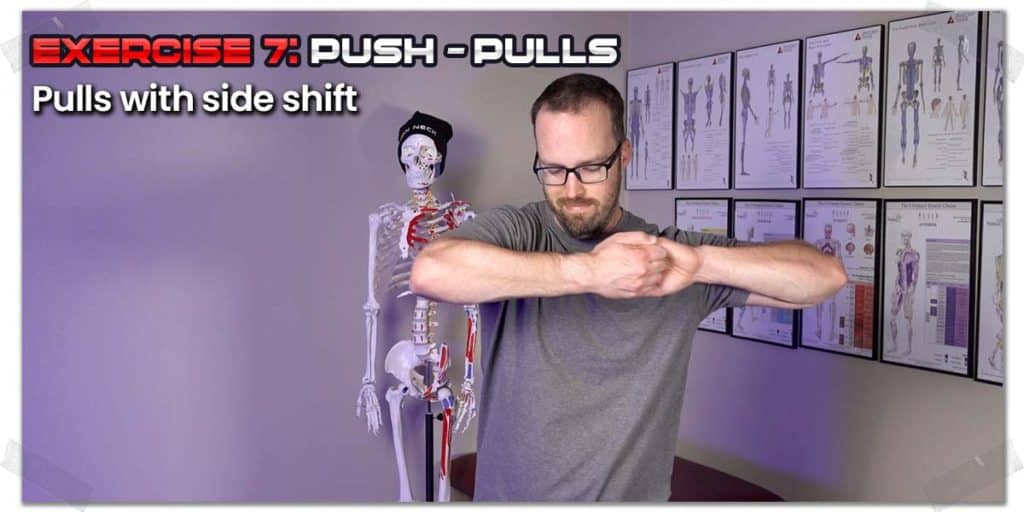
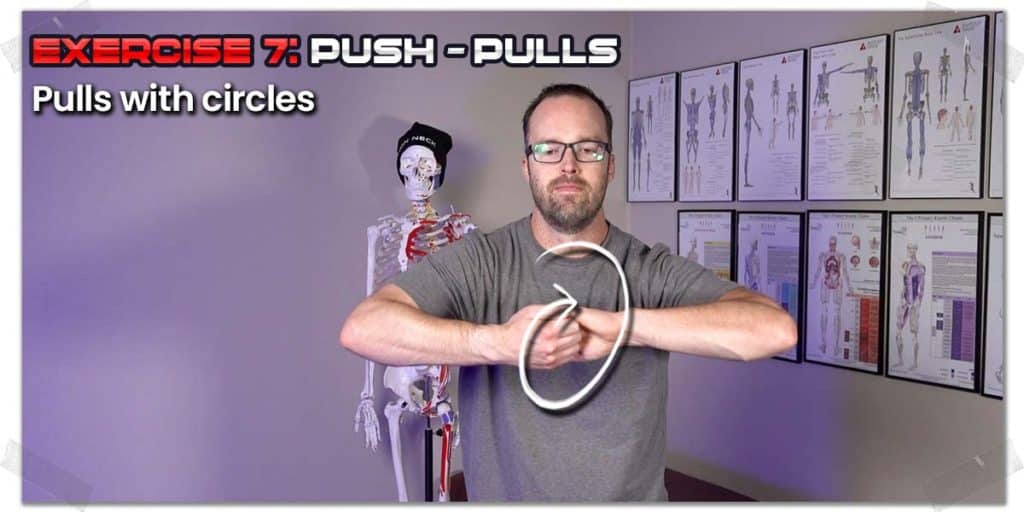
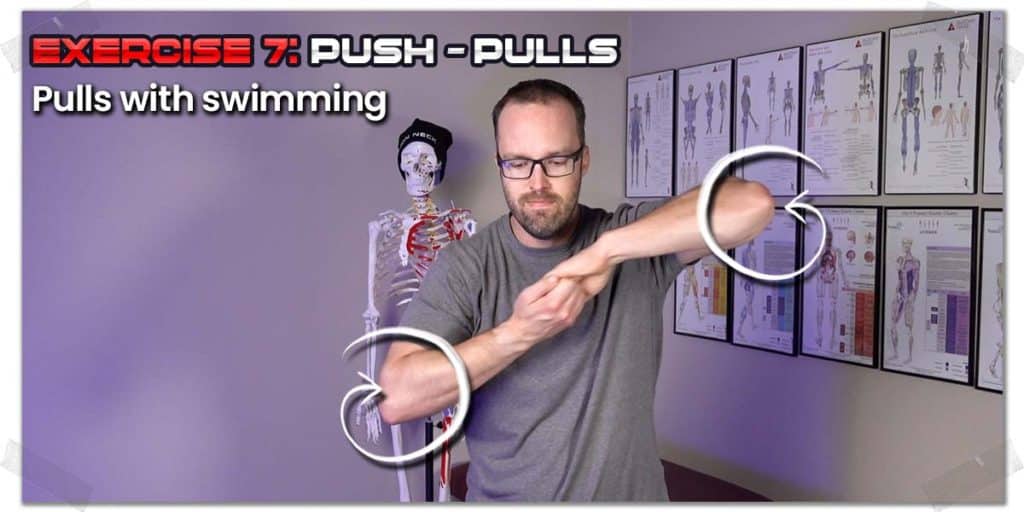
For the push-pull, raise your arms up directly in front of you and hook your fingers so that one hand faces you while the other faces away. From there, pull your arms apart aggressively for five seconds. Immediately after, keep pulling your arms apart while moving your arms left to right. Do five repetitions to each side. Don’t let your arms drop as you do this.
From there, keep pulling your arms apart while performing five circles going forwards and then five circles going backwards.
Lastly, as you continue to pull on your arms, make a swimming motion with your shoulders. Perform five forward rotations per shoulder, then perform five backwards rotations per shoulder.
Exercise 8: Box presses
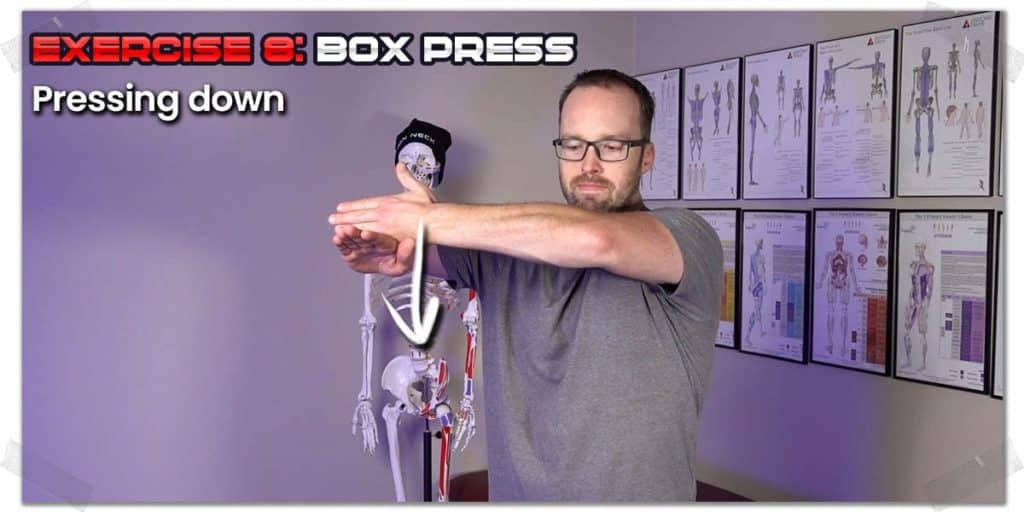
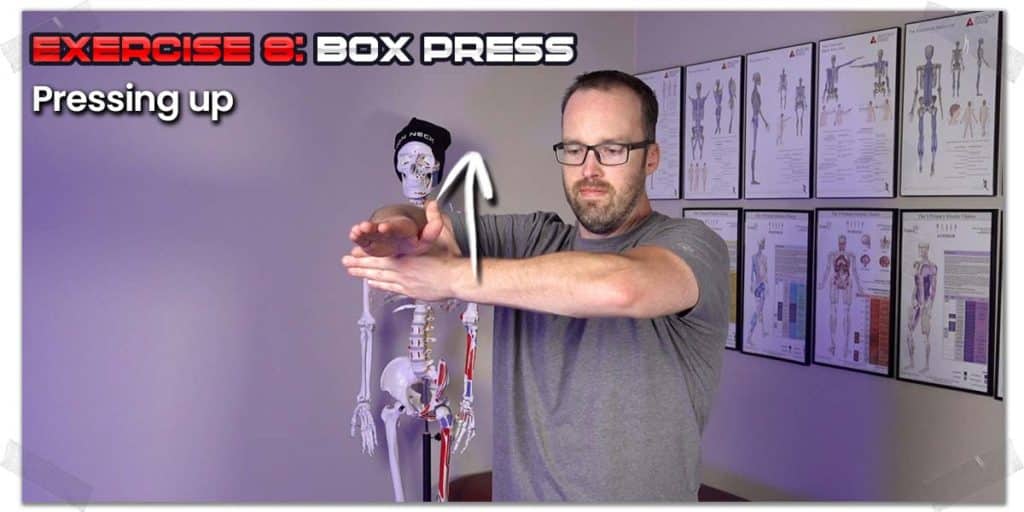
For the box press, raise your arm directly out to your side with your elbow bent to 90 degrees and your palm facing down. Take your other arm and place its hand on top of the bottom hand with your thumb pointing upwards.
Push your top arm down while pulling your bottom arm up. Hold this push for five seconds, then repeat the movement with your palm facing down. Then, repeat this movement one more time with your thumb pointing down.
After you’ve done this, you’re going to take your top arm and bring it underneath your other arm so that you now push upwards. Push upwards with your thumb pointed up, your palm facing down, and then your thumb pointing down.
Then, you can switch up your arms so that your arm that was in front now goes out to the side, and the arm that was at your side now goes out in front. From there, repeat the above series of movements.
Exercise 9: Arm circles
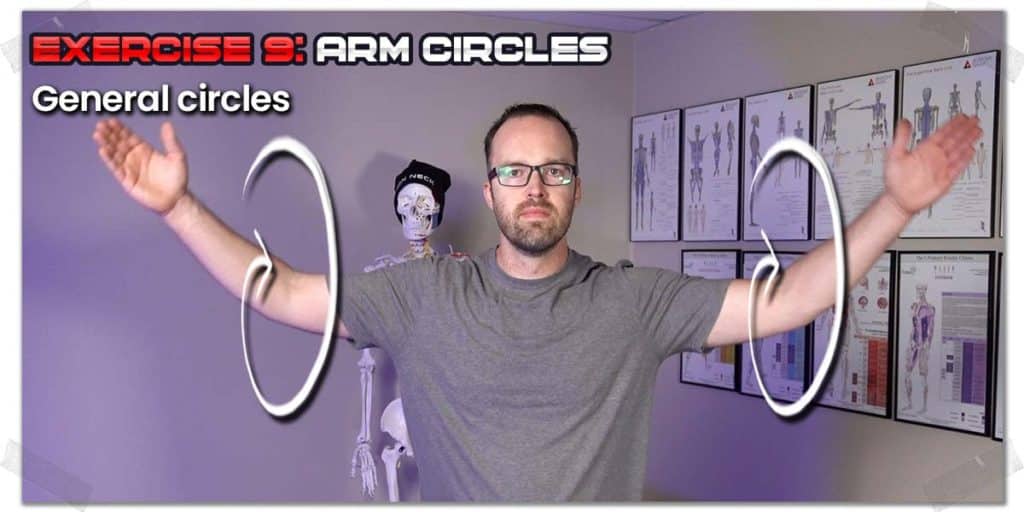
For arm circles, raise your arms directly out to your side. Start with your palms facing upwards, then perform three small, three medium, and three large arm circles going forwards, then perform three of each going backwards.
Next, repeat this exact same series with your thumbs pointing upwards, again doing three small, three medium, and three large circles going forwards, and three of each going backwards.
Lastly, repeat this entire series once more with your palms facing the floor.
Exercise 10: Palm butt press
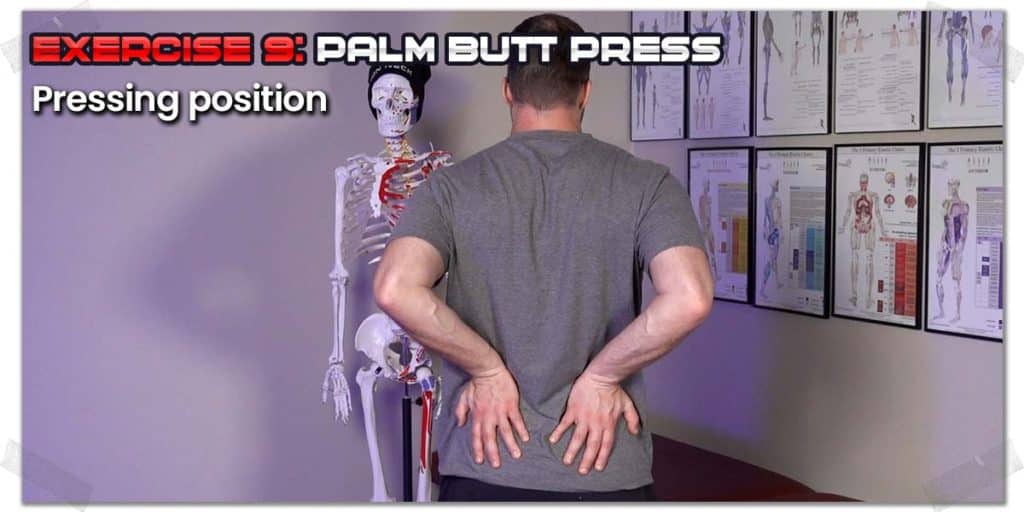
For the palm butt press, place your palms directly over the top of your butt and then press them into your back while simultaneously pulling your shoulders back. Hold this press for five seconds, then repeat the press with one hand on top of the other and then with your palms facing away from your lower back.
Exercise 11: Wall presses
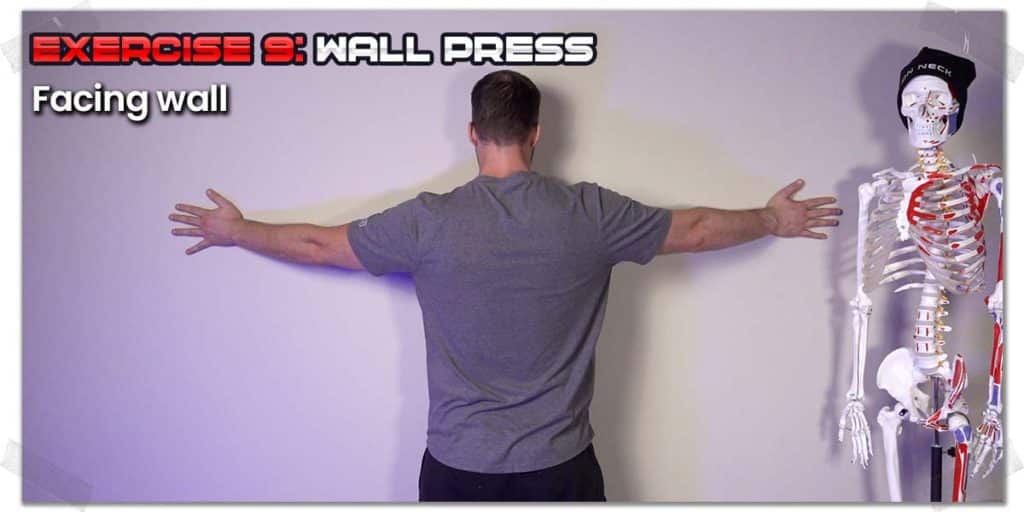
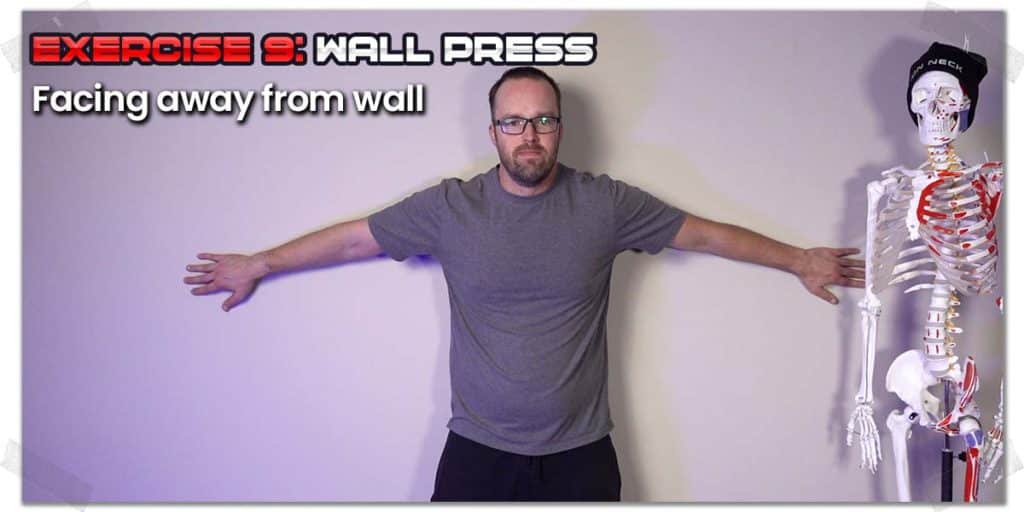
For the wall press, stand a few inches away from a wall while facing it, then raise your arms out to the side and place your palms against the wall. From there, aggressively push your palms into the wall and hold for five seconds.
Then, repeat this process with your palms facing the floor, then with your palms facing the ceiling.
And then, you get to repeat the exact same series of pushes, but this time while facing away from the wall.
Final thoughts
So there you have it! Your rotator cuff should be all prepped and ready to go at this point! If need be, you can change the number of repetitions for each exercise based on your wants and/or needs.
Also, get into the habit of practicing this routine to commit it to memory. It always takes the longest to go through when you’re first learning it, just like anything else we learn. As you run through it more and more, you’ll get quicker and quicker with the execution.
Now, go make some great things happen!

Hi! I’m Jim Wittstrom, PT, DPT, CSCS, Pn1.
I am a physical therapist who is passionate about all things pertaining to strength & conditioning, human movement, injury prevention and rehabilitation. I created StrengthResurgence.com in order to help others become stronger and healthier. I also love helping aspiring students and therapists fulfill their dreams of becoming successful in school and within their clinical PT practice. Thanks for checking out my site!
