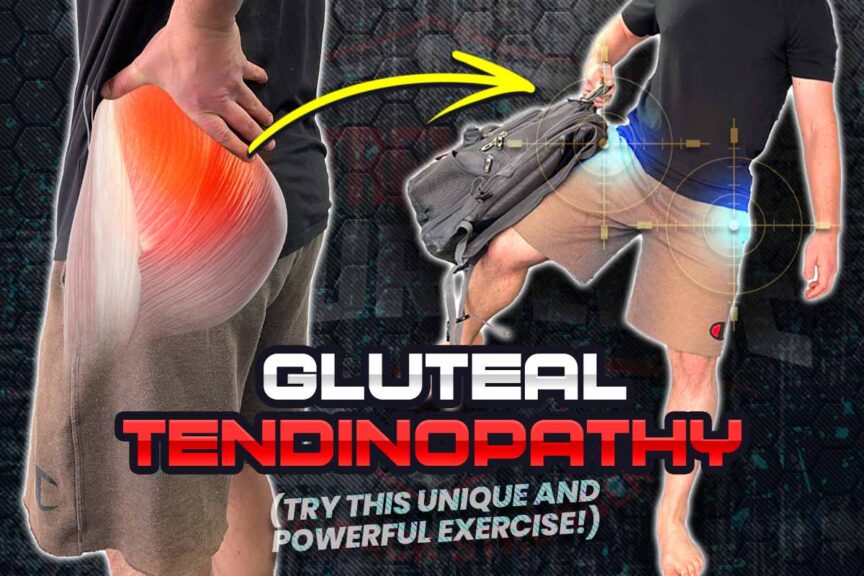
In this article, you’re going to learn a unique exercise for developing deep hip stabilizer strength. It’s quite deceptive yet incredibly effective. Once you try it for yourself, you’ll know exactly what I mean.
Oh, and the protocol that goes along with it for optimizing your hip health is profoundly practical for just about everyone—I’ll show you how it can be performed when in the gym, at home, or just about anywhere else using nothing more than a backpack or a suitcase.
So, let’s break it down!
A small request: If you find this article to be helpful, or you appreciate any of the content on my site, please consider sharing it on social media and with your friends to help spread the word—it’s truly appreciated!
Toublemakers: common sore muscles of the hip
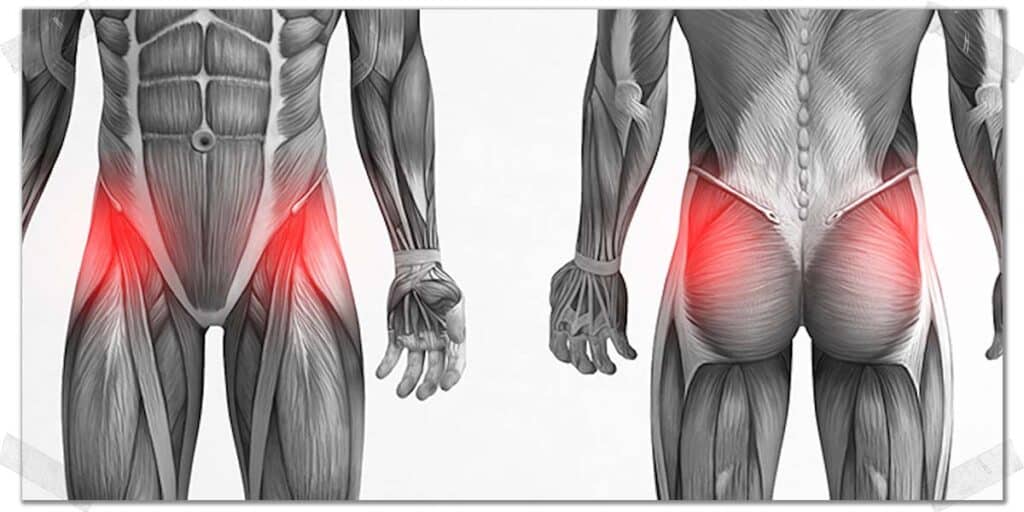
There are twenty-one muscles that cross the hip joint on each leg, and they are all profoundly important for optimizing hip health. Naturally, if each of these muscles were to be a student within a classroom, as always, there tend to be a couple of troublemakers in the group.
Sometimes, when the troublemakers in the classroom act up, we need a teacher (in this case, an exercise) to put them in their place.
While there are indeed a number of these deep hip stabilizer muscles that can become unhealthy, sore, and achy, in this article, I’m keeping things simple and will focus on two particular muscles, which are:
- The glute medius and
- The glute minimus
(Yes, for those of you who enjoy anatomy, you’ll know that other muscles, such as the gemelli and obturator muscles, among others still, are at play here.)
So what does it feel like when these “troublemaker” muscles are acting up? Generally, people will experience feeling a tight, achy soreness along the outer region of their upper hip, notably the area of their hip right where your cell phone would hit your butt as you slide it into your back pocket.
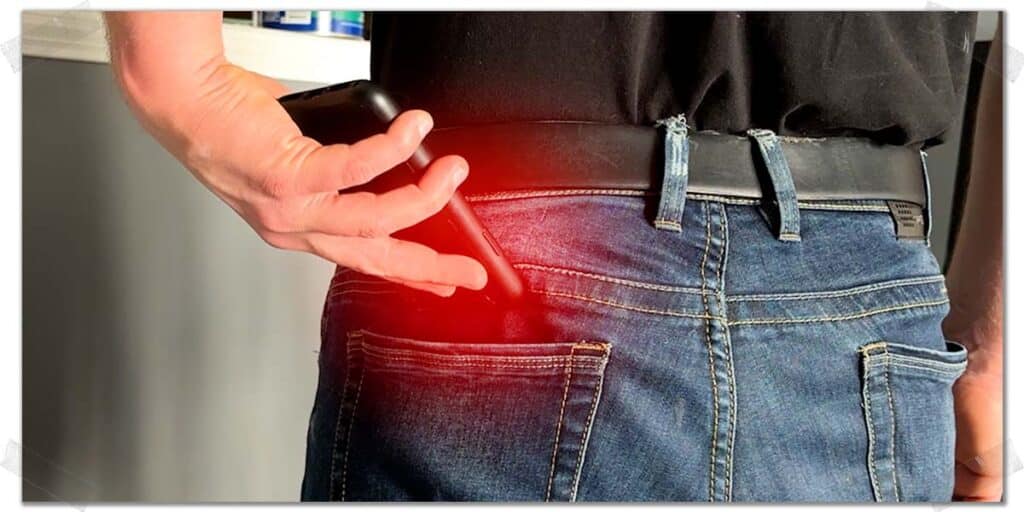
If you have aching, soreness, or feelings of stiffness in this area, it may well be that your gluteus medius and gluteus minimus muscles are acting up.
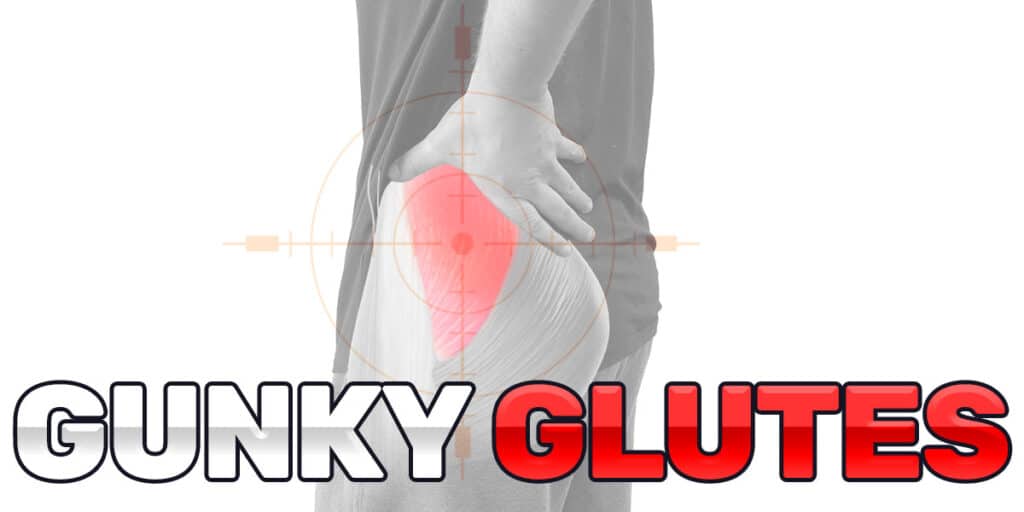
Often, these muscles are painful and dysfunctional due to a generalized lack of health whereby their tendons are “gunky” and afflicted by a condition known as tendinopathy (in this case, gluteal tendinopathy).
Related article: The Hip Strengthening Exercise Unlike Any Other (And Why It Works)
Fixing gluteal tendinopathy: What’s so unique about this exercise
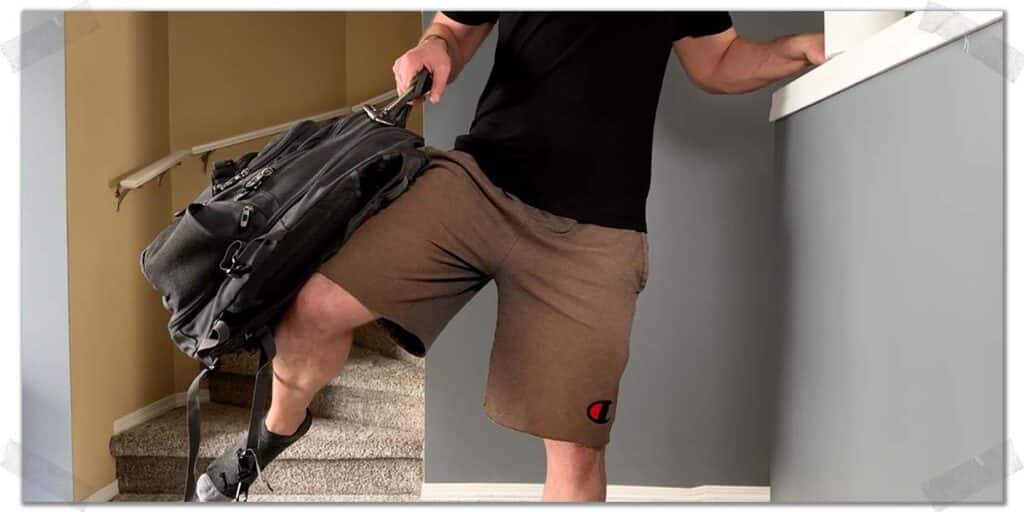
When the glute medius and glute minimus muscles aren’t adequately stimulated on a regular basis (which is actually surprisingly common), they can become weak and unhealthy, leading to all sorts of annoying or even debilitating aching sensations in your hips or even in your lower back. And this simple movement and upcoming protocol I will show you will help prevent that from happening.
If these particular hip muscles aren’t healthy and happy, you might notice that your hips either feel intermittently or chronically sore or achy. This discomfort or pain is typically felt anywhere along the outer region of your hip and is notably common in the region right where your phone or wallet would make contact with your hip as you begin to slide it into your back pocket.
This aching, sore, stiff feeling can be very annoying and even downright brutal to experience. Believe me, I would know. I’m a physical therapist, but like you, I’m only human. This stuff happens to us all.
Gluteal strengthening: Why not other exercises?
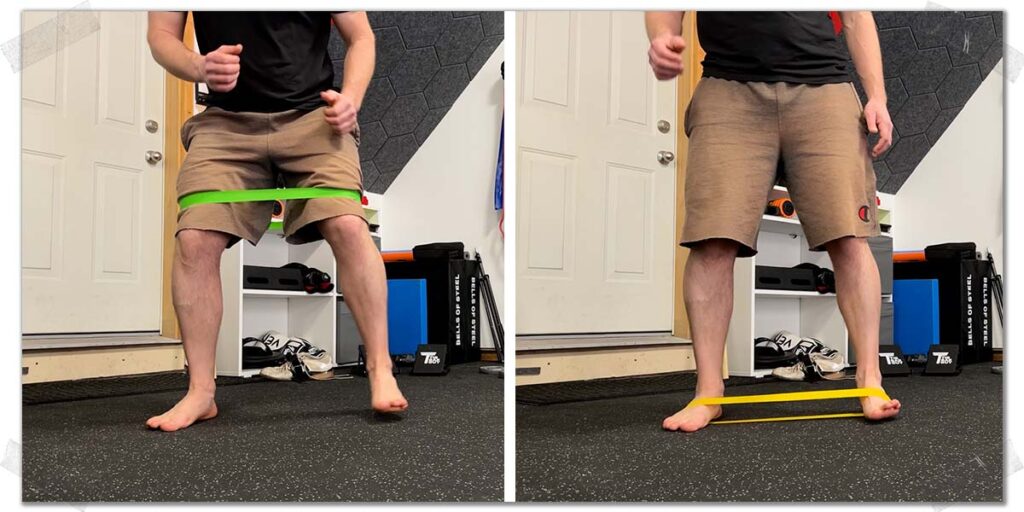
I get it—there’s no shortage of hip-strengthening exercises being taught online, in gyms, and in rehabilitation clinics. Notably, the more popular exercises double-leg glute medius and minimus exercises you might often see, which include:
- Banded monster walks
- Lateral straight-leg walks
- Side-lying leg lifts
To be clear, I’m not against many of these more popular or common gluteal strengthening exercises; they certainly have a time and a place and can be very effective for numerous instances where hip health and physical performance need to be improved.
However, practicality and convenience set aside, there are two particular limitations with many of these more popular exercises that the general population might not be aware of.
If you understand these limitations, you can open up an entirely new world of effective deep hip stabilizer strengthening exercises.
So, let’s look at these main limitations.
“If you have aching, soreness, or feelings of stiffness in your upper rear hip area, it may well be that your gluteus medius and gluteus minimus muscles are acting up. “
Limitation 1: A double-leg approach
The first limitation we run into with many of these traditional hip strengthening exercises is the fact that the brain just isn’t as interested in talking to these deep hip muscles when we’re standing on both feet compared to standing on one.
As such, double-leg exercises such as monster walks, while effective, at times might not pack the punch they need to in terms of optimal fiber recruitment to the glute medius and minimus muscles.
To overcome this limitation and truly pick on these muscles, we need to take away any extra help they can get and put them on an island, if you will. And a single-leg stance is an outstanding way to do so.
Limitation 2: Glute max abducting the hip
The second limitation is that while your brain will indeed activate some of these stabilizers with exercises such as banded monster walks, however, this activation or stimulation typically doesn’t occur to the same extent when it’s performed solely via hip abduction. Abduction is the name of the movement we produce when we pull our hip and leg away from the midline of our body.
The glute medius and glute minimus play an important role in producing hip abduction (pulling the leg out to the side, away from the midline of the body), so naturally, many people perform this type of movement in an attempt to target them and build their strength. Again, it’s not a bad idea because that does indeed challenge them. But there’s something worth knowing here:
As I have detailed in another article on hip strengthening, half of your gluteus maximus — your big rump muscle — attaches to your IT band, meaning that this muscle is responsible for producing a significant portion of hip abduction. Most folks might know this muscle produces hip extension (pulling your hip and leg behind you), but they don’t realize it also plays a significant role in pulling your leg out to the side.
This simply means that with many traditional glute medius strengthening exercises, glute max is helping out way more than we would otherwise like it to.
Related article: Here’s Why Your Hips Ache After Working Out (And What To Do About It)
Now, I can already hear you here: “But Jim, you’re performing hip abduction with this exercise you’re showing here, is that not the same as these other exercises?” And I love how you’re thinking!
Remember, we’re actually targeting the stance leg with this exercise, and not necessarily the leg that is abducting out to the side (though, to be clear, the leg raising out to the side is indeed receiving muscular stimulation as well).
Raising the non-grounded leg out to the side actually forces the deep muscles of the stance hip to contract in a rather aggressive manner as if they’re being forced to “clamp down” as a means to stabilize the hip, allowing you to continue standing upright.
However, to be perfectly clear, if you implement the secret sauce I’m about to spill, you’ll get a hefty dose of strengthening into the non-grounded leg as well because glute medius and minimus still have to produce a decent amount of effort to pull your hip away from the midline of your body. So, we’re getting a double whammy here.
The convenience of this hip-strengthening exercise
Additionally, right before I talk about the secret sauce of this exercise, let’s briefly mention the practicality of this exercise. Since you don’t need any fancy gym equipment and can make do with an everyday item like a backpack or briefcase, you can do this exercise just about anywhere.
What’s even better is that you don’t need to lie on the floor; standing upright is as simple and convenient as it gets. I often do this exercise in my kitchen or living room as I’m a massive fan of convenience.
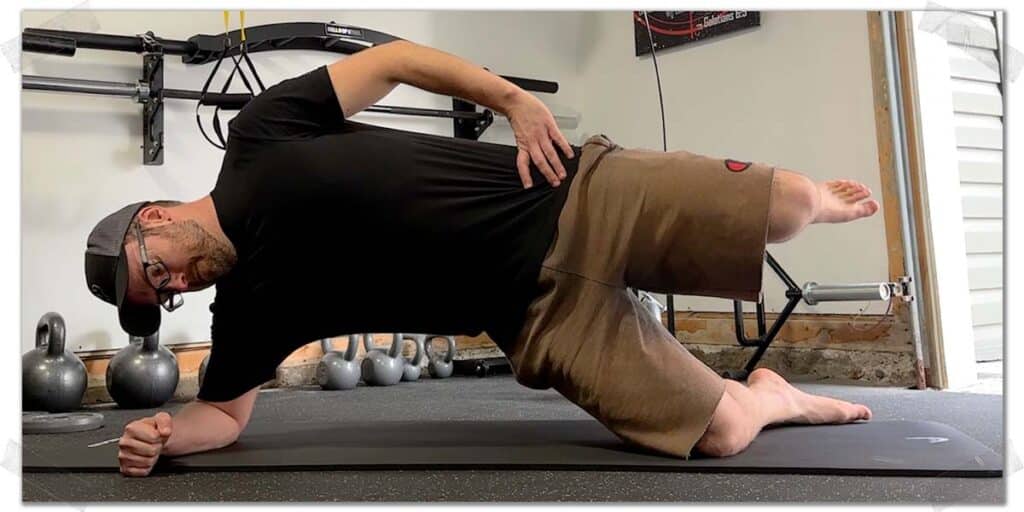
There’s a very similar side plank exercise you could perform, which is an outstanding exercise that has been shown to extensively target these hip muscles the same way that the standing version does. Still, it requires you to get down on the floor and then support your body weight with your shoulder, which might not be ideal for specific populations. Additionally, it’s difficult to fine-tune the resistance with this exercise compared to the standing exercise I’m demonstrating in this video.
The Secret Sauce: Better Gluteal Strengthening
Alright, secret sauce time.
When you perform this exercise, there are two things you must keep in mind at all times (if you want to make it brutally effective):
Factor 1: Vertical positioning
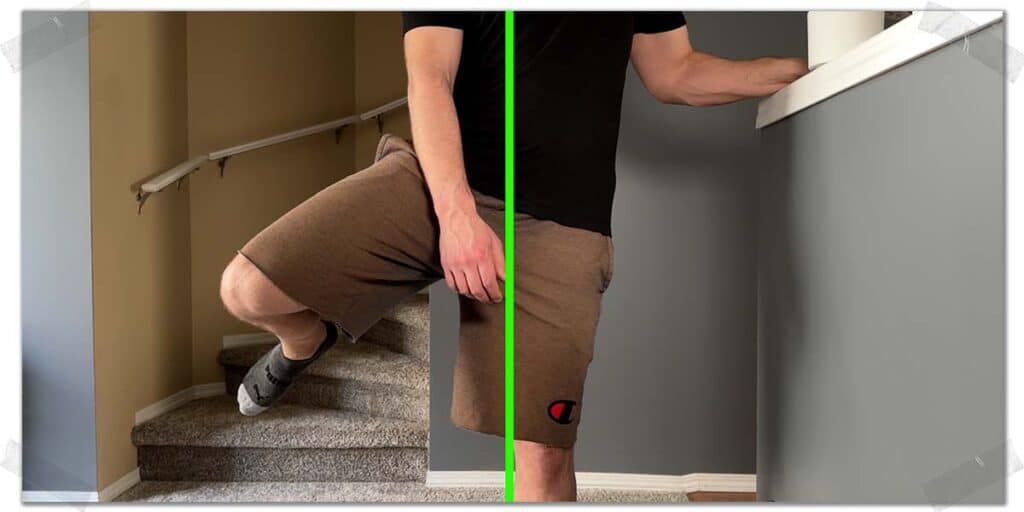
The first is that you need to keep your torso upright at all times; do not lean to the side, even in the slightest. Some people lean to the side, thinking it helps them raise their hip higher, but leaning doesn’t increase your hip abduction range; it just gives you a false sense that you are while reducing the efficacy of this exercise. So, keep your torso upright.
Factor 2: Maximal hip height
The second thing to keep in mind is you need to abduct your hip as high as you can and then constantly, at all times, tell yourself to fight for just one more millimetre of height. Do not let your hip drop back down even in the slightest. The more you fight to maintain this maximal height, the more you’ll feel your stance leg activate AND your non-stance leg as well.
And now that you know these secrets, we can take these hip-strengthening benefits to new levels by giving you the following protocol:
“Remember, we’re actually targeting the stance leg with this exercise, and not necessarily the leg that is abducting out to the side.”
The protocol: From isometric to isotonic hip contraction
We all have different needs and abilities, and some individuals’ hips will be healthier than others, so keep this in mind with this upcoming protocol.
When implementing this exercise, a great protocol to work up to is to hold a 30-second contraction without letting your leg drop even by a centimetre, then immediately perform ten to fifteen slow repetitions without letting your foot touch the ground at any point.
I often have to ditch the extra weight after 30 seconds when I perform my follow-up repetitions, as my hips are on fire at this point, and I really need to fight through the fatigue that is building up at a rapid pace.
If you can’t get thirty seconds, just get what you can for time and increase the number of seconds you hold the single-leg position as you continually implement this exercise week after week.
If your hips are really deconditioned, you might not even need to perform any follow-up repetitions, as the initial hold might just be tiring enough. Or you may want to only perform the follow-up repetitions while foregoing the thirty-second hold altogether. Just find what works best for you and build things up from there.
Related article: Why You Have Hip Pain From Kettlebell Swings (Causes | Fixes | Tips)
The reason for starting out with the hold and then performing repetitions afterwards comes from some really cool research I’ve been looking at over the past year or so by Dr. Keith Baar, which is showing some promising results for being more effective for cleaning stubborn tendon issues, which are very common in these hip muscles.
Why: Using a Backpack?
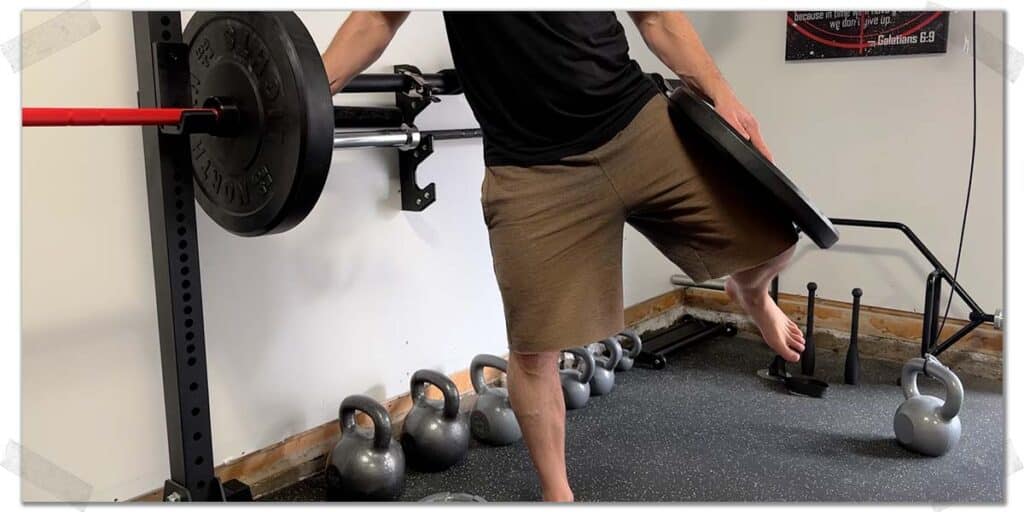
Extra weight forces your hip muscles to work much harder, delivering a more effective stimulus to the muscles. I often have my athletes, clients, and patients use a weight plate, as it’s highly practical if you’re in the gym or have access to gym equipment.
However, not everyone does. But most everyone has access to a backpack, briefcase, suitcase, or something similar that can be loaded with enough weight to give you all the challenge you need. And, you’ve got a perfectly placed handle to hold onto, making this an exercise that’s practical and highly convenient.
Pro tip: You can also use a mini band around your thighs if you have one and would prefer to use that instead!
Of course, you can do this movement free-standing and still get a hefty stimulation—it just depends on your overall strength and the health of your hips.
Final thoughts
Practicality. Effectiveness. Simplicity. Stronger hips. Healthier hips. There’s a lot of good stuff going on here with this hip-strengthening movement, and if you found anything within this article to be of benefit or enjoyment, please consider sharing this article with others you believe may benefit.
And if you thought this article had some cool concepts, wait until you check out this article right here, which will continue to deepen your knowledge and understanding of how to make some great things happen for your body.
And in the meantime, keep making great things happen!

Hi! I’m Jim Wittstrom, PT, DPT, CSCS, Pn1.
I am a physical therapist who is passionate about all things pertaining to strength & conditioning, human movement, injury prevention and rehabilitation. I created StrengthResurgence.com in order to help others become stronger and healthier. I also love helping aspiring students and therapists fulfill their dreams of becoming successful in school and within their clinical PT practice. Thanks for checking out my site!
