For any active individual, experiencing tight, sore, stiff, or aching calf muscles is an issue that’s bound to arise at some point in their pursuit of an active lifestyle. It’s happened to me, and it will likely happen to you.
But just because you’re experiencing abnormal discomfort in your muscles doesn’t mean you have to (or should) live with it or that you ought to ignore it; having a practical and effective intervention that helps eliminate any dysfunction in these muscles is a necessity…assuming you want to maintain your active lifestyle and stay pain-free and avoid injury.
In this article, you’ll learn about a soft tissue treatment technique known as body tempering, what it aims to achieve, and how to perform this technique on your calf muscles using nothing more than a common barbell sleeve (which you can find in nearly any gym)!
I’ll forewarn you: it’s not a technique for everyone (it can be rather intense), but if you’re dealing with a tight calf or two and have access to a standard Olympic barbell, it may be worth giving this little deep tissue massage technique a try.
So, let’s get after it!
A small request: If you find this article to be helpful, or you appreciate any of the content on my site, please consider sharing it on social media and with your friends to help spread the word—it’s truly appreciated!
Related article: Calf Raises & Foot Pain | Causes | Solutions | Pro Tips
What this technique achieves
Essentially, this technique replaces the hands of a massage therapist providing a deep tissue massage with those of a common and more accessible item. You can think of the barbell sleeve here as a rolling pin, your tight, knotted calf muscles as dough, and you as the baker kneading the dough to get the lumps out. (In this case, the lumps are abnormally tight bands of muscle tissue known as trigger points.)
This is a form of soft tissue treatment known as body tempering (link takes to you a PubMed article), which can provide improvements to soft tissue quality and reduce stiffness and soreness within muscles. You’ll often see folks rolling their calves using foam rollers or similar objects, and while this more traditional approach can be pretty effective and worthwhile for specific individuals, sometimes other folks can benefit from this more intense body tempering technique.
Secret Sauce: Getting the most out of this technique
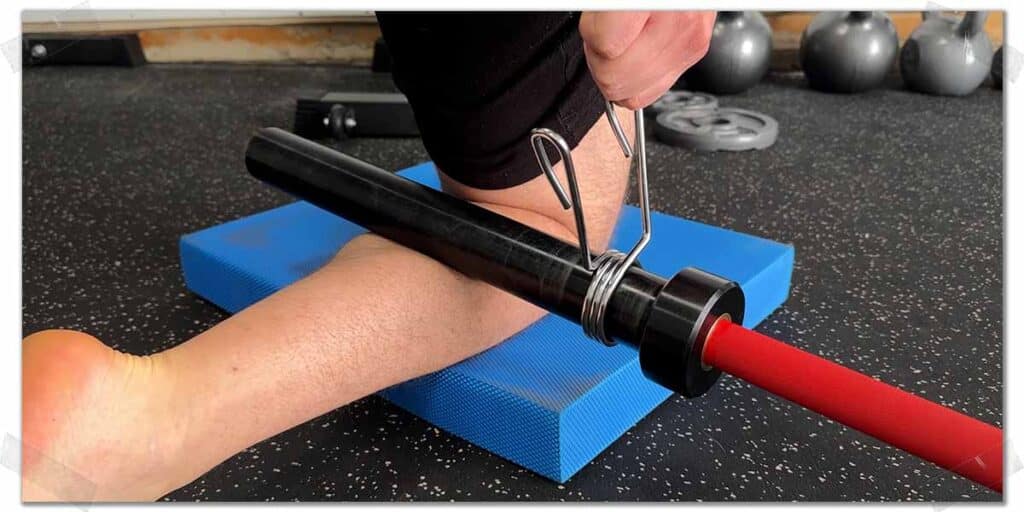
The secret to the upcoming technique I’ll soon show you is to use a traditional spring-loaded barbell collar. You can do this without the collar and still get good results; however, the collar will come in handy for two particular reasons, and I’ll explain them in just one second.
But first, let’s talk about where on your calf you will likely get the biggest benefit with this technique.
The basics: Lower leg anatomy & tempering location
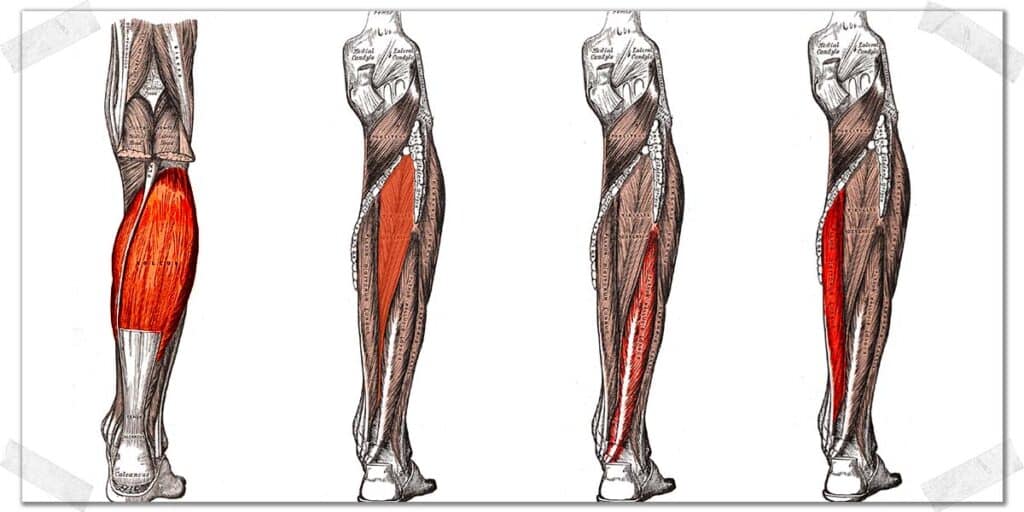
While the calf muscle, which is anatomically called the gastrocnemius muscle, can become tight and restricted anywhere within the muscle, it often becomes the most gunked up in the area where its muscle fibers begin to blend into the Achilles tendon, which is called the musculotendinous junction. I won’t get into the reasons as to why, but know that the difference in tissue characteristics between the muscle fibers and its respective tendon fibers can lead to all sorts of issues.
So, it’s worth exploring this junction area with extra attention when performing this tempering technique. Be forewarned, however, that it will likely be pretty intense. I’d advocate that you don’t go below this junction since it will likely become very unpleasant, and there won’t be a ton of muscle tissue to target. But you can, of course, still explore the muscle belly above this area, too.
Additionally, it’s work knowing that the calf muscle isn’t the only muscle we’re targeting here; there are multiple muscles along the posterior compartment of your lower leg. However, the two heads of the calf muscle and the soleus muscle (which sits directly underneath the gastrocnemius heads) will likely receive the most significant stimulus from this technique.
“The difference in tissue characteristics between the muscle fibers of the calf and its respective tendon fibers can lead to all sorts of issues.”
Related article: Why Your Calves Get Sore From Running Uphill (And What to Do About It)
Secret sauce: Why use the spring-loaded barbell collar?
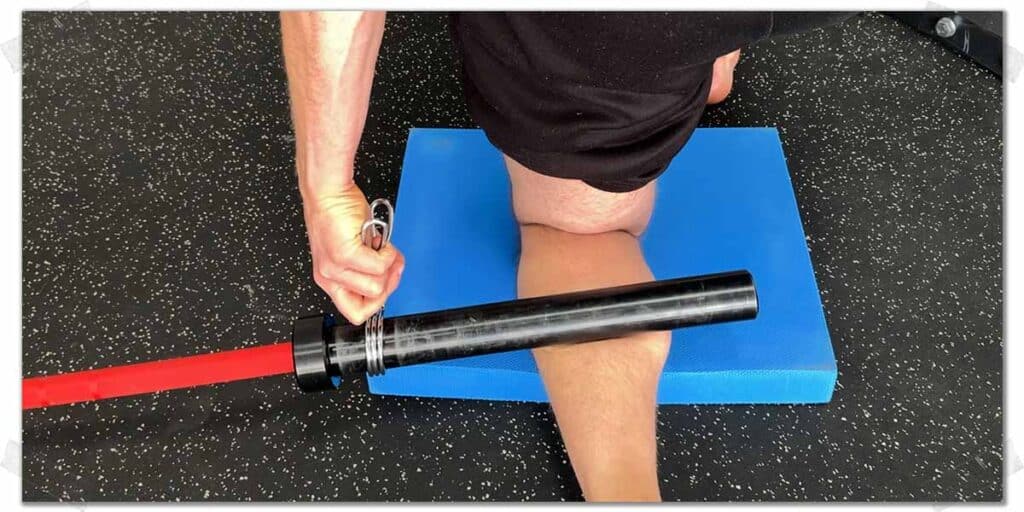
Alright, back to the secret sauce with this technique.
Spring-loaded collars are incredibly popular in gyms, and, in this case, they come in handy for allowing you to fine-tune the movement of the barbell sleeve and to pull upwards on the barbell if you want to lighten up the pressure to a small extent. The collar acts as a handle or a throttle, allowing you to be much more precise when executing this technique. Again, it’s not necessary to use, but it makes moving and lifting the barbell much easier.
Best Practices: Performing this tempering technique
There’s no single universal way to perform this calf tempering technique, but as a general starting point, here’s what I would recommend for those whom this technique is appropriate for:
- Tempering your calves works well for tissue preparation or tissue recovery. It can be used as part of a warmup before physical activity, during cool-down after working out, or even in between. You can even perform it on dedicated recovery days.
- When performing this intervention, keep the rolling technique within a very small area and go nice and slow; it’s not ideal to try to cover the entire calf from top to bottom in a single pass. Once you’ve spent some time on a spot (say, 20 to 30 seconds), lift the sleeve, place it on a different area of your calf, and repeat.
Freebie: Getting the free calf tempering PDF sheet
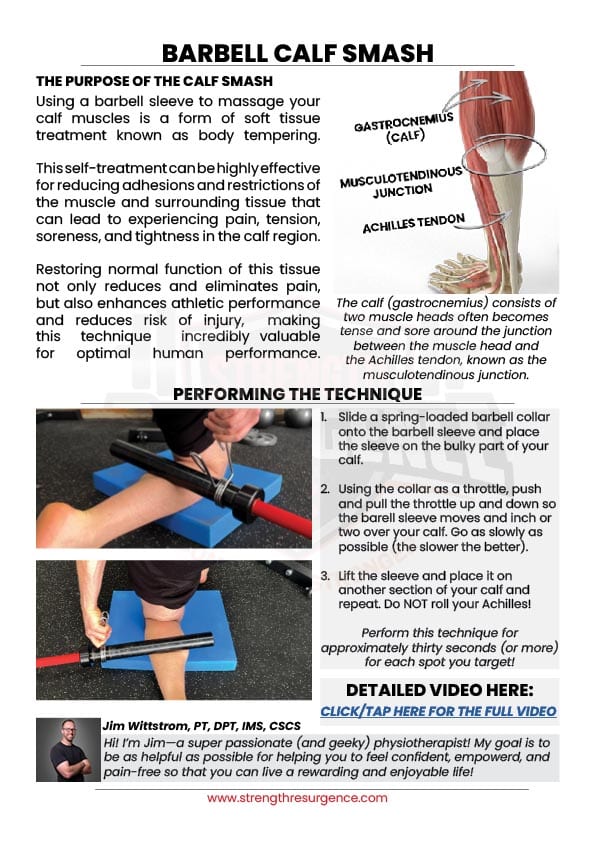
If you want a handy reference sheet for this technique that you can keep on your phone or as a hard copy, I’ve created a free PDF handout that you can download. This one-page sheet recaps the details of how to perform and get the most out of this technique.
Click here to access the free Calf Barbell Tempering PDF!
I figured I’d make this PDF so that you can have access to it on paper or on your phone when you’re in the gym or elsewhere. The link is posted in the description below, and again, it’s totally free!
Other methods: Targeting & treating tight calf muscles
As always, there are multiple ways to restore tissue mobility to your calves, and it’s always worth understanding what’s causing this tension or discomfort so that you can drill down to the root cause of the issue. A professional massage of these muscles and this general area of your body can be outstanding. Still, sometimes, this just isn’t in the cards for those on a tight budget or who don’t have access to a qualified massage therapist.
Final thoughts
At the end of the day, make sure you’ve got ways to keep your calve muscles supple and pain-free. If you’re active and neglect the health of these tissues, it can lead to pain, impaired physical performance, and even injury, which is something I see too much of in the clinic. So, take care of your calves, and your calves will take care of you.

Hi! I’m Jim Wittstrom, PT, DPT, CSCS, Pn1.
I am a physical therapist who is passionate about all things pertaining to strength & conditioning, human movement, injury prevention and rehabilitation. I created StrengthResurgence.com in order to help others become stronger and healthier. I also love helping aspiring students and therapists fulfill their dreams of becoming successful in school and within their clinical PT practice. Thanks for checking out my site!
