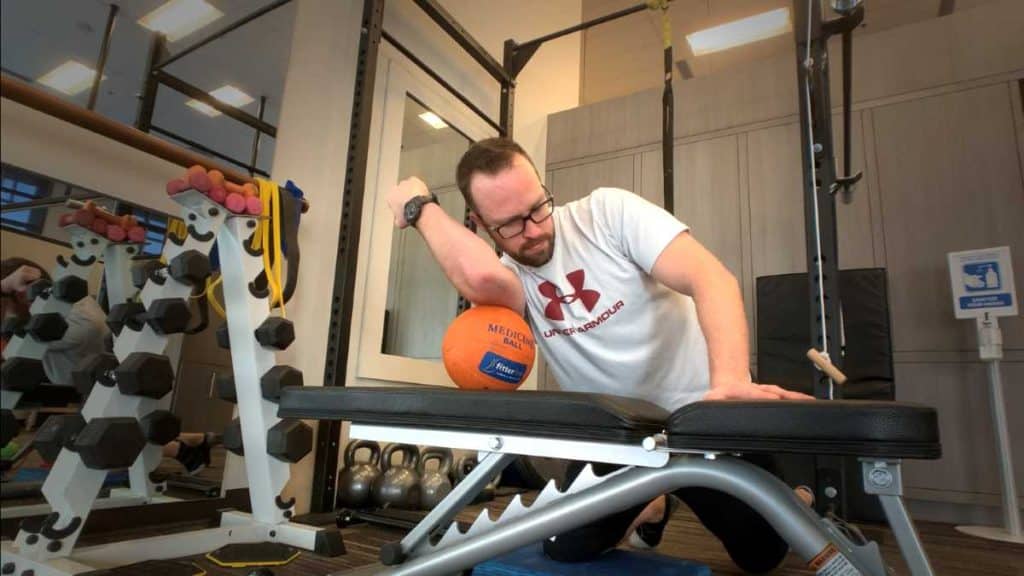
If you haven’t had success when it comes to finding a practical way to roll out your tight, sore and achy pectoral muscles, you’re not alone. Plenty of people looking to keep their pecs from feeling excessively tight and lousy actually struggle to find a practical and effective way to do so; it’s a tricky issue since this area of the body just doesn’t lend itself well to the shape of a foam roller.
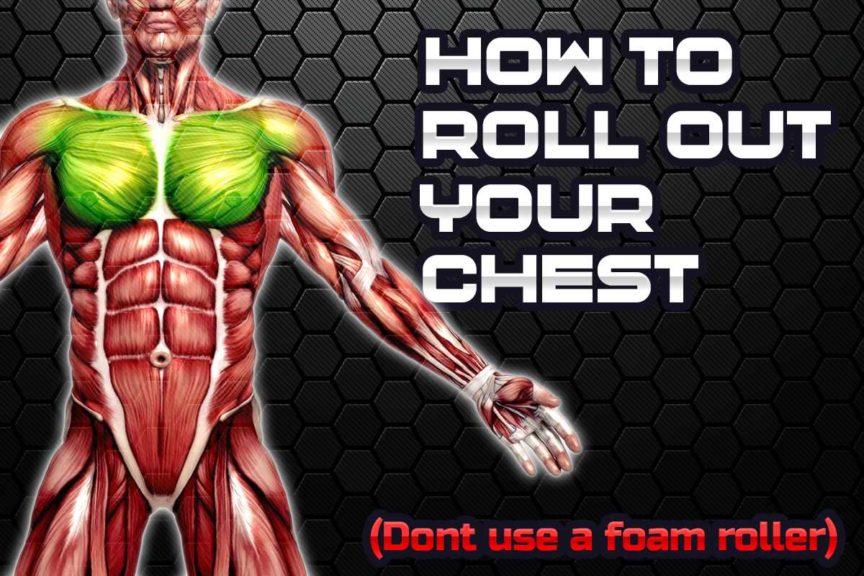
The best way to roll out your pecs is to use a firm, medium-sized ball. Use the simple set up and movements described below, which will allow the ball to target the pectoral muscles for effective massage and tissue release. This will help reduce pain and restore mobility.
If you’re wondering exactly how and why this is likely a superior option for you when compared to using a traditional foam roller, or if you’re wondering which size (and type) of ball may be best to use, be sure to keep on reading! This article is going to break down all of these details so that you can have full confidence in rolling out your pecs in the most effective and ideal way possible.
To help you save time, you can use the article headlines below to instantly navigate to that section of the article. These are quick links, so simply click (or tap) on the following article headlines to jump to that particular section.
ARTICLE OVERVIEW (QUICK LINKS)
Click/tap on any of the following headlines to instantly jump to that section of the article!
Why you need to ditch the foam roller for your chest
Using the best ball possible: size, firmness and more
The best technique to use for getting maximal results
Bonus: How the ball works great for your lats & triceps as well
Final thoughts
Related article: The Seven Best Ways to Massage your Calf Muscles all by Yourself
Why you need to ditch the foam roller for your chest
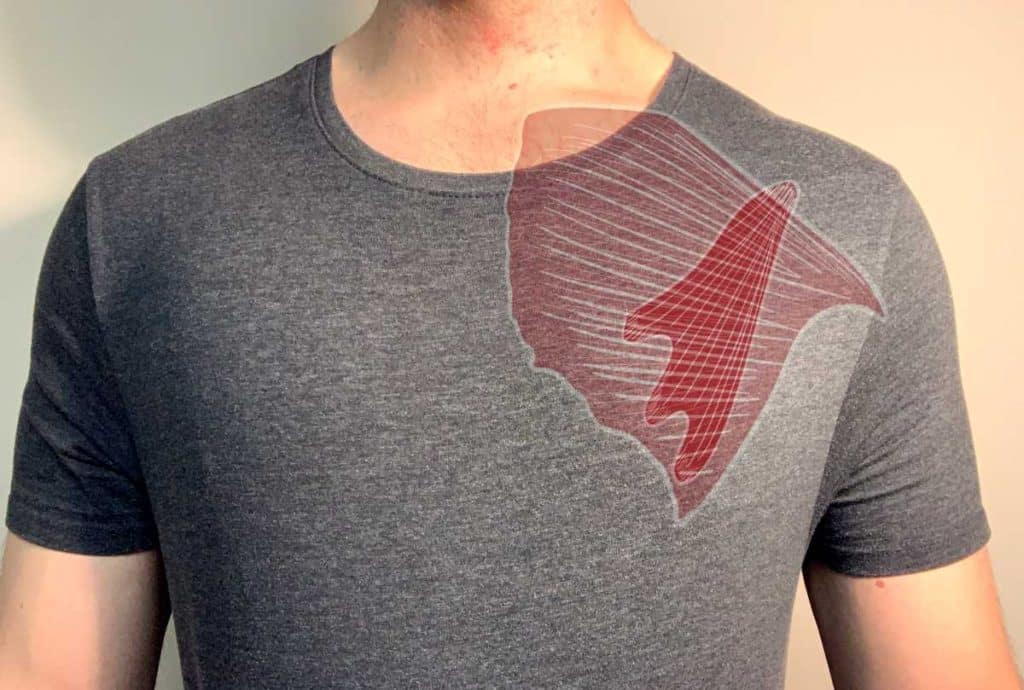
Using traditional foam rollers, Rumble rollers, vibrating rollers, etc. can all be great therapeutic tools for self-treating various areas of your body, but they’re not super ideal for targeting the chest/pectoral muscles. This is largely because the cylindrical shape of rollers don’t lend themselves well to the shape and contours of the chest, making it difficult for the rollers to target the pectoral muscles that sit right on top of them.
This isn’t to say that it’s a complete waste of time or entirely useless to try rolling your chest with a roller, just that you’re likely going to experience much better results when switching to a spherically-shaped object (i.e. a ball) rather than the cylindrical-shaped roller.
Why opt for a ball instead?
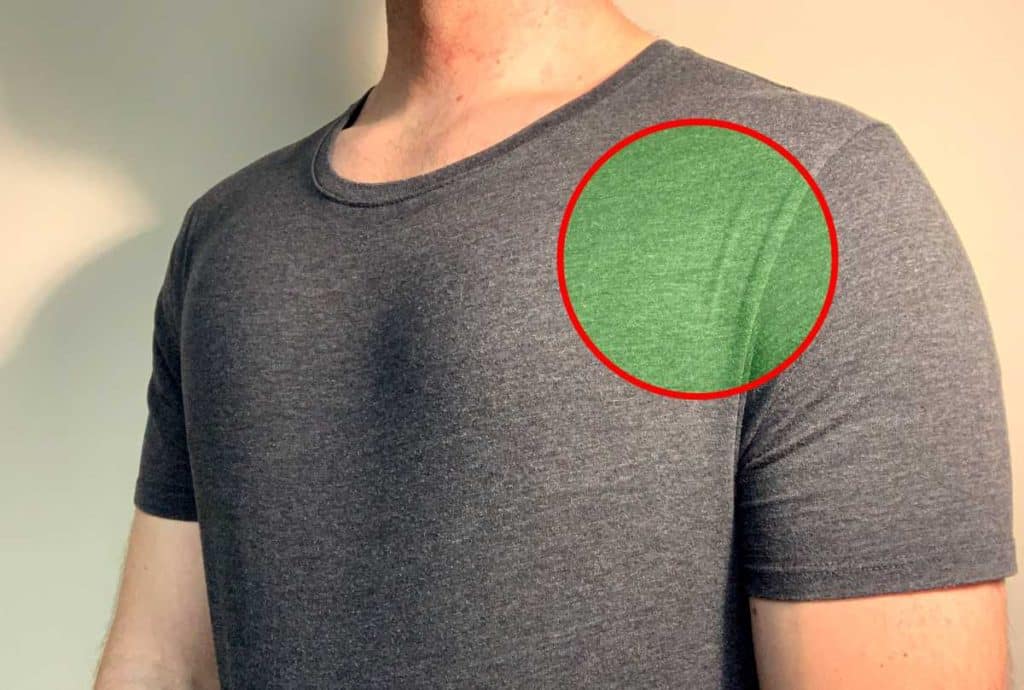
There’s two things to consider when trying to do some rolling of the pectoral muscles: their location and their contour on the body. Let’s start with their location.
With the chest muscles being on the front of the body, just beneath the neck, you can’t exactly plop a roller on the ground and roll those muscles as you would as if trying to roll muscles on your leg or on your mid back – you’d have to keep your neck cranked upwards just to not have your nose scrape along the ground. That and your arm is going to have to go into some awkward positions in order to try and get it out of the way as you roll. Sure, you could try to place the roller on a bench and kneel over it, but this isn’t exactly much better.
Secondly, the contouring of the pectoral muscles makes it hard for a cylindrical roller to get these muscles in any sort of effective manner, especially the portion of muscle that is closer to the shoulder (the pectoral major muscle crosses the shoulder joint and attaches near the top of the arm bone). So, even if you could get into a comfortable position, you’ll likely find it hard to target certain portions of the pectoral muscle in an effective manner.
Using the best ball possible: size, firmness and more
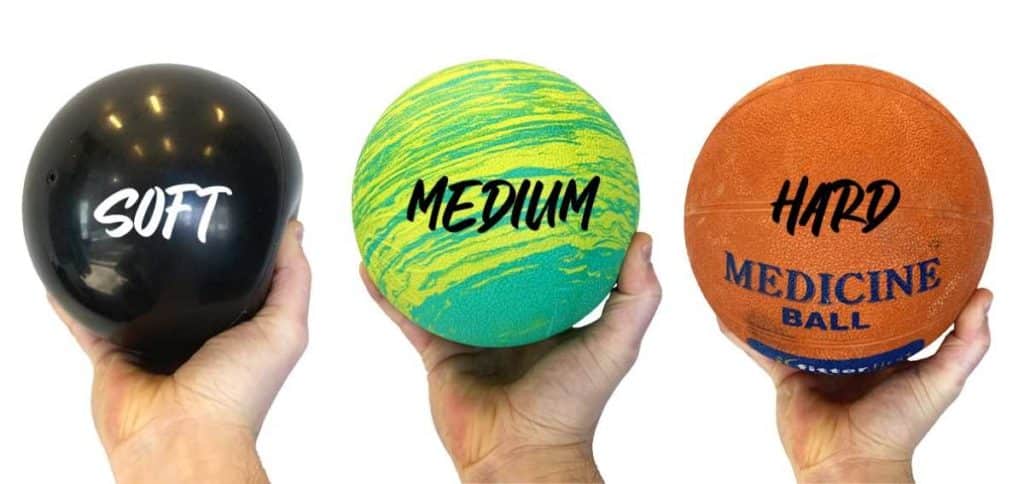
So now that we’ve established why you’ll likely experience much better results using a ball, we now need to look at picking the right type and size of ball to use. Thankfully, you actually have a lot of options here.
Use a specialty mobility ball or not?
The first thing to quickly address is whether or not you need to use a specially designed ball for these types of fascial release/muscle relaxation techniques. The short answer is no, but you may find that a dedicated therapeutic ball such as the RAD Centre Massage Ball or the URBNFit Mini Pilates Ball may hold some nice and unique benefits if you’re getting really specific with things, but no, it’s certainly not necessary (Note: The above links take you to Amazon, where if you make a purchase using these links, I receive a very small commission at no extra cost to you. I use this money to offset the expenses I incur with running this website.)
I currently use a dedicated therapy ball by OPTP as well as one of my medicine balls (just depends on what mood I’m in) and they’ve both been working quite well for me, however I’ve used many types of different balls in the past (discussed below) with good results as well.
All you ultimately need is a ball that is the right size and the right firmness. As long as you have those two features dialled in correctly, you should be just fine. For years I used medicine balls found in our training facility; we had some that were fairly firm and about the size of a cantaloupe, which worked perfectly for me and should for you as well.
Side note: If you’re looking to purchase a ball, it may be a good idea to purchase a firm medicine ball, as you’ll then have a ball that can essentially be used for multiple purposes (rolling your chest, strength training exercises, etc.) rather than a ball that solely serves as a therapeutic ball. But it’s totally up to you, of course.
If deciding to go this route, I would personally go with either the DYNAPRO Medicine Ball (since it can be inflated or deflated to modify firmness, and since it’s rather lightweight, you won’t get charged a ton with shipping) or the Everlast Tough Grip Medicine Ball since it weighs the same as the DYNAPRO (above links take you to Amazon).
If you don’t have access to a medium sized medicine ball or don’t want to pick one up, your next best bet is to head on over to the toy department or sporting goods department at the local store and look for a children’s-sized basketball. A full-sized basketball will likely be too big, but a kid’s size ball should work great – this is also something that I’ve used with good success in the past.
You can honestly get rather creative with this, so don’t feel like you’re confined to the aforementioned types of balls above. It just has to be firm enough to help release your tissues while small enough (but not too small) to fit nicely into your pectoral region in order to target the entire muscle.
Ball firmness: Selecting the right amount
The firmness of the ball is ultimately going to depend on what is most comfortable for you, but there are a few things to keep in mind as a general set of guidelines:
Just like a foam roller, the more firm the ball, the more pressure you’ll put on the muscles. This means that sensitivity of the muscles will increase as the firmness of the ball increases. A softer ball may likely be a more ideal starting point if your chest muscles are really tight, whereas a more firm ball may be more ideal if your muscles aren’t as tight and can thus tolerate more pressure. Take some time to experiment to find what feels most appropriate for you.
Ball size: Selecting the most optimal size
While the firmness of the ball that you use can vary from one person to the next, the size of the ball should likely be the same for most people. You want a ball that is small enough to fit into the “front pocket” of the shoulder but not so small that you can’t lean into it and put any pressure onto the muscle. Again, about the size of a cantaloupe should do nicely.
I tend to find that a ball of around 48 centimetres (19 inches) in diameter works perfectly, although you can still get great results with a ball that is slightly bigger. Just keep it under basketball size as by this point the ball won’t fit into the front pocket of the shoulder/chest all that well and likely won’t provide enough point pressure over the area you’re trying to target.
The best technique to use for getting maximal results
Even if you select a ball that is the most ideal size and firmness for your own needs, you won’t have optimal results if you don’t know the best way to use it. But don’t worry, I’ve got you covered with all you need to know here:
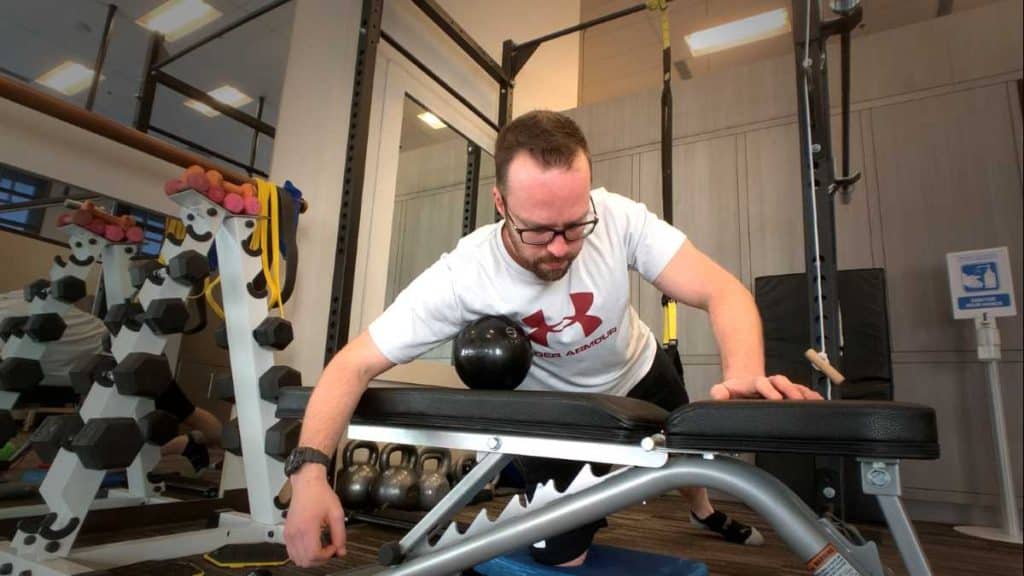
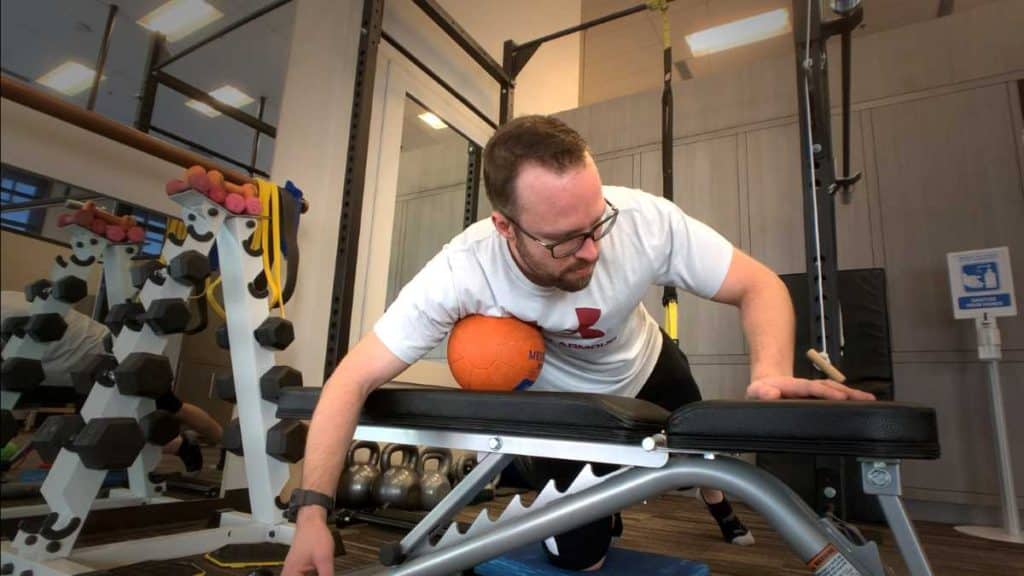
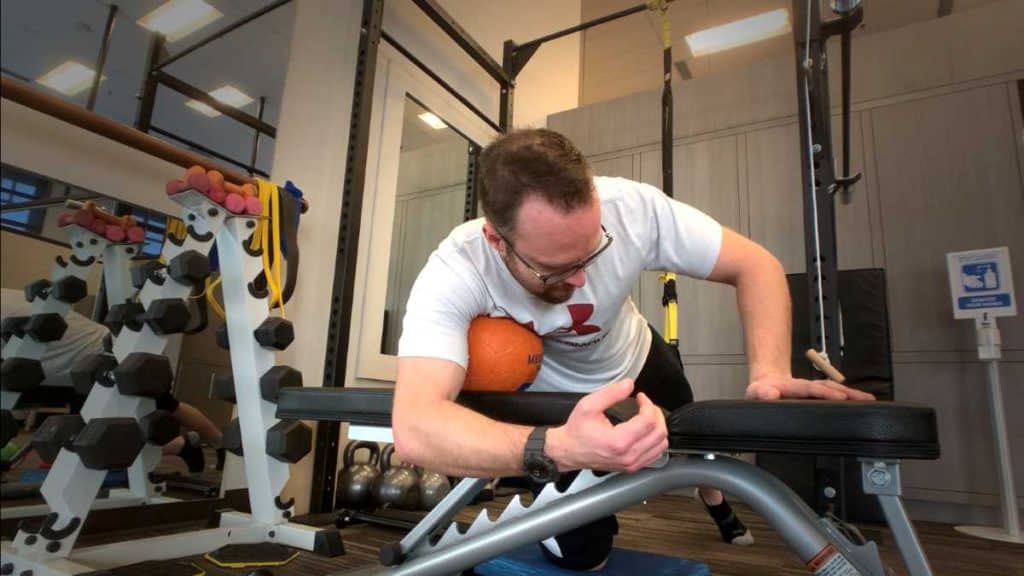
While you can certainly perform this pectoral rolling leaning up against the corner of a wall, my personal preference has always been to perform chest rolling while draping my upper body on top of the ball as the ball rests on a workout bench. This tends to be more effective since you can not only apply much more downward pressure onto the ball (and thus your pectoral muscles), but also since it’s easier to fine-tune the exact positions that you feel are best for you.
Related Article: Massage Gun vs. Vibrating Foam Roller – is One Better than the Other?
Below are three different techniques you can try for getting a great self-release to your pectoral muscles.
Technique 1: Simple, sustained pressure
The first technique to try is to simply drape yourself over the ball and find an area of your chest that feels stiff or tight. Let your arm rest in a comfortable position off to the side or out in front of you. Once you find a spot that is more sensitive to the pressure, simply stay in this position and let your muscles “sink into” the ball. No need to do any moving with either your body or your arm; just relax, breathe deeply and hang out in this position for a minute or so.
If this feels therapeutic enough for you, then you don’t have to worry about trying any of the following techniques. This technique is often enough (and thus a good starting point) for those who have lots of muscle tension or poor chest mobility.
Once you’ve released one side, you can go after the other side. One time per side might be enough, but if you wish, you can go back to the other side and repeat the process. Three rounds on each side usually does a good job at getting things to feel more relaxed and moving a bit better. Just take some time to play around with it and see what works best for you.
Technique 2: Stirring your body
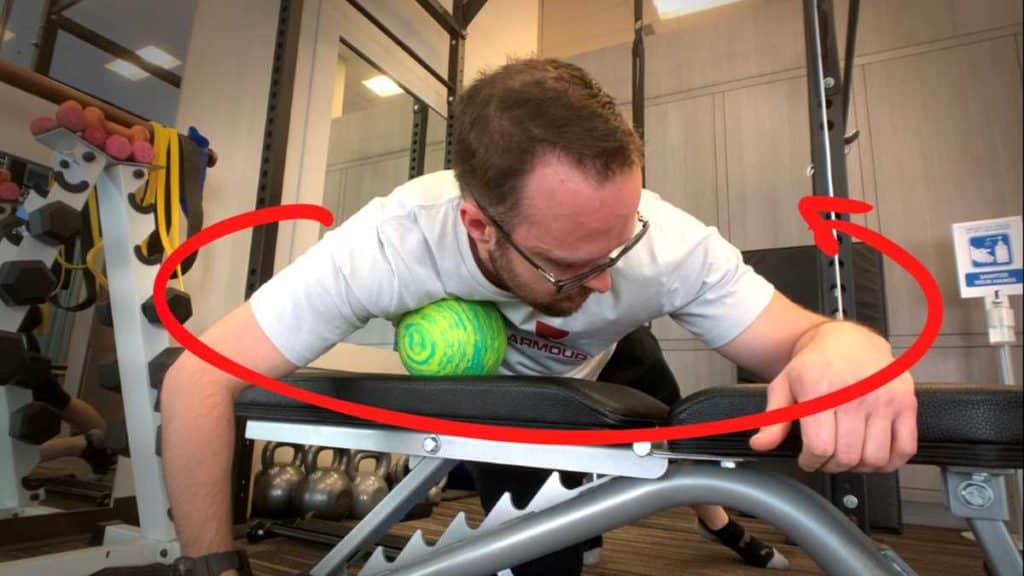
If you’re wanting something a bit more intense or dynamic than the first technique, or you feel that the first technique is no longer as effective as it used to be, this second technique will kick things up a notch.
Related article: IASTM: How it Works to Decrease Pain and Improve Mobility
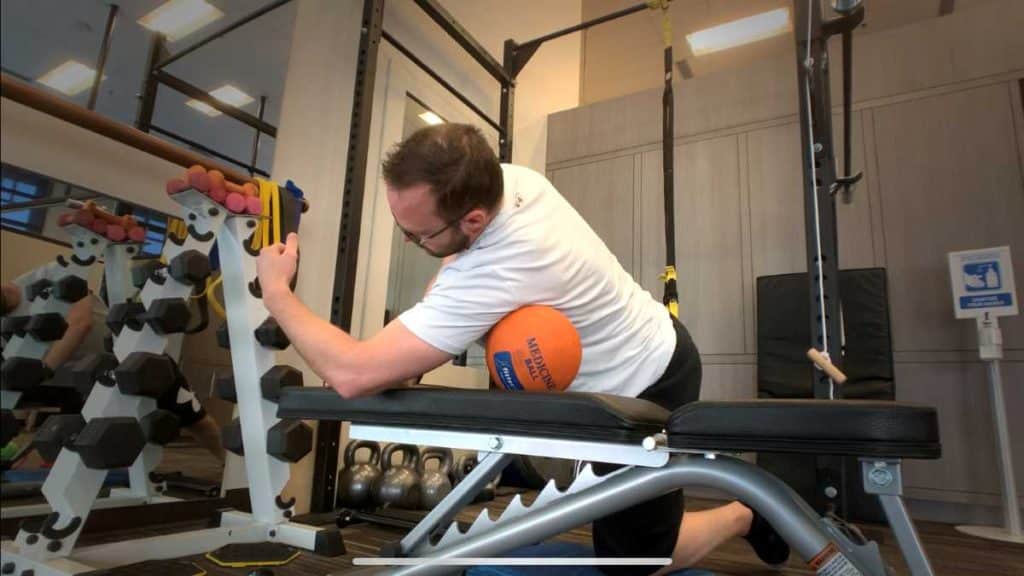
For this technique, set up just like you did with the first technique, but now you’re going to slowly stir your upper body around in a circle (either clockwise or counter-clockwise) so that the ball rolls over your chest muscles while your arm rests in a comfortable position off to the side. Try to keep your upper body directly over top of the ball. Not only will this prevent the ball from slipping out or away from you, but it will also provide much more ideal pressure onto the pectoral muscles, providing a more therapeutic response.
Again, play around with the movement, seeing what feels best for you in terms of treatment time and intensity.
Technique 3: Tack & floss movements
This technique works really well for those who want to fine tune their pectoral mobilization and therapeutic response as much as possible. It’s about as intense as the second technique, but can also be a bit kicked up an additional notch from there if so desired.
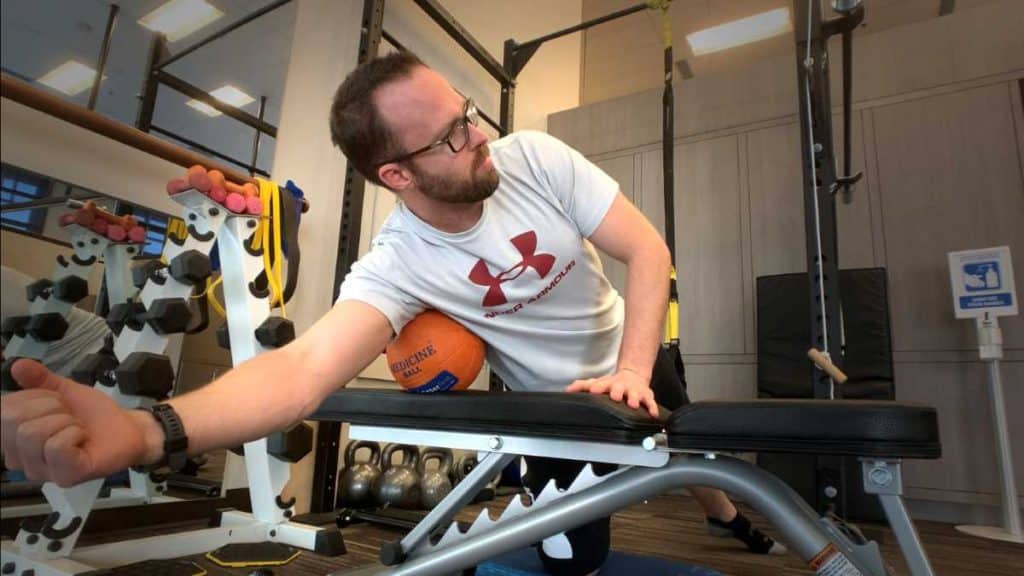
Drape yourself over the ball the same way you did for the first or second technique and pin a sore or tender spot of the muscle up against the ball. Now, rather than stir your upper body over this spot, keep the ball pressed on this area while you sweep your arm out to the side with the same motion as if you were making a snow angel.
Related Article: Blood Flow Restriction: Evidence and Uses for Injury Rehabilitation
You can play around with just how much you move your arm, but you should feel that the greater the range of motion that you move your arm through (while the ball continues to pin down your pectoral muscles), the more intense of a stretching or mobilizing feeling you get in return. You’ll feel this the most with a rather firm or hard ball.
This type of technique in which an individual essentially “pins down” one of their muscles while then producing a movement that stretches those muscles out is sometimes known as a “tack and floss” method, where the muscle or tissue is pinned down and then movement is produced with that muscle or tissue as a means to reduce adhesions and restore that tissue’s mobility.
A quick tip on discomfort
While feeling tenderness or soreness in the pectoral region is the anticipated response, if you feel that the pressure of the ball when placed near the front of the shoulder is giving you “pins and needles” or tingling sensations into your arm, hand or fingers, then re-adjust the ball and try again.
There is a network of nerves that runs through the front shoulder region (known as the brachial plexus) and down into the arm, which can give us the tingling, pins and needles sensation into this region when these nerves experience direct pressure. Nerves do not like direct pressure, so pins and needles/altered sensation is to be avoided. If you readjust the ball a few times but still experience this sensation then you are likely better off to find a different way to release your pectoral muscles.
Bonus: How the ball works great for your lats & triceps as well
One of the best things about using a ball for the pectoral release described throughout this blog post is that it can be used for more than just the pectoral muscles. AND what’s even better is that it lends itself perfectly for releasing your triceps and lats without even needing to change positions from draping yourself over top of the bench. This means you can do an entire movement flow (i.e. moving from one muscle group right into the next) for releasing all of these muscles in a quick and efficient manner. So, be sure to try these techniques as well:
Rolling out the lats
Since the lats are such large muscles, effectively targeting these muscles can be done a number of ways. When using the ball, simply drape yourself on top of the ball in a three-quarters turned position with your arm raised above your head (to expose the lat). Next, simply push your body forward, then pull it backwards in a sawing-like motion.
You’ll likely have better rolling success with a softer ball as I’ve found in the past that a rather firm ball (such as a medicine ball) can sometimes squirt out from underneath the muscle.
Roll out the lat for as long as feels best for you, then switch sides and repeat. I often perform the lat roll right after having rolled out my pecs, as it’s pretty easy to flow from one muscle right into the next.
Rolling out the triceps
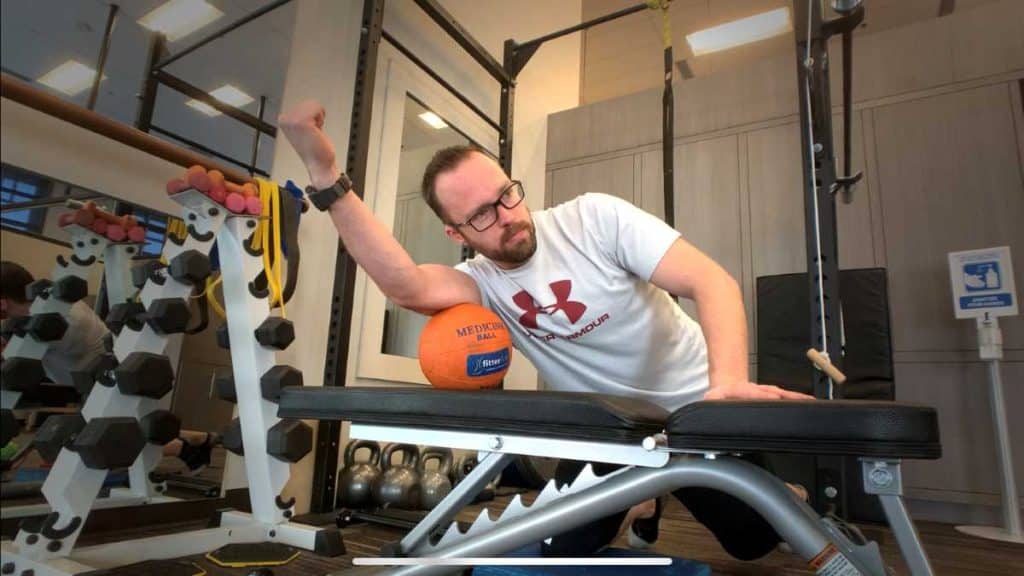
When it comes to rolling out your triceps using the ball, it’s a rather straightforward process. Keep your body in the same position as you’ve been in when rolling your pecs and/or lats, but this time straighten out your arm in front of you and place your tricep on top of the ball. Push your arm out in front of you and then pull it back, producing essentially the same sawing motion you did when rolling your lats.
When rolling the triceps, I personally find that a firm medicine ball works the best. Since not nearly as much body weight will be pressing down on the ball, a firm or hard ball will likely provide the pressure you’ll need to feel like you’re adequately releasing these muscles.
Just like with your chest and lats, roll your triceps as much as you feel to be beneficial. I tend to always finish off my upper body rolling sessions by rolling them after I’ve targeted my pecs and my lats.
Final thoughts
There’s nothing wrong with trying to use a foam roller or travel-sized roller when it comes to targeting your pecs, lats and upper body. But it may just be that the cylindrical shape of the roller isn’t all that ideal for you when it comes to getting at these muscles (the pecs in particular).
If you’re finding this to be the case, try opting for a ball to perform the rolling instead. Not only will it provide more directional versatility when rolling, but it will contour to the pectoral muscles much more effectively, allowing you to get the pectoral region in its entirety.
Play around with the techniques mentioned in this post and modify as needed in order to make them as ideal as possible for yourself. After all, the only thing worse than having tight pecs is not having an effective strategy (and wasting a lot of time) when trying to get them under control and feeling better again.
Move well. Live bold.
-Jim

Hi! I’m Jim Wittstrom, PT, DPT, CSCS, Pn1.
I am a physical therapist who is passionate about all things pertaining to strength & conditioning, human movement, injury prevention and rehabilitation. I created StrengthResurgence.com in order to help others become stronger and healthier. I also love helping aspiring students and therapists fulfill their dreams of becoming successful in school and within their clinical PT practice. Thanks for checking out my site!
